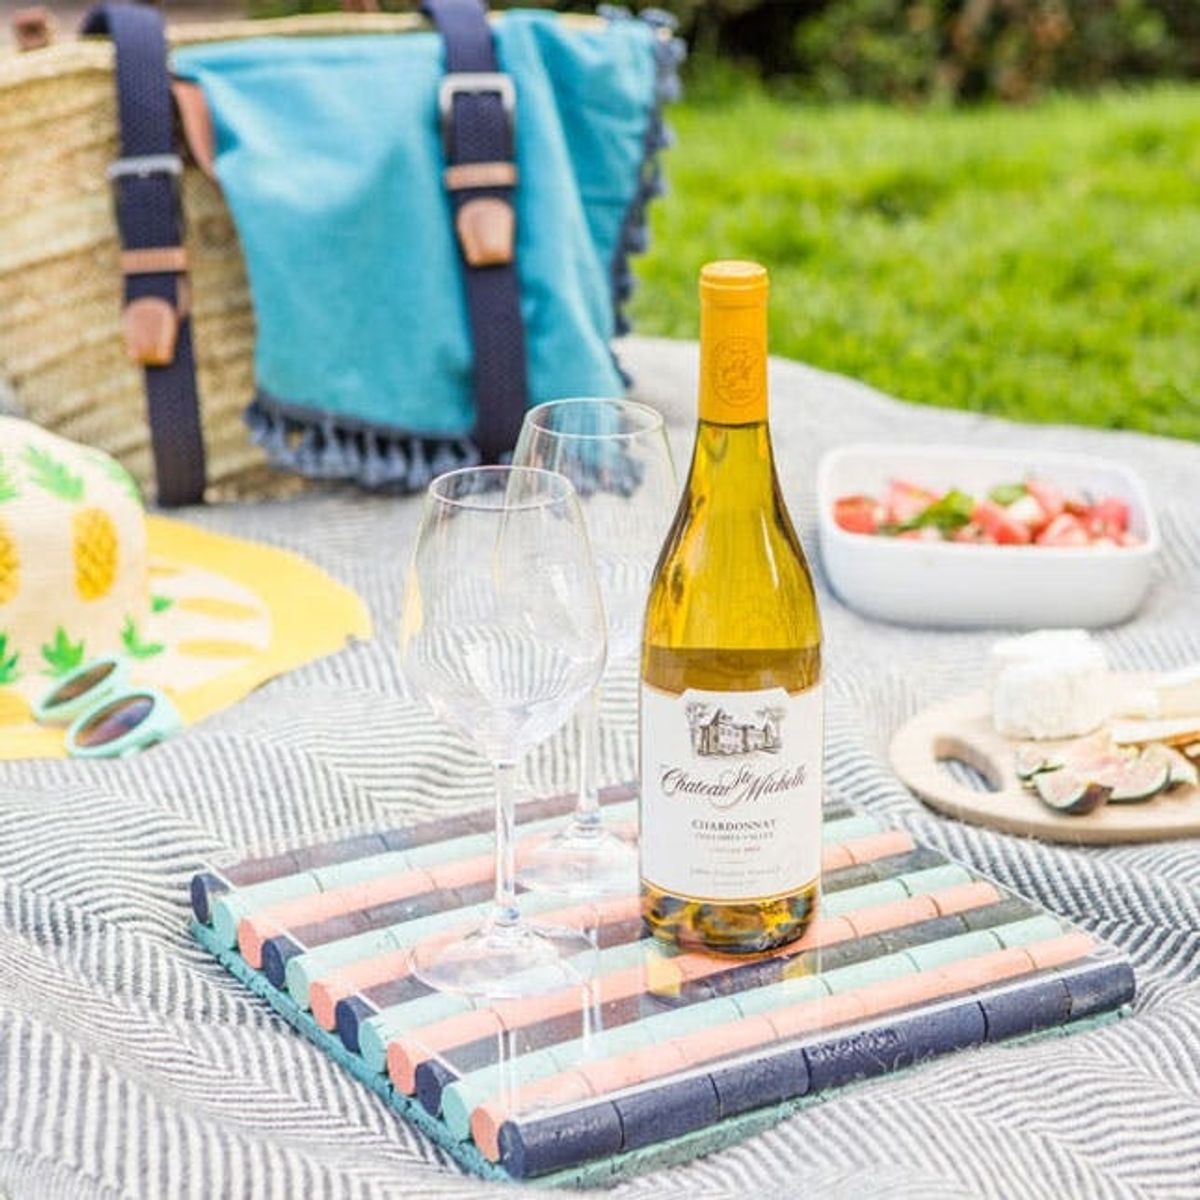
Picnic season’s been hinting itself into existence for the last few weeks, but with the start of June it is officially ON. At Brit HQ, we like to be able to throw a picnic together at a moment’s notice. But we’re not just talking about chips and salsa, a blanket that used to be a tapestry in your college dorm room and a bag of recycled solo cups. We keep things classy around here, with fancy tea sandwiches, a color blocked cork serving board (DIY tutorial below!) and, of course, wine.
Chateau Ste. Michelle
Make a toast to your besties, who make sure you actually take the time to spend an entire day doing nothing in the sunshine. Make a toast to that set of three friends who is always down for an impromptu road trip. Make a toast to your partner, who always pours you a glass of wine when you get home from work. Make a toast to your mom who still sends you a chocolate bunny every Easter. And hey, make a toast to yourself for kicking butt like the #girlboss you are.
All summer long, Chateau Ste. Michelle is inviting all of YOU to head to AToastTo.com to make a toast to your boyfriends, girlfriends, BFFS and more. Once you customize your own toast, share it on Facebook or Twitter using the hashtag #AToastTo and you’ll be entered for a chance to win some awesome prizes. There’s a new prize package every week, and you might even win a trip to the Summer Concert Series at their actual Chateau in Woodinville, Washington.
Picnic Basket Backpack Hack
2. Color Blocked Cork Serving Board: You’ve likely seen a cork board or two, but what about a color blocked cork board made out of repurposed corks?! After many months of arduous wine-drinking, we ended up with a ton of corks to create our very own board. Scroll on to check out the whole tutorial after we share a few more of our picnic essentials.
3. Teeny Tiny Tea Sandwiches: Tea sandwiches are not just for tea parties! These bite-sized delights are perfect for a picnic and you can make a whole bunch of different combos. My personal fave is definitely Watercress and Herbed Butter. In fact, it would go perfectly with a glass of Chardonnay right about now… ;)
4. Yummy Watermelon Mozzarella Salad: Inspired by a vegetarian take on ceviche, this summery salad is one you’ll wish was bottomless. The sweetness of the watermelon plays beautifully with fresh mozzarella. If you feel like mixing it up, throw in a handful of chopped cucumber and a few fiery jalapeños!
The Perfect Painted Beach Hat
What about that cork serving board? Don’t worry, we’ve got a tutorial for that too. Follow the steps below!
Tools + Materials:
– spray paint (we used navy, sky blue and orange)
– tons of wine corks, ideally around the same size and width
– 12-inch by 12-inch flat cork board
– 12-inch by 12-inch piece of plexiglass
– E-6000 glue
– X-Acto knife
Instructions:
1. Spray paint your base cork board one color. We went with light blue.
2. Lay out your corks on your cork board to see how many you need. If they don’t fit perfectly, now is the time to use an X-Acto knife to cut any excess off the top.
3. Paint your corks! We created four stripes in each color, so we painted 28 sky blue corks, 28 orange ones and 28 navy.
4. Once they’ve dried, use E-6000 glue to attach each cork one by one onto your base board.
5. Squeeze a little E-6000 onto the four corners of your board, and lay the plexiglas down on top to attach. Let dry overnight before using.
Because this project is so customizable, you can change it up for any event or color palette you like. It could also be a great way to make serving boards and trays for a wedding. First, you need to get your layout going. Lay out your corks on your cork board to see how many you need. If they don’t fit perfectly, now is the time to use an X-Acto knife to cut any excess off the top.
Then it’s time to spray paint. Spray paint your base cork board one color. We went with light blue. Then paint your corks! We created four stripes in each color, so we painted 28 sky blue corks, 28 orange ones and 28 navy.
Once they’ve dried, use E-6000 glue to attach each cork one by one onto your base board. Squeeze a little E-6000 onto the four corners of your board, and lay the plexiglas down on top to attach. Let dry overnight before using.
Stripes for the win! Cheers!
Don’t forget to make your festive toasts at AToastTo.com and share using hashtag #AToastTo on Facebook and Twitter to enter for a chance to win all sorts of awesome things.


