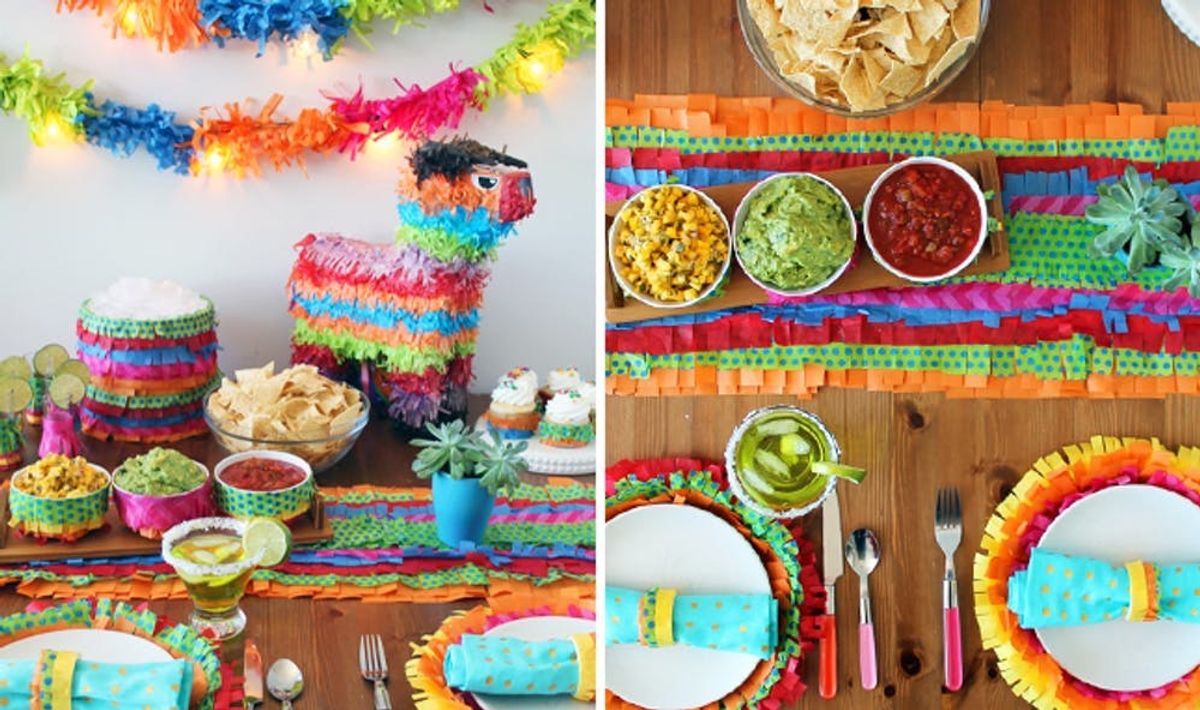
Hola! Ready to get your Cinco de Mayo on? This is one of our all time fave party decor concepts because it’s foolproof! You can use any colored tissue paper you like, but we recommend using bright bold colors if you want to give it that Cinco de Mayo look. There’s really no wrong way to go when “piñata-ing” your party decor.
How to Piñata Your Party Using Only 3 Materials

Hola! Ready to get your Cinco de Mayo on? This is one of our all time fave party decor concepts because it’s foolproof! It’s easy, it’s fast, and it’s super inexpensive. You couldn’t mess it up if you tried. You can use any colored tissue paper you like, but we recommend using bright bold colors if you want to give it that Cinco de Mayo look. We even used polka-dot patterned tissue paper, just for fun. There’s really no wrong way to go when “piñata-ing” your party decor.
Materials:
– tissue paper
Tools:
– scissors
– hot glue gun
Time saving pro tip: Keep any pre-existing folds in your tissue paper when cutting your fringes so you are cutting several pieces of fringe at once.
1. Piñata Shot Glasses
Start by cutting several pieces of fringe of each color, about 3 inches tall and 6 inches long. It doesn’t have to be exact though. That’s the beauty of this project – it will look cool no matter how perfect your fringes are. Start at the bottom of a shot glass and glue a piece fringe all the way around. Then above that, start with another color and glue it all the way around too. You want to leave a good amount of space in between each layer so you can see each color. Keep going and winding your way up until you are about 3 inches from the top.
2. Piñata Serving Bowls
Cut several pieces of fringe again – these should be about the same size as the shot glass fringe. Start at the bottom of each bowl and glue pieces all the way around, wrapping your way up. You can wrap each color around the bowl once or twice, it’s up to you. We used our little bowls for chip dips, but you could easy scale this up for a bigger serving bowl.
3. Piñata Napkin Rings
Prepare by cutting several pieces of fringe, about 1 inch tall and 5 inches long. Start at one end of each napkin ring and glue it around. Repeat all the way to the top. For these, wrap each color around once. There will probably only be room to do 3 colors.
4. Piñata Chargers
Start with a large sturdy paper plate and cut your fringes in your desired colors. These fringes can be bigger which will help the process go faster. We used pieces about 4 inches tall and 12 inches long.
5. PiñataIce Bucket
Recognize our chevron ice bucket? Time to piñata it up! Cut several pieces of fringe in your desired colors, about 3 inches tall and 12 inches long. Start at the bottom and glue a piece fringe all the way around. Then above that, start with another color and glue it all the way around too. Repeat all the way to the top of the ice bucket.
6. Piñata Table Runner
Lay several pieces of paper vertically and glue together to create a base for your runner. We used standard 8.5 x 11 card stock, but you can use any color or adjust the sizing to fit your table. Cut pieces of fringe that are bigger for this one – about 4 inches tall and 12 inches long. Start by glue a strip along all 4 outside edges. Then glue another strip above that, again around all 4 edges. Repeat until you get to the center. For the center strip, we cut a length of tissue paper with fringe on both sides.
You could make just one or two of these projects for an awesome statement piece at a party, but we couldn’t resist combining all them for a piñata explosion of a party. Don’t they look so fun all together? This would be perfect for a Cinco de Mayo party, but really any occasion could be celebrated using this piñata-fringe look (especially if you changed the color of tissue paper used).
To see how we made these awesome piñata party lights, check out our how-to here.
Who’s ready for a margarita after looking at this party?
We got this adorable piñata version of Ferdinand the Bull from Party City. Isn’t he too cute to hit until candy falls out?
Will you make any of these for a party this summer? What other ways might you use this piñata-ing technique in your party decor? Talk to us in the comments below!


