Get a head start on your gardening goals!
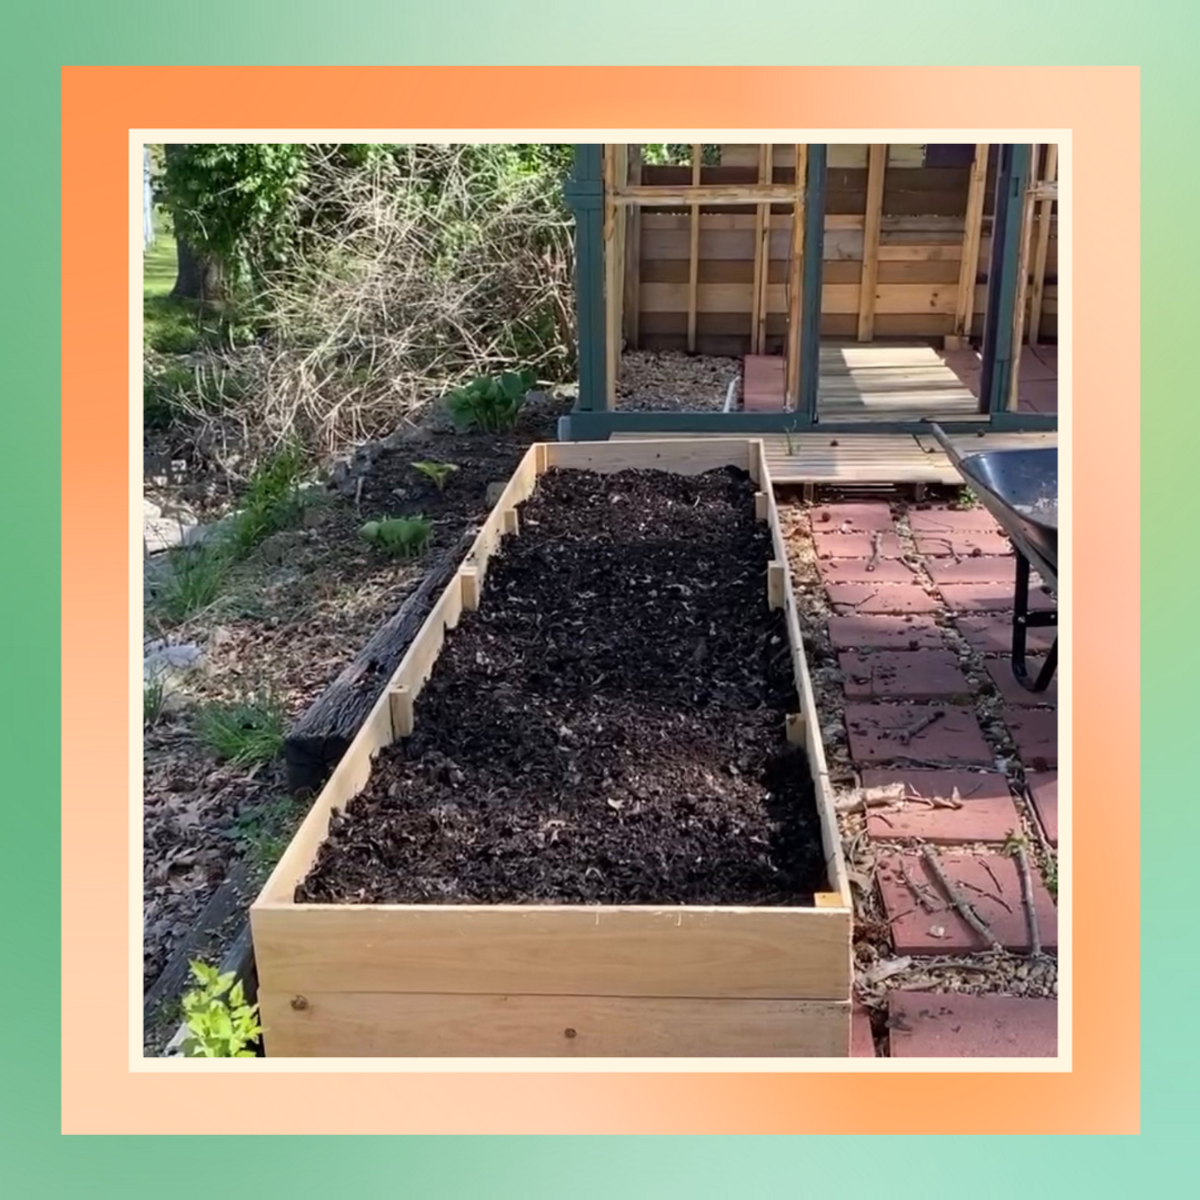
How To Build A Raised Garden Bed This Spring For Under $50

Between my uptick in sneezes and the longer days, it’s safe to say spring is on the way. If your cottagecore dreams include dancing through your garden in a princess dress while “Ceilings” echos from your phone, you’ll need to start your garden soon.
When I first began gardening, I was frankly shocked at the cost to build, fill, and support a full vegetable garden. With a few seasons now under my gardening apron, I’ve learned a trick or two that will save you money without cutting corners.
Why raised garden beds?

Raised garden beds are highly recommended for backyard gardening (over in-ground gardening) because these kind of beds tend to have better drainage and will keep your plants warmer earlier in the season. Building your own raised beds is much easier than you might imagine, and with my little trick, it’s surprisingly affordable.
What's the secret?
Instead of purchasing lumber (varies in cost from $8 - $22) to construct your beds, opt for a much less expensive option: fence pickets.
Most home improvement stores carry single fence pickets for under $4, that are either pressure-treated or made of cedar — both of which are made to withstand all-weather conditions. We used cedar pickets as they’re naturally resistant to bugs, and most importantly, rot — even when in contact with soil for long periods of time.
How do you make a raised garden bed?
This project can be done in one day for under $50. It’s simple enough for even beginning DIYers to give it a try. Just remember: the measurements here are for a raised garden bed that is 12-foot by 1-foot by 3-foot. For a custom-sized bed, just adjust the measurements to fit your desired space.
Put your dress on the hanger for now, or don’t, and get ready to build your very own raised garden beds. Here's the step-by-step breakdown.
Step 1: Purchase your supplies and materials

Here’s what you’ll need:
- 10, 6-foot fence pickets
- 1 furring strip (1-inch by 2-inch by 8-feet)
- Wood screws
- Impact driver (or nail gun)
- Saw
Step 2: Make your measurement and cuts

Cut off the “dog ear” top of the fence pickets using a saw so that the pickets are left with right angles.
Leave eight fence pickets all full length and cut the remaining two in half. Then cut the furring strips into 11-inch sections. You’ll need 12.
Step 3: Lay out your furring strips and create the four side pieces

Each picket is 5.5-inches in width, but you’ll want your bed to be deeper than that, so we’ll stack two pickets on top of each other, creating 11-inch sides.
To connect the two pickets, use three furring strips, one on either end and one in the middle.
Drill wood screws into the furring strip and fence picket to attach them together. Repeat to create the two long sides.
Use this same method to stack the 3-foot fence picket cuts on top of each other to create the two short sides.
Step 4: Assemble the bed

Now that your four-sides are built, you’re ready to attach them together. Use wood screws and an impact driver (or nail gun) to fix the end pieces to the furring strips on the side pieces. This works much better with an extra set of hands that can hold the side pieces upright while you drive the nails into the wood.
Step 5: Fill your bed with soil and plant your seeds

This is where the fun begins. Fill your raised bed with soil and nutrient-rich soil to create a welcoming home for your vegetable and flower seeds. Get to planting and enjoy the fruits of your labor.
This simple DIY will help you save some money upfront so you can invest in what matters most in your garden, soil and seeds.
You can watch the full process here! ⤵️
EXPAND
Photos via Mackenzie and Chance Edwards.
Love this raised garden bed tutorial? Subscribe to our newsletter for more spring DIY ideas!


