Looking for a last minute birthday gift for your gal pal? Why not give her a ring holder? You only need two materials to make these little homes for your finger jewelry!
DIY Sculpey Ring Holders FTW!

Looking for a last minute birthday gift for your gal pal? Why not give her a ring holder? You only need two materials to make these little homes for your finger jewelry. Inspired by Ariele Alasko’s wooden holders and, of course, the old school ring toss pool game, these are easy-peasy, functional and sleek.

Materials:

– Sculpey clay
– Deco paint pens
Instructions:

1. Warm up your clay by rolling it around in your hands and creating a ball.
2. Press the ball onto a flat surface to create a base.
3. Mold your clay by rolling it on a flat surface with your hand held at an angle and the base of the holder pointing away from your hand.
4. Smooth out any bumpy areas.
5. Bake your Sculpey according to the instructions on the package (ours was 275 degrees Fahrenheit for 45 minutes).
6. Draw designs with your paint pens.
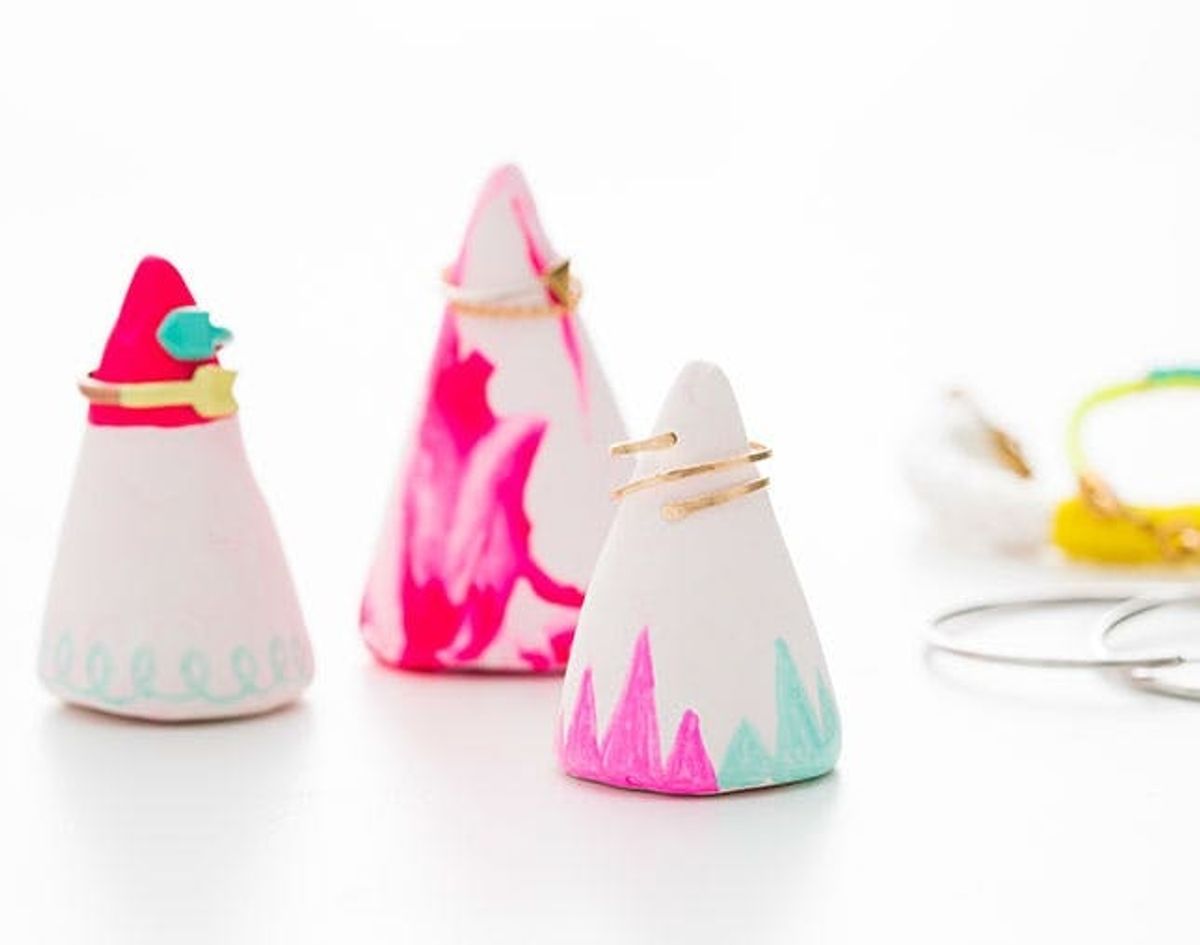
We love that marbled look that’s so easy to make with clay, so we’re starting off with a marbled ring holder.
Combine two colors of Sculpey by folding them together like taffy. Then get rolling to make this awesome lil’ cone. You can test out your ring to make sure it fits, then bake and you’re done!
Marbled Ring Holder


This one has a little block of color and some curlicues at the bottom for a little extra flair.
First make a cone out of a single color. Then make a thin sheet of a second color. Peel it off of your table and then wrap it around the cone. Smooth it into the cone until it is flush. Test your ring for size and then stick it in the oven.
Color Block Ring Holder

After you bake it, you can add designs if you so desire.

Adorbs!

For our last trick we’re adding some triangles to a white cone.
Make a cone and bake it. Then add geometric designs using Deco paint pens.
Geo Painted Ring Holder

There you have it!

These are so colorful and fun, and they’ll keep your rings organized and safe.

Your other jewelry’s going to be so jealous.

That bling looks so good!


