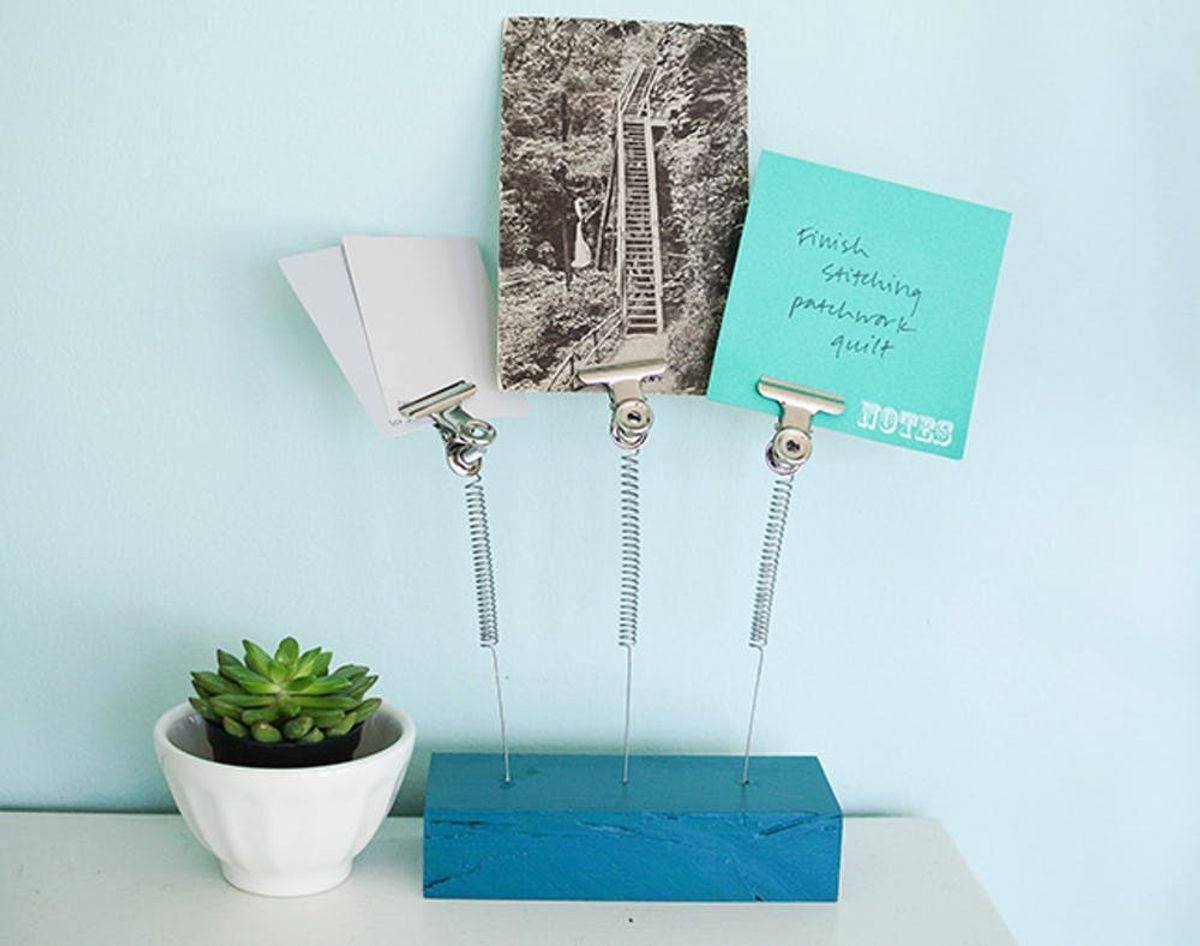
With spring fast approaching, now is certainly the time to get things organized and in order. And who couldn’t use a fun new office supply to keep you on task? We certainly swooned over this whimsical clip spring organizer from Anthropologie for that very reason—it’s perfect for displaying photos or memos of what’s next to tackle. But as soon as we saw the price tag of this “online exclusive,” we knew we were met with a challenge to recreate this desk accessory in a much cheaper and more colorful way. Ya’ll ready for our latest installment of DIY Copycat? Spoiler: it costs $63 less and takes only five steps to make—take that “online exclusive!” ;)
Make this $78 Clip Organizer for Only $15

With spring fast approaching, now is certainly the time to get things organized and in order. And who couldn’t use a fun new office supply to keep you on task? We certainly swooned over this whimsical clip spring organizer from Anthropologie for that very reason—it’s perfect for displaying photos or memos of what’s next to tackle. But as soon as we saw the price tag of this “online exclusive,” we knew we were met with a challenge to recreate this desk accessory in a much cheaper and more colorful way. Y’all ready for our latest installment of DIY Copycat? Spoiler: it costs $63 less and takes only five steps to make—take that “online exclusive!” ;)
Materials:
– wood block
– 3 extension springs with hook end and loop end
– 3 1 ¼ inch bulldog clips
– 3 machine screws (10-24 thread, ¼ long)
– 3 hex nuts (10-24 thread)
– wood glue
– colorful paint (spray or brush paint)
Tools:
– drill
– 1/32 inch drill bit
– paint brush
– wire cutters
– needle nose pliers
Instructions:
1. Drill the holes in the wood block where you want your springs to go, about an inch apart. Set aside.
2. Attach the spring to the bulldog clip with a screw and hex nut.
3. Cut off the “hook” portion of the spring and widen out your spring with needle nose pliers.
4. Paint your block.
5. Glue your springs in place and let dry. Then clip away!
Pick all of these materials up at your local hardware store, and be sure to save the receipt. Why? ‘Cause you’ll find you only spent about $15 for everything you need to make this spring clip holder yourself. DIY FTW! Lay everything out on your workspace, then drill holes in your wood block where you’d like the springs to go. They can be in any pattern you like—zig zag, in a cluster, or in a straight line, like we did. Next, make your clip contraptions by screwing your clip to your spring, and securing it with a hex nut. Finally, snip the curve off of your spring, and pull it so that the springs widen ever so slightly.
Spoiler alert! Here’s a preview of what your organizer will look like. Don’t like the spacing? Want to add more springs? Think the clips will look better spray painted gold? Now’s the time to make any alterations!
Next, paint your wood block—we dug this deep ocean blue color—and glue your springs in place. Make sure you fill up those holes with wood glue to make your springs as sturdy as possible! Once it’s completely dry, take it to the nearest desk, windowsill, or kitchen counter STAT!
What a cool way to keep your notes organized—and for $63 less than the online version! We love that you have the ability to personalize your organizer from the get-go, so you can make sure it perfectly fits into your aesthetic rather than settling for a clever concept that’s not quite your style. Plus, we’re much more inclined to actually do our errands now that they’re springing up in our faces—literally! It’s also a super cute way to display your photos or small prints, though, you could always mix and match. Put that creative multi-tasking on display!
Would you rather buy or DIY? Have you make any copycat projects at home for less lately? Tell us about your DIY hacks in the comments below.


