Sew your summer style.
Slay Your Summer Style With This Two-Piece Eyelet Shorts Sewing DIY

Lately, I’ve been trying my hand as an amateur seamstress (takes one sewing class, thinks she’s couture). But seriously, looking at some of the simpler styles out there, I told myself, “I can do that!” So, inspired by these cute summer outfits, I made a two-piece eyelet shorts set. It’s the perfect cover-up for a day at the beach or sitting poolside and soaking up that summer weather. You can scroll on to see how it’s done, but take note that this is definitely for amateur sewers (read: no specific measurements or patterns). The best part is the *look* is meant to be casual and cute, so there’s really no wrong way to do it.

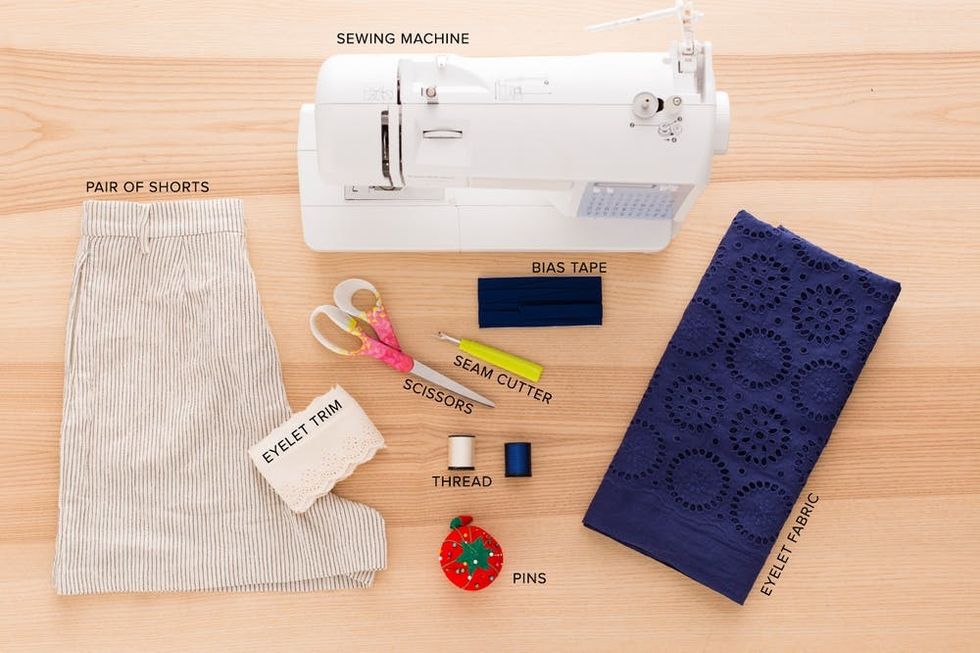
Materials and Tools:
- sewing machine
- pair of shorts
- eyelet trim
- eyelet fabric
- matching bias tape
- scissors
- thread
- pins
- seam cutter
- iron (not pictured)
Instructions:
Shorts with Eyelet Trim
- Fold the trim in half and line up to the bottom of the shorts. Make a cut about half an inch longer than the shorts.
- Create a hem at the tip of the trim by folding over twice and pressing so it stays in place.
- Pin to the bottom of the shorts and sew.
Shirt
- Prewash your fabric to account for any shrinkage.
- Fold your fabric in half with the finished edges at the bottom.
- Hold the fabric up to your chest to measure the width of the fabric and cut.
- Sew the sides together with a ¾-inch edge, leaving a five-inch space for the armholes at the top.
- Fold the shirt in half and cut a neck hole at the top seam.
- Fold the bias tape around neck and arm openings and pin in place.
- Sew the bias tape onto the shirt.
- Try your shirt on to measure the length. To shorten, cut and add a hem.
- Put your new two-piece set on and you’re ready to go!
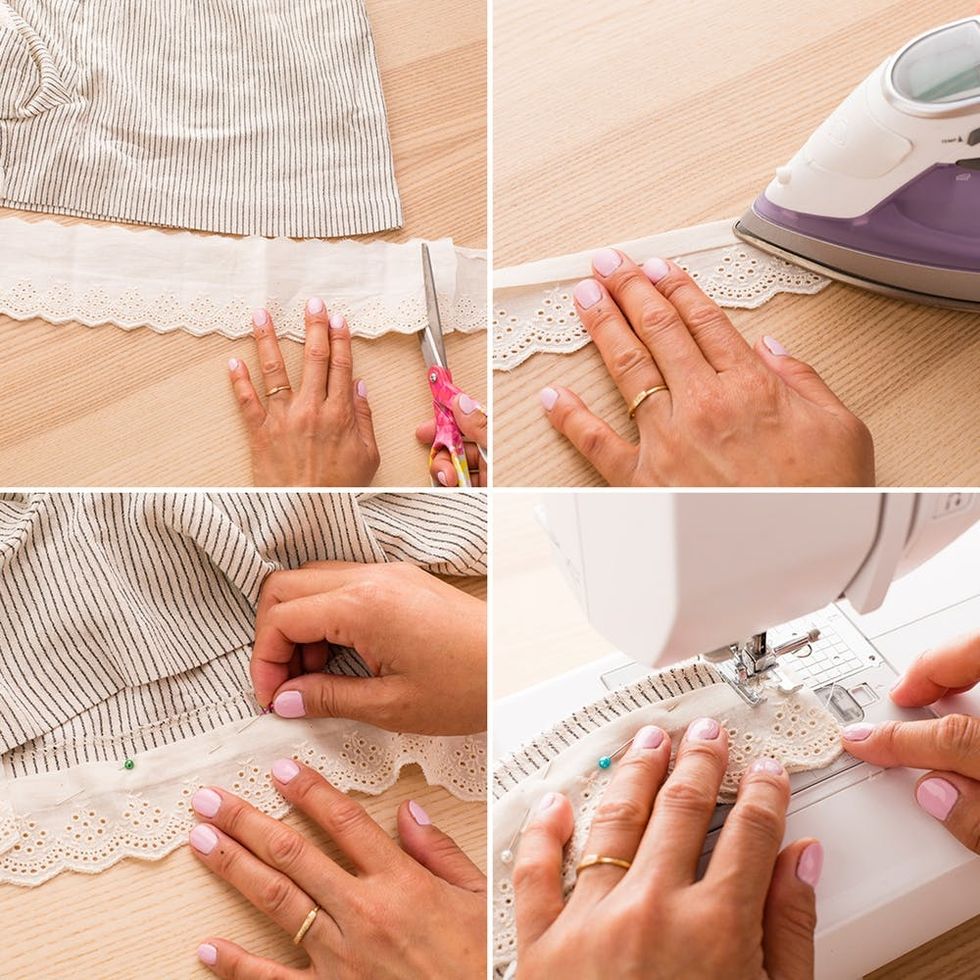
Take an old pair of shorts to the next level by adding some cute eyelet trim. Cut a piece that’s an inch longer than the circumference of the shorts leg. Create a seam at the top by folding over the edge and press. Pin to the edge of the shorts and sew.
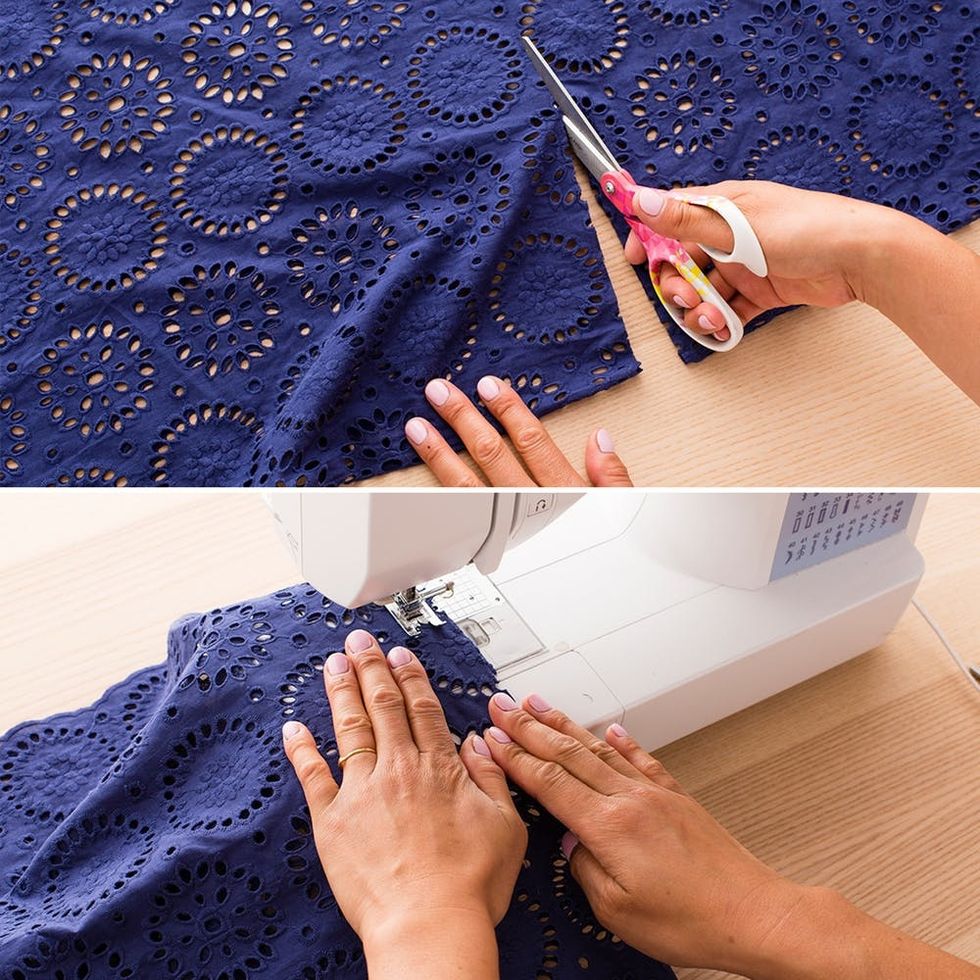
Next up, make the shirt. Essentially, this is a rectangle with an arm and a neck hole. Fold your fabric in half with the finished edge at the bottom. I’m not great at following measurements, so I held the fabric up to my chest and shoulders to get a feel for how wide it should be and then cut the fabric. You’ll want to sew the sides together leaving a ¾-inch edge and make sure there’s room for the arms; stop sewing about five to six inches from the top.
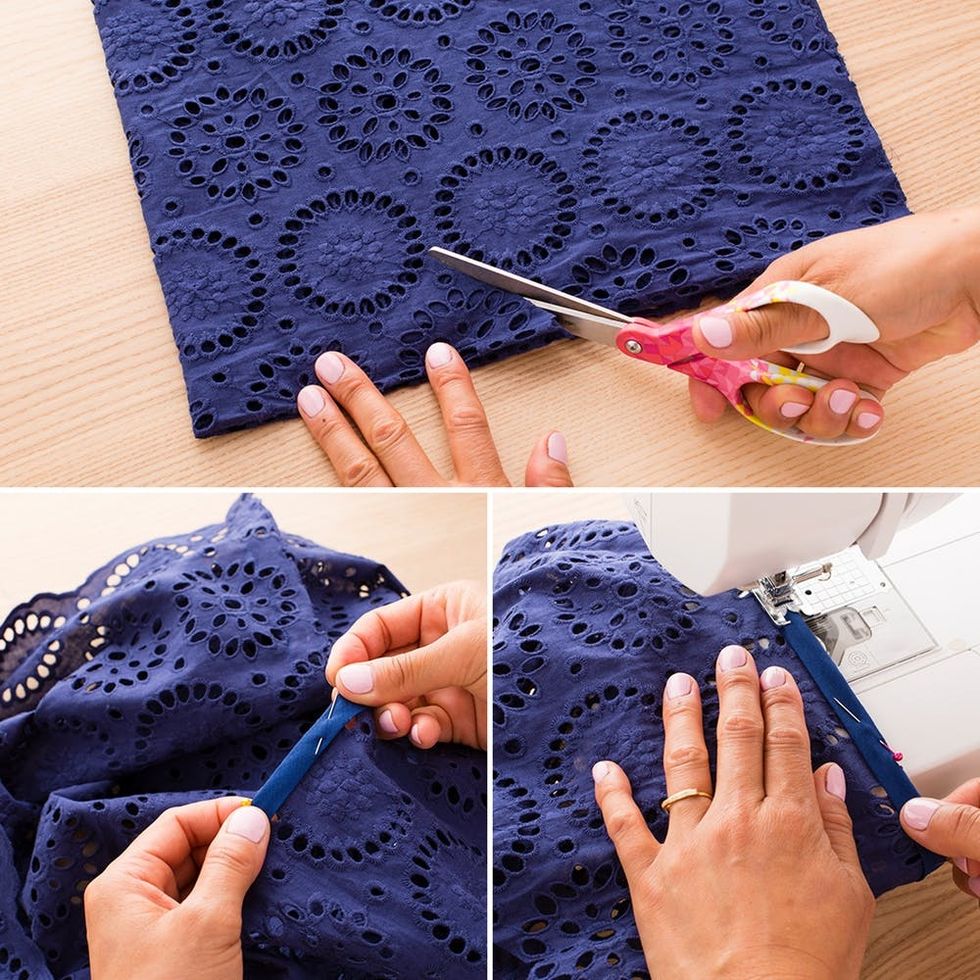
Once you finish sewing up the sides, you’ll need to cut out a neck hole. Since I’m not one for measuring, I simply fold the shirt in half and cut a quarter circle. Just remember that the space will double when you unfold the shirt, so don’t go too wide. Next you’ll want to finish off the edges on the arm and neck holes. Pin on matching bias tape and sew.
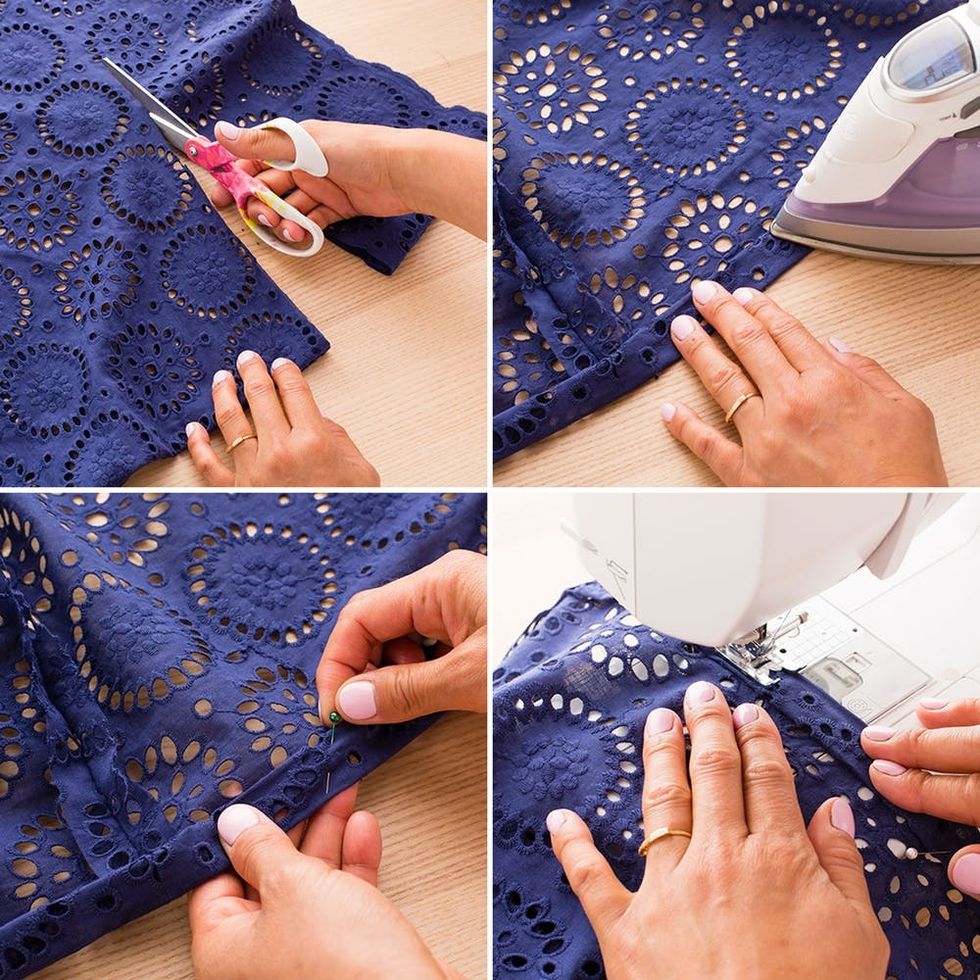
When I first finished the shirt, it looked super frumpy. So I decided to make it more of a crop top to go with the high-waisted shorts. I cut off the excess fabric and then pressed, pinned, and sewed on a new hem.
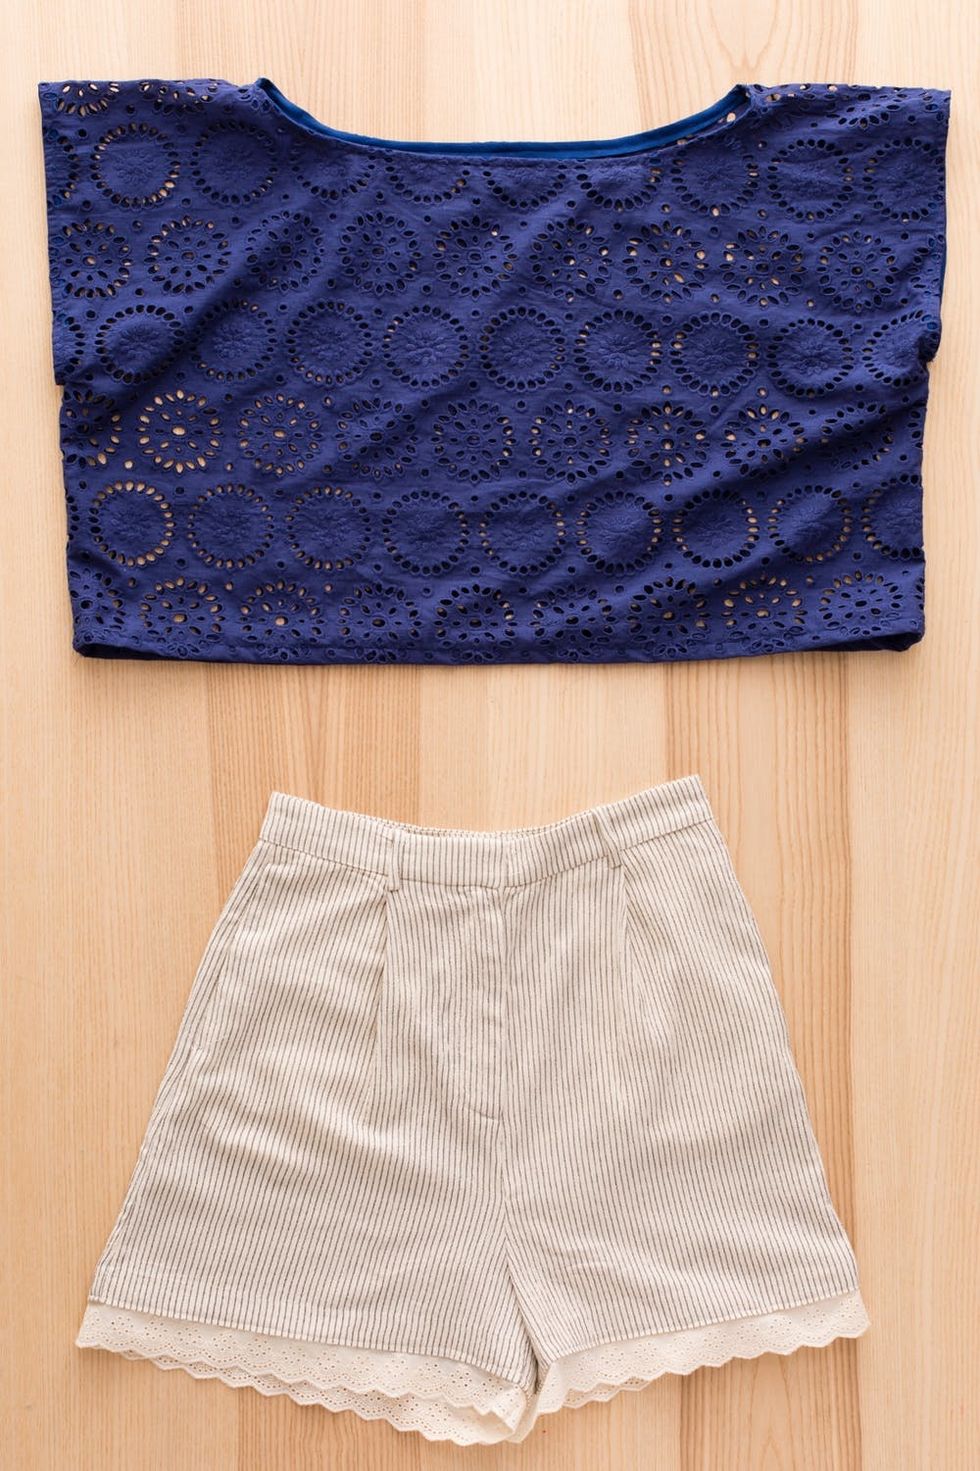
Ta-da! Your very own two-piece eyelet set.

It makes a great beach coverup and is perfect for hanging in the sun.
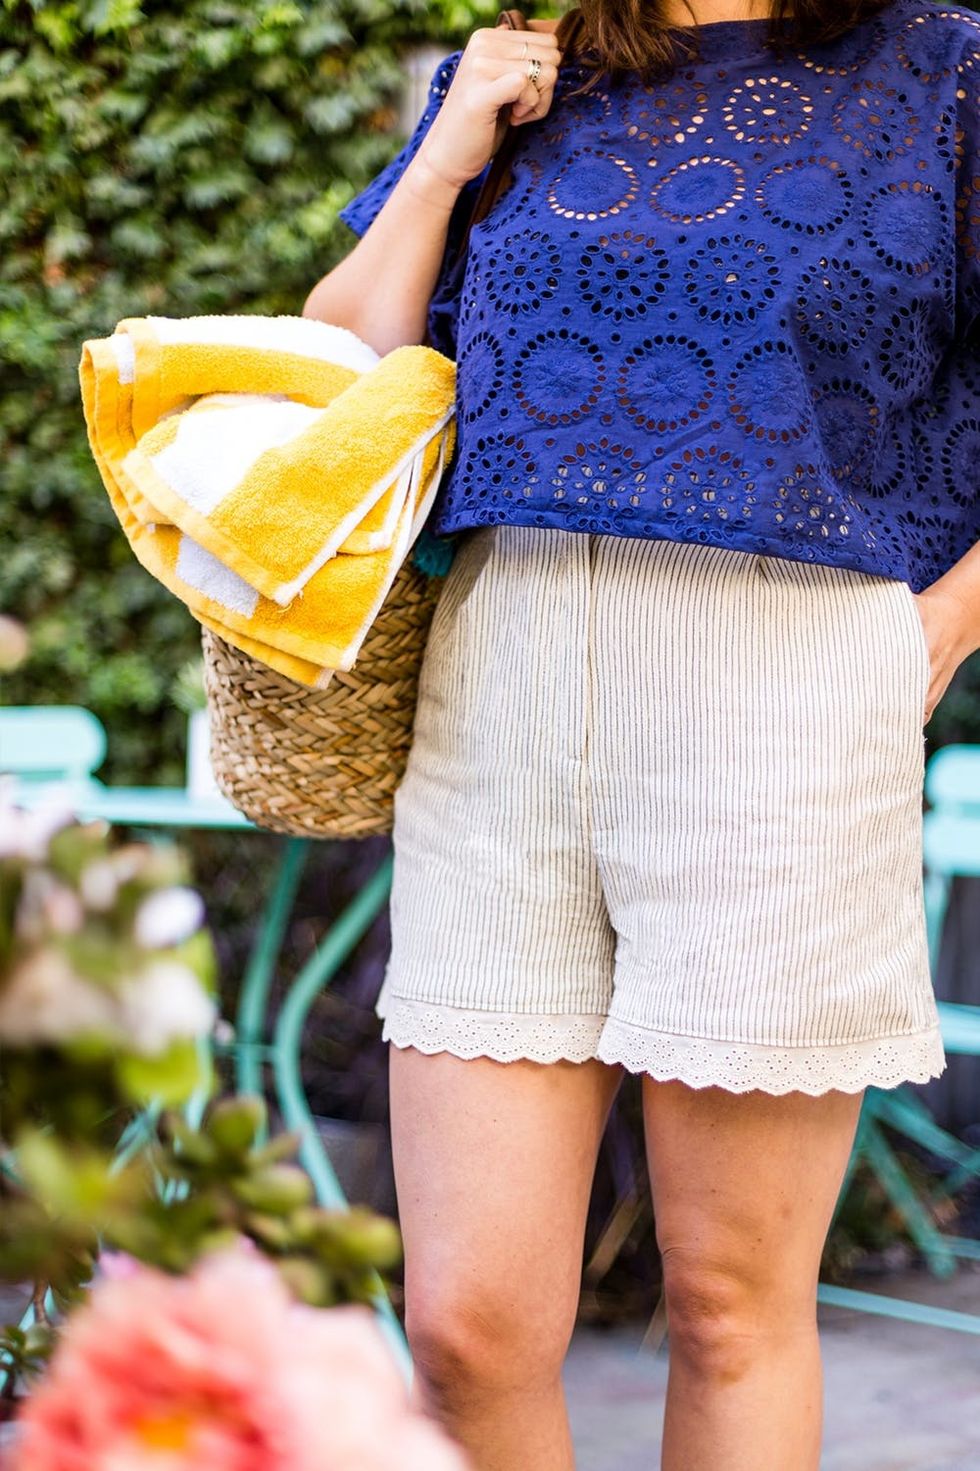
The trim on the shorts really adds a delicate touch, while still remaining quite hip.

Off to the beach you go!
What are you wearing this summer season? Share your look with us on Instagram by tagging @BritandCo, and follow us on Pinterest for more DIY style hacks.
Photography: Chris Andre
Model: Stephanie Brown


