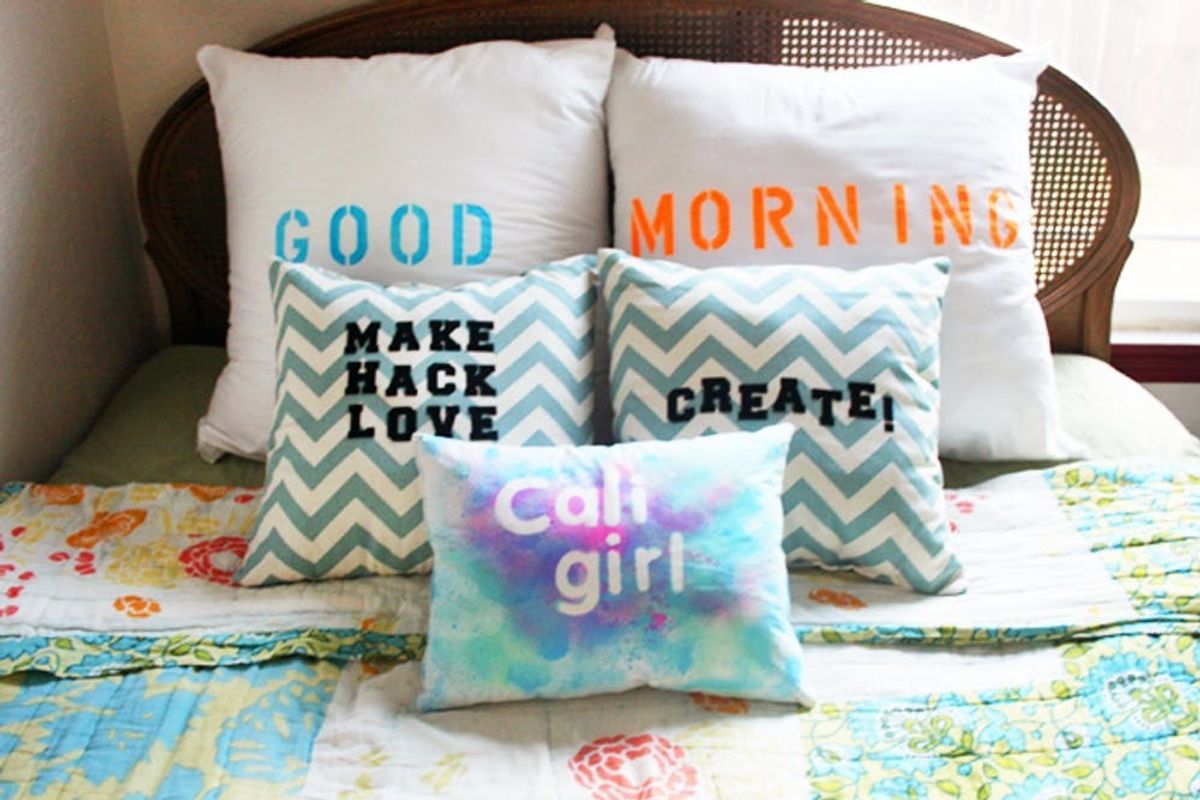
Personalization and customization are all the rage these days; we just don’t want something that everyone else has. We want something special, unique, handmade, just for us. But sometimes can be pricey to get! However, you don’t have to dish out big bucks or big chunks of time to make your pillows your own if you follow any of these 3 easy ways below.
DIY Basics: 3 Easy Ways to Add Type to Pillows

Personalization and customization are all the rage these days; we just don’t want something that everyone else has. We want something special, unique, handmade, just for us. But sometimes personalized home decor can be pricey! However, you don’t have to dish out big bucks or big chunks of time to make your pillows your own if you follow any of these 3 easy ways below.
1. Chevron Iron-On Pillows
We love chevron on all things: totes, braids, bar sets,jewelry, and now on pillows! Chevron pillows are pretty easy to find, but we love the idea of making them your own by ironing on a favorite quote or mantra. We choose to do “Create!” on one pillow, and “Make Hack Love” on the other – all great words to live by :)
Supplies:
– chevron pillows
– iron on letters
– string
Tools:
– iron
– scissors
– dish towel
Begin by cutting the letters needed for your design and follow the instructions on your package of iron on letters. If you are using a package like our’s, then prep the pillow by holding ironing the surface where your letters will go for about 30 seconds. Then place your letters with design down, place a dish towel on top, and iron for about 30 seconds. Remove the dish towel and allow the letters to cool completely before slowly peeling the plastic back off.
To spell out the phrase “Make Hack Love”, we used string to make sure all the letters were fairly straight. Just lay the string across and place the letters on. After ironing, just remove the string and your message will be perfect!
2. Fabric Marker Pillows
Fabric markers are so amazing! We love how you can use them in a pinch when you don’t have the patience to wait for fabric paint to dry or don’t want to deal with the mess of fabric paint.
Supplies:
– 2 white pillows
– fabric markers
– letter stencils
Materials:
– tape
– measuring tape
Layout your design and tape the stencil together, then measure the pillow to find the center. Place the stencil in the middle and tape it to the pillow. Color in the stencils and then remove. See how easy that was?
We decided to write “GOOD” on one pillow, and then on the other we wrote “MORNING” on one side, and “NIGHT” on the other.
3. Graffiti Relief Pillows
We always have so much fun playing with Tumble Dye and experimenting with the different techniques it can make on projects like chambray shirts and scarves, and now we love using it on pillows!
Supplies:
– white pillow
– Neon Tumble Dye Sprays
– foam letter stickers
Tools:
– plastic or newspaper to protect your work area
Start by laying down a drop cloth, trash bag, or newspaper to protect your work area. Then peel the back off the letter you need for your design and stick them into place on your pillow. Spray your first two colors (we used blue and mint), but don’t overspray or the colors will just completely blend together. Then we placed ours out in the sun for 20 minutes so it would dry so those colors wouldn’t bleed too much into the next color. Then we sprayed on our accent color of neon pink just in the center to really make the letters pop. Place back in the sun to dry for 1 hour and then remove the letters. Ta-dah! You have just created your first graffiti art!
These pillows look great all together or just on their own!
Does this whole drawing on fabric thing bring back memories of the classic ’90s toy, the Doodle Bear, for anyone else?
Get creative with what messages, words, names, or quotes you put on your pillows :)
Have you tried using stencils like this before? Any other ways you get your typography on? Talk to us in the comments below.


