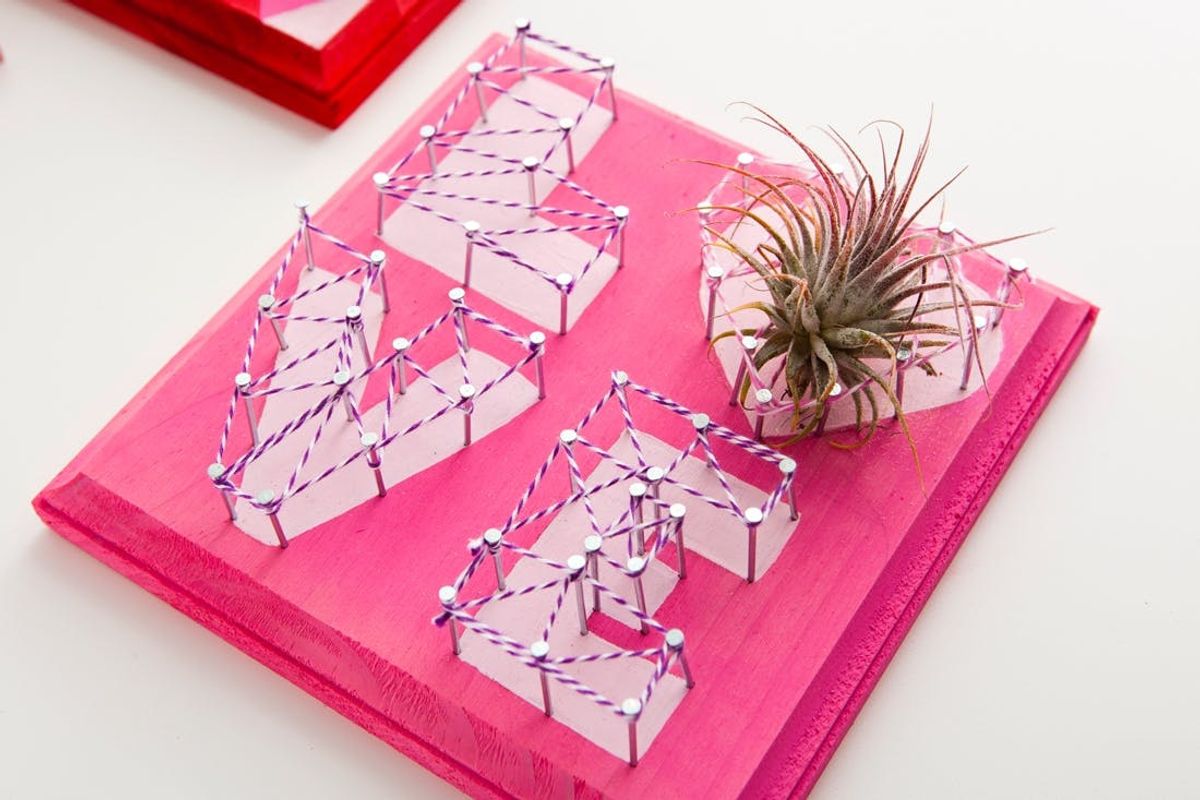
There is no way to hide that nail string art is one of our favorite DIY Basics here at Brit + Co. We decided to revisit the Living Wall Art DIY and revamp it for Valentine’s Day. With a few basic steps you can create living wall decor to decorate your space for February.
Air Plant Wall Art, Valentine’s Edition

There is no way to hide that nail string art is one of our favorite DIY Basics here at Brit + Co. We decided to revisit the Living Wall Art DIY and revamp it for Valentine’s Day. With a few basic steps you can create living wall decor to decorate your space for February. But guess what’s even cooler? We’ve kitted everything you need to make your own Valentine’s Air Plant Nail Art in the form of a Brit Kit — just $24.99 in the shop.

Materials (or buy the kit here!):

– wood square
– small nails
– colorful string or bakers thread
– shades of pink or red paint
– paper
– air plants
Tools:
– hammer
– paint brush
– scissors
– ruler
Instructions:
1. Create design on wood using a ruler or stencil.
2. Paint design and let dry.
3. Hammer nails into the wood. Make sure they are far enough in so they won’t fall out, but are still tall enough to wrap string around them. Place nails about 1/2 inch apart from each other while following the outline of your design.
4. Tie string to nail and wrap thread around nails. Knot off at the end and trim loose ends.
5. Place air plants inside webbing and you’re done!
Get all your materials together.

To kick this project into Valentine’s Day mode we first laid down a coat of red paint wash. To create a paint wash just dilute your acrylic paint with water.

For the heart design, we created a stencil using a piece of printer paper. Then we traced the heart stencil onto the painted wood. Make sure your first layer of paint is dry, and then go ahead and paint in your stenciled heart. We chose a lighter pink to contrast against the red.

Once the paint is dry it is time to start nailing! Hammer in the nails just enough to anchor them to the wood. Follow the outline of the heart by placing the nails about 1/2 inch from each other.

Choose a nail to start and knot the string. For this design we wove the string around the perimeter of the heart and then bounced from side to side. To create more of a webbing to hold the plants we created some more lines from top to bottom. Cut, knot, and trim the excess thread.

Look at that beautiful string art! Now it is time to insert your planets and hang on the wall!

For our next design we chose a geometric pattern…duh!
Use your ruler to measure out your design. We measured one inch from the top and the bottom of the board and created small triangles within. Next we used the ruler to created four triangles in the center band on the board.

Time to paint away. Paint some triangles the same color to create larger triangles on the board. Be creative!

We chose to create our nail art with the large triangle in the center of the board. Anchor the nails into the board but make sure you leave room to wrap the string. Tie the string to one nail and start wrapping! For this design we wrapped the perimeter of the triangle and then filled in the center. Once again, be creative! ;) When you are satisfied with your web of string knot the string and snip off the loose ends.

Place your air plants inside your webbing and hang that baby up on the wall!

Check out our other designs for more inspiration!
Are you in love with these Valentine’s Day inspired nail wall? We sure are! Tell us what pattern you’ll be making this Valentine’s Day in the comments below!


