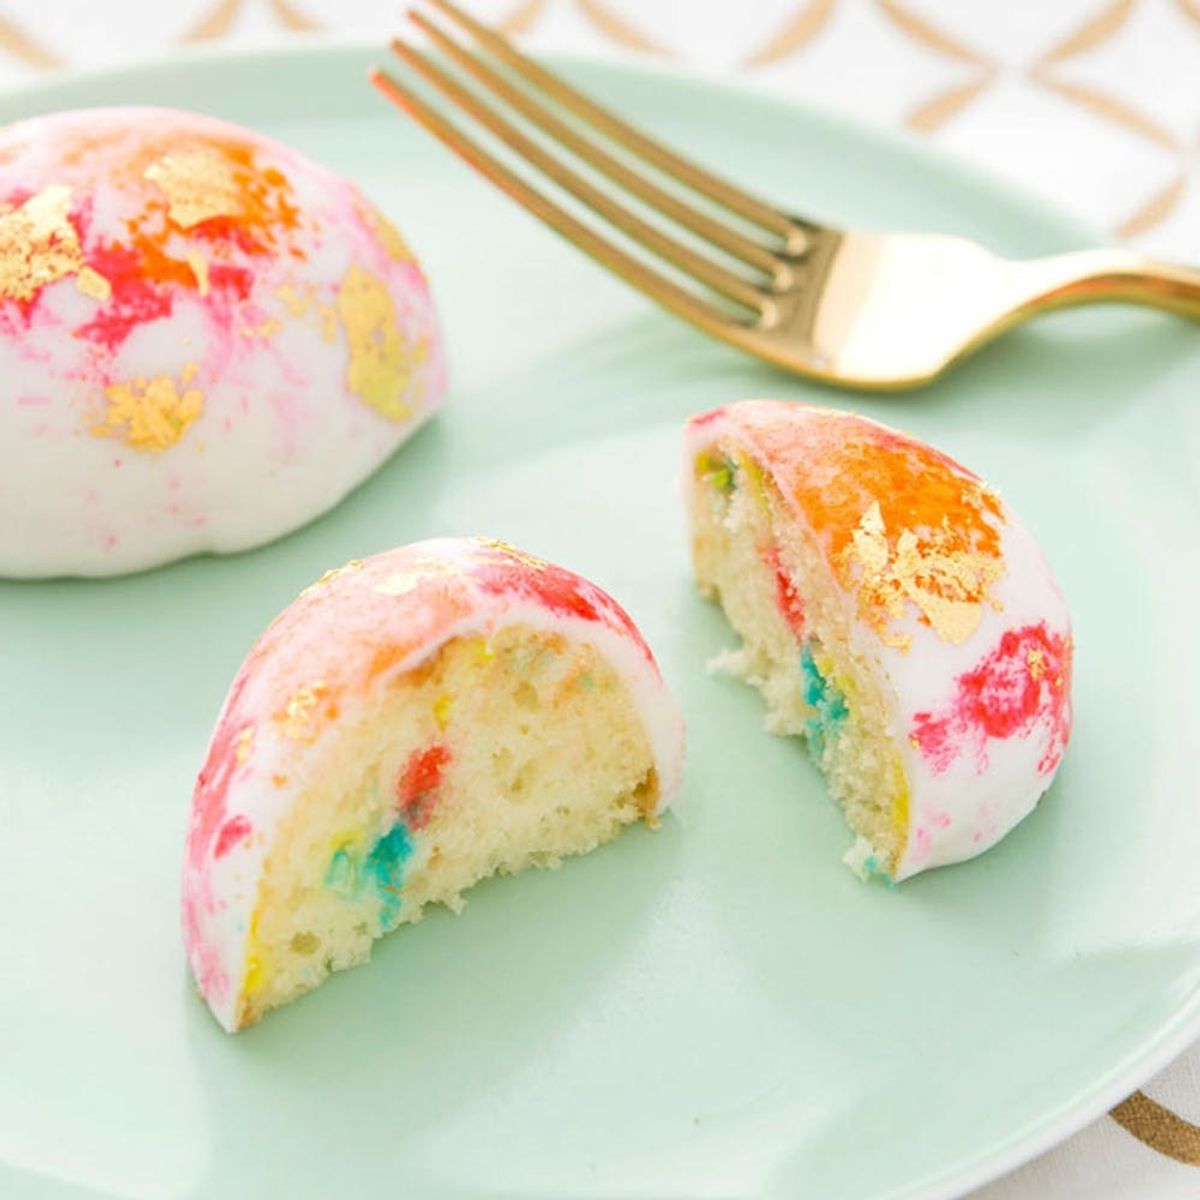
Gold makes everything taste better.
Make This Gilded Watercolor Funfetti Cake Easter Eggs Dessert Recipe

Easter was always my favorite holiday growing up. I love everything about it: the colors, the egg hunts and, of course, the sugar! Anyone who knows me will agree that I have the biggest sweet tooth (no joke, I share bags of candy so that I don’t eat them all myself). So, this year I jumped at the opportunity to DIY some Easter treats. In this tutorial, we’ll show you how to make the cutest desserts for your Easter brunch using our Watercolor Gold Leaf Cake Kit. These adorable cakes will have your guests shouting, “I LOVE GOOOOOOOLLLLD!” Goldmember would be proud.

These cakes are almost too pretty to eat… almost.

Materials included in the kit:

– gel food colors
– edible gold leaf
– clear vanilla extract
– sea sponges
– paintbrush
Materials not included in the kit:
— cake mix
— eggs
— vegetable oil
— water
— fondant
— whisk
— spoon
— egg-shaped silicon mold
Get your materials together (or buy the kit HERE) and let’s get started!
Instructions:
1. Combine all of the ingredients needed for your chosen cake mix into a bowl, and mix thoroughly.
2. Spoon the cake batter into the egg molds, filling the molds about 3/4 full. Bake according to the instructions for your specific cake mix.
3. Allow the cake to cool after baking, and then trim the rounded tops with a serrated knife to create a flat surface. Remove the eggs from the molds.
4. Roll the fondant to about 1/8-inch thickness and drape it over the cake egg. Press down along the edges.
5. Using a knife, carefully trim along the edge of the egg, and remove the excess fondant.
6. Smooth the edges of the trimmed fondant with your fingers.
7. Squeeze a small amount of the gel food coloring into a bowl, and use a wet sponge to dab some of the food coloring onto the egg.
8. Dip your paintbrush into the vanilla extract, and dab a bit onto the surface of the egg where you’d like the gold foil to go.
9. Using the back end of your brush, carefully pick up a small amount of gold foil and place it onto your egg. Repeat this for all of your eggs.
10. Allow the eggs to dry completely before handling.
Combine all of the ingredients needed for your cake mix into a bowl. We chose to use Funfetti cake mix for an additional layer of color.

Thoroughly whisk all of the ingredients together until the batter is smooth and free of dry clumps.

Carefully spoon the batter into the silicone egg mold. Fill the molds about 3/4 full; the batter will expand while it bakes. Bake according to the instructions listed for your chosen cake mix.

Allow the cake to fully cool before handling it. Using a serrated knife, carefully trim the rounded tops of your cake eggs to create a flat surface and then remove the cake from the molds.

Roll the fondant out to about 1/8-inch thickness. Carefully drape the fondant over the cake egg and press down along the edges.

Using a knife, carefully trim around the edge of the cake egg and remove the excess fondant. Smooth the edges with your fingers, and tuck any extra fondant underneath the egg. Repeat these steps until you’ve covered all of the cake eggs with fondant.

To watercolor your eggs, squeeze a small amount of the gel food coloring into a bowl. Wet the sea sponge and dab it into the gel food coloring, then carefully dab the sponge onto the fondant.

Have fun with it! Use as many or as few colors as you’d like. We went with a warm, springtime palette.

The vanilla extract serves a dual purpose. If the colors are too concentrated for your taste, dip your paintbrush in the extract and ‘wash’ the fondant to dilute the food coloring and create a true watercolor effect. The extract also helps the gold leaf stick onto your eggs. Use the back end of the paintbrush to grab a bit of gold foil and carefully set it onto the eggs.

Allow your eggs to dry completely before handling.

And you’re all done! Place these eggs inside of mini baskets with a few extra sweet treats to complete the nest look. These are the perfect ending to any Easter brunch.

Just make sure your guests know they’re okay to eat ;).
What other Easter DIYs are you working on? Show us your project by tagging us on Instagram and using the hashtag #iamcreative! Check out our list of Colorful Easter Desserts for more ideas.


