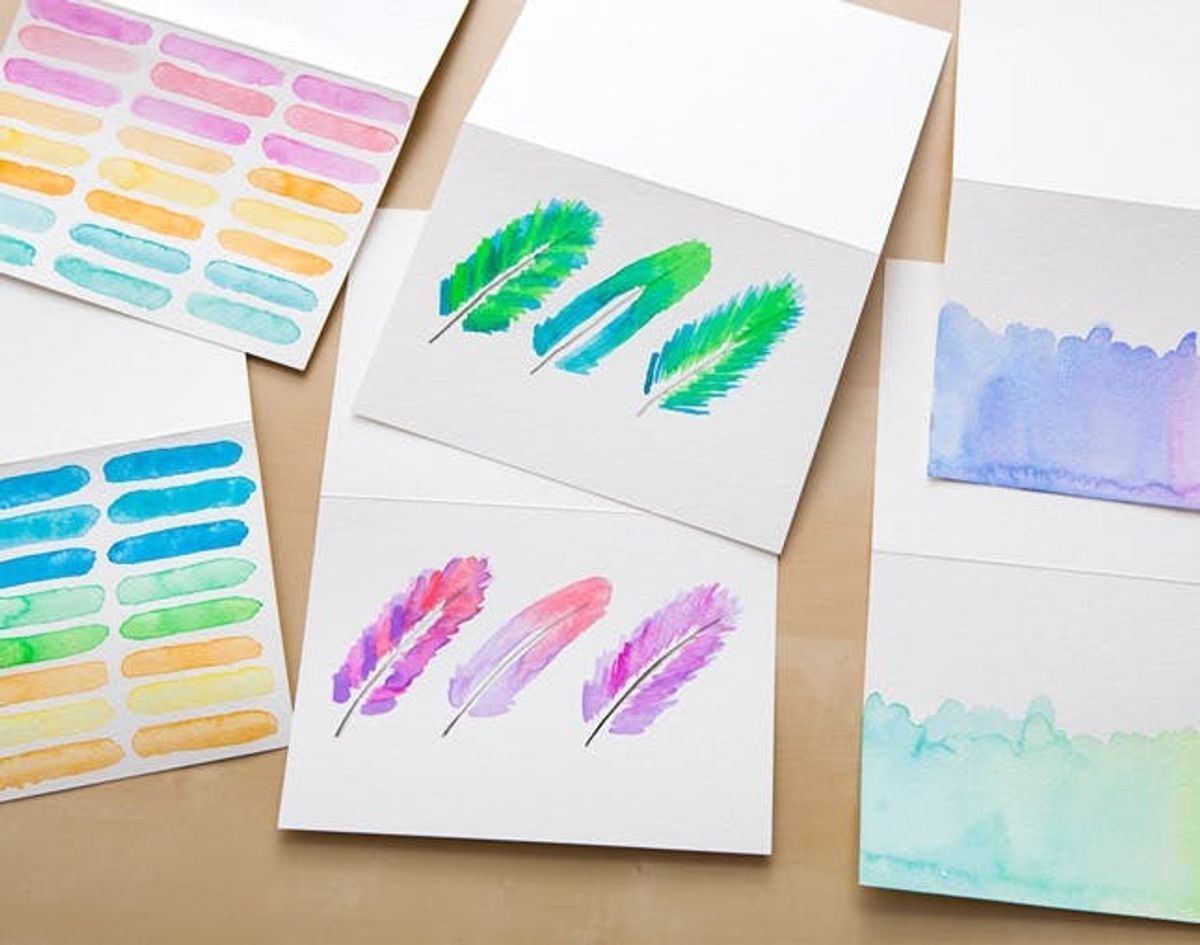
Valentine’s Day is right around the corner, and what better way to tell your S.O. or friends you love them than sending a good old fashioned card? Let’s be real, who doesn’t enjoy opening the mailbox only to see their name hand-written on an envelope? (Answer: no one!) That’s why we opted to watercolor some cards to send to our Valentine, and in a forward-thinking fashion, left them blank inside to keep them versatile for any occasion of the year. Here are four cards we created that are quick and easy. Best of all? You can get everything you need to create your own set of cards in our shop — say hello to our Watercolor Cards Kit, just $19.99!
Media Alert: Turns Out Watercoloring is Not Just For Kids!

Valentine’s Day is right around the corner, and what better way to tell your S.O. or friends you love them than sending a good old fashioned card? Let’s be real, who doesn’t enjoy opening the mailbox only to see their name hand-written on an envelope? (Answer: no one!) That’s why we opted to watercolor some cards to send to our Valentine, and in a forward-thinking fashion, left them blank inside to keep them versatile for any occasion of the year. Here are four cards we created that are quick and easy. Best of all? You can get everything you need to create your own set of cards in our shop — say hello to our Watercolor Cards Kit, just $19.99!

Watercoloring is truly an art. It’s not the easiest medium to use and it often has a mind of its own, so we kept our designs simple. In general, our technique was to dip the brush into the water, mix a bit of water with the paint, and then touch the brush to the water a second time. It is helpful to let a bit of the water come out of the brush by lightly rubbing it on the edge of your glass. Though you do want the paint to be watered down, you don’t want your brush to be dripping.

Materials:
– watercolor paper (cards + envelopes)
– watercolors
Tools:
– various paint brushes
– pencil
– eraser
– water receptacle
Practice making some lines and shapes using your watercolors first. This will give you a better sense of the types of designs you can make.

Dashed Heart Design: First we made one with a classic heart. Clearly this is a great one for V-day, but isn’t every day a good day to say “I love you?” We think so.

Instructions:
1. Use a pencil to draw a heart on your card.
2. Then, using the smallest brush, paint short lines across the top of the heart changing colors as you move down.
3. Wait for the paint to dry and erase the pencil outline.
Lightly draw a heart and then use your smallest brush to fill it with tiny lines. Fade the colors as you move down the heart.

Once the paint is dry, gently erase the outline of the heart.

Color-Dipped Card: Next we made a card with an ombre look.

Instructions:
1. Using the large brush, paint about halfway across the card, working only in the bottom portion of the card.
2. Use a second color for the other side and a third to blend in the middle.
3. Let dry, then you’re done!
If you want a cleaner look, you can also put a piece of painter’s tape at the top edge of where you’re “dipping” the card.

The paint just melts together making it very simple to get that gorgeous fade effect. It’s like a sending someone a sunset! (Too cheesy?)

Lines of Color: For our next trick, we created a simple colorful pattern. This is easy enough for your kiddos to do with you!

Instructions:
1. Using your large brush, paint a short line across the top of the card, starting in the center.
2. Paint a second and third line on either side of the first (these should all be the same length).
3. Work your way down the card changing color as you go.
Using the large brush we made three columns of colorful lines.

So simple, yet so beautiful.

Trio of Feathers: And finally, we painted three wispy feathers.

Instructions:
1. Paint three thin quills, leaving space for the barbs. That’s right — barbs!
2. Switch to the medium size brush and paint barbs (we did three different versions).
Use your smallest brush for the stem and a slightly thicker brush for the barbs.

We used two different colors but you could add as many as you like. Nothing wrong with some rainbow feathers! ;)

All in all, they make a pretty nice collection — don’t you think?
snag a kit
 just $19.99 in the shop.

What other projects would you like to see in our Brit Kits shop? Talk to us in the comments below.


