 Recommended for you
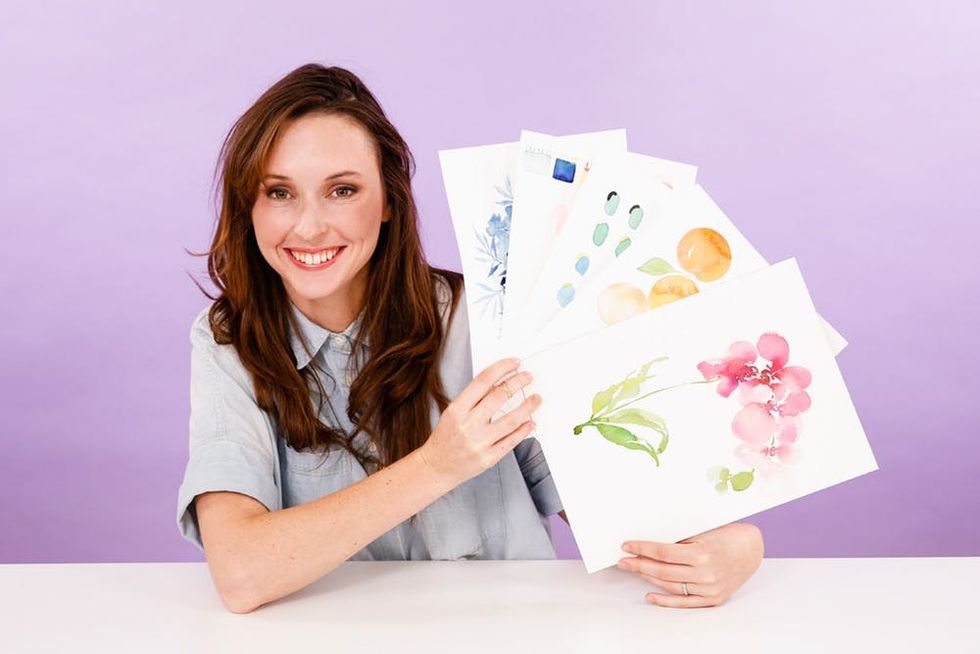
Now’s the time to start a new creative habit. So, as you’re dreaming of warmer days, bring a little springtime into your life by learning how to paint your favorite flower watercolor. That’s your creative prompt, y’all. So let’s do it!
With the help of watercolor artist Jenna Rainey, we’ve created a simple tutorial to get you started. Jenna has picked two of her favorite flowers to paint: a peony and a rose. So grab your watercolors, paint brushes and paper and let’s do this!
Cold Pressed Watercolor Paper (Fabriano)
Watercolor Paints (Winsor + Newton)
Psst! You can also follow along and learn the creative skills with Jenna’s Intro to Watercolor Painting class. And don’t forget to grab Jenna’s new book: EVERYDAY WATERCOLOR on Amazon as well!
3-STEP TUTORIAL: A WATERCOLOR PEONY
When painting any sort of subject, it’s always helpful to visualize the basic shape of your subject prior to painting. In this case, we’ll be painting a peony from the side, which will be shaped like a fan or a cone. Think of how a flower grows — each petal will be growing out of one stem, so each petal should be pointing back to this and peeling outward like a cone. So let’s get started.
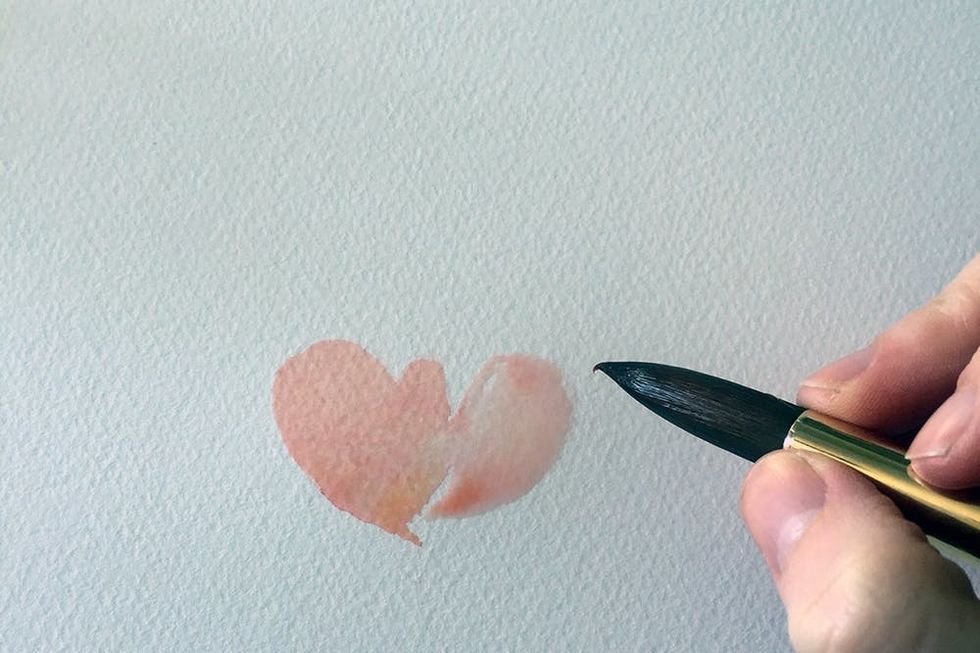
Step One: Mix up a really light blush wash — for mine, I used Opera Rose, a touch of Scarlet Lake and Yellow Ochre from Winsor and Newton and a lot of water to make it lighter. Load your size 16 brush up with this mixture, and begin painting in the front layer of petals with upside teardrop shapes for each petal. Remember that each of these tear drops should be pointing back to the stem, which we’ll be putting in later, and the height of each will follow a “C” curve, so should be highest in the middle.
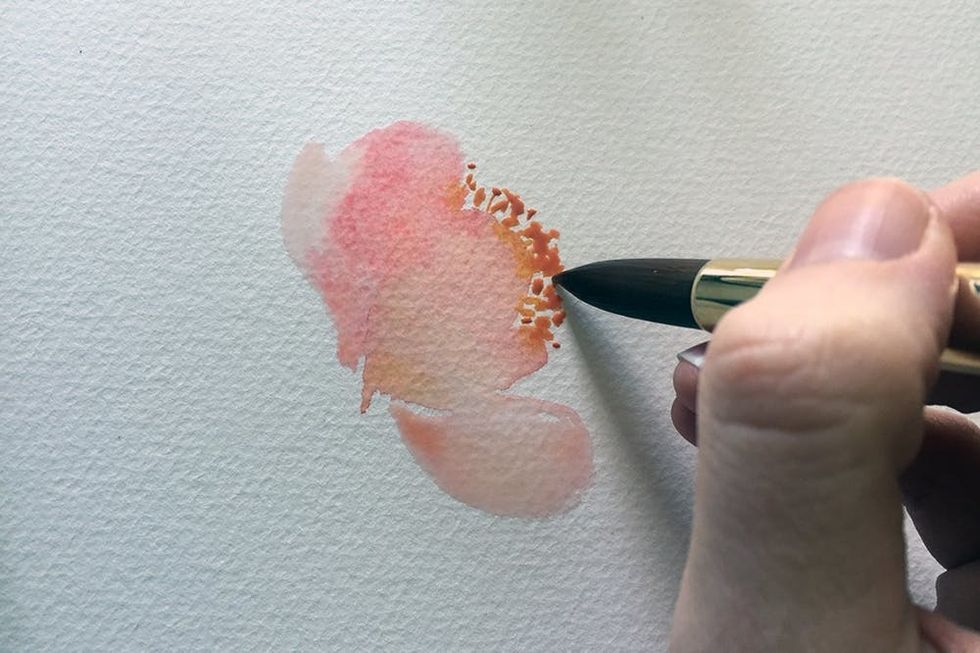
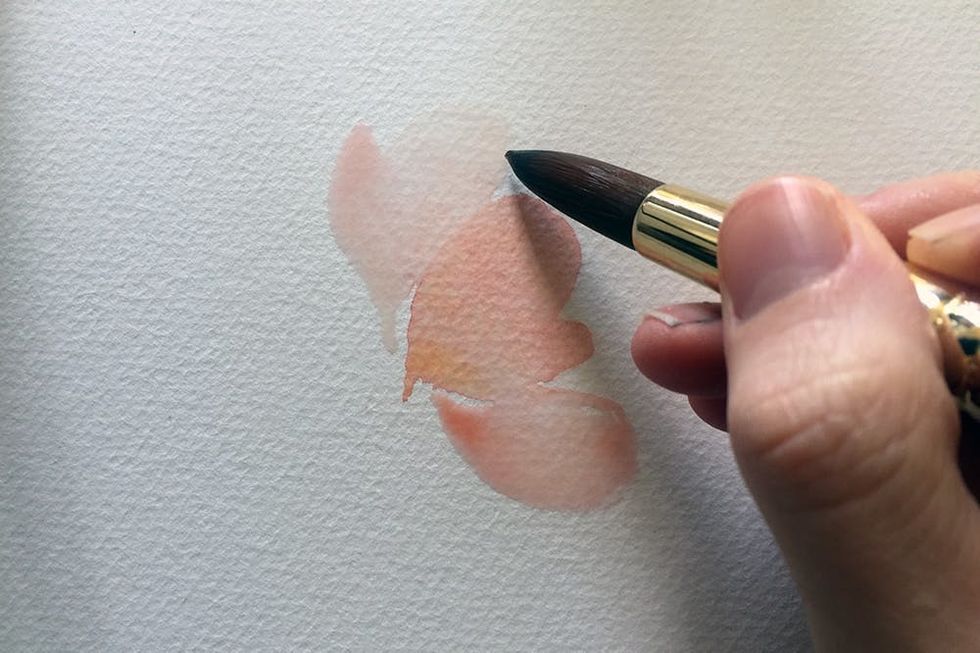
Step Two: With the tip of your brush and with a thick mixture of Yellow Ochre, put in stamen at the tops of these front petals. Leave enough white space between each so it doesn’t look like a yellow blob!
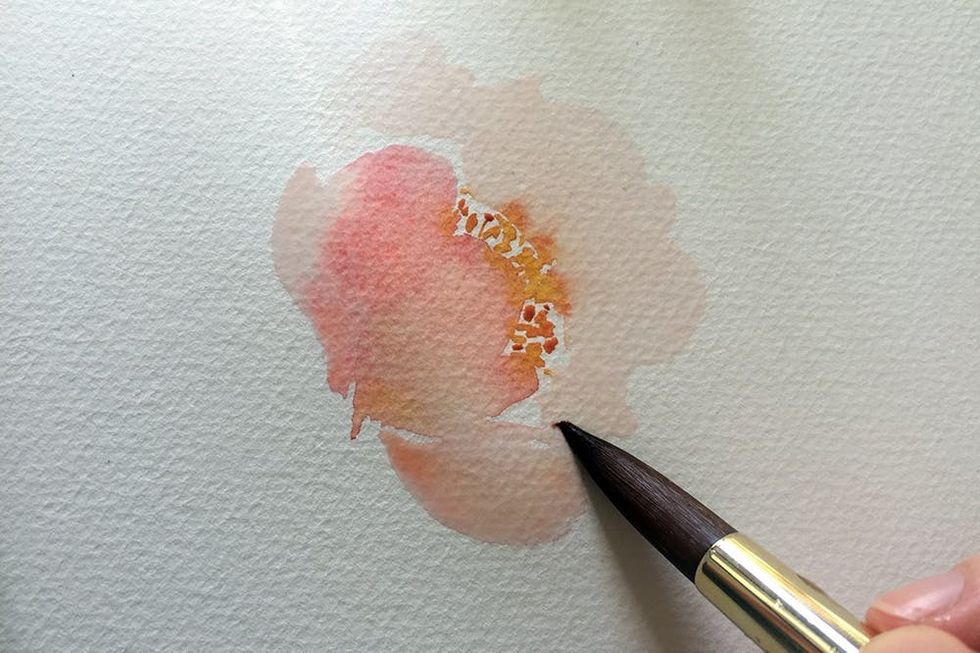
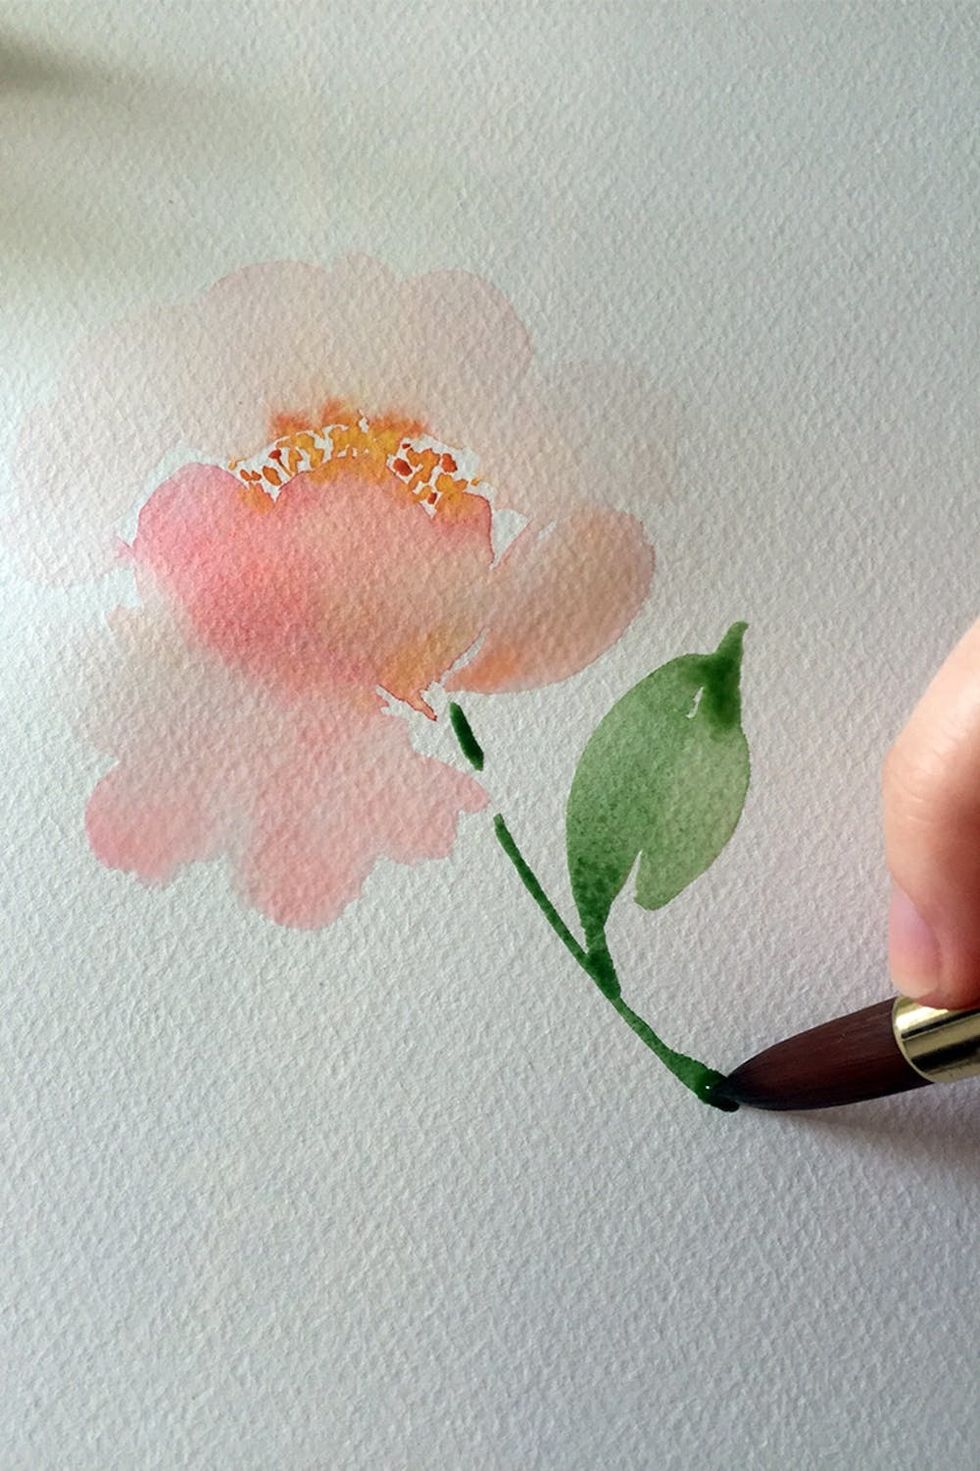
Step Three: From here, it’s time to paint in the back layer of petals. These are the same shape and will follow the same structure as the front layer, but only the tops of the petals will be showing. Once you’re liking the overall shape of the flower, add in your stem, pointing it directly to the middle of the flower, then add in leaves! Leaves will be broken down into two sides, starting with pressure, then releasing pressure for the tip of the leaf.
3-STEP TUTORIAL: A WATERCOLOR ROSE
Just like the peony, we want to break down this rose into its basic shapes before painting. We’ll be painting a rose as if we were holding the flower by the stem and looking straight down at the flower. With this in mind, the shape of a rose can be broken down to a sphere. Each petal will curve around the center circle of the flower! Let’s do this.
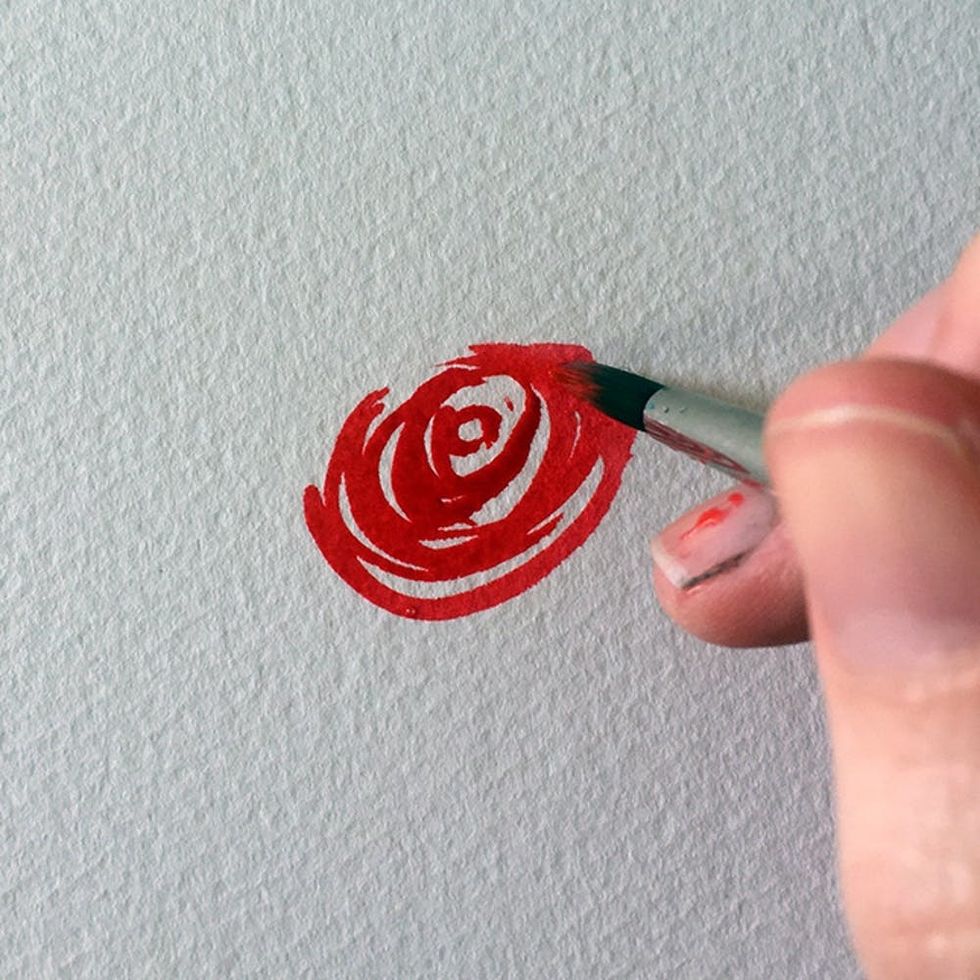
Step One: Grab your size six brush and mix up a really thick, dark mixture of reddish/pink — I used Scarlet Lake and a touch of Opera Rose by Winsor and Newton. Using the point of your brush, bring really thin swirls around a tight center circle. Make sure to leave a good amount of white space between each swirl, but not too much so that it looks off. White space will help show layers of petals.
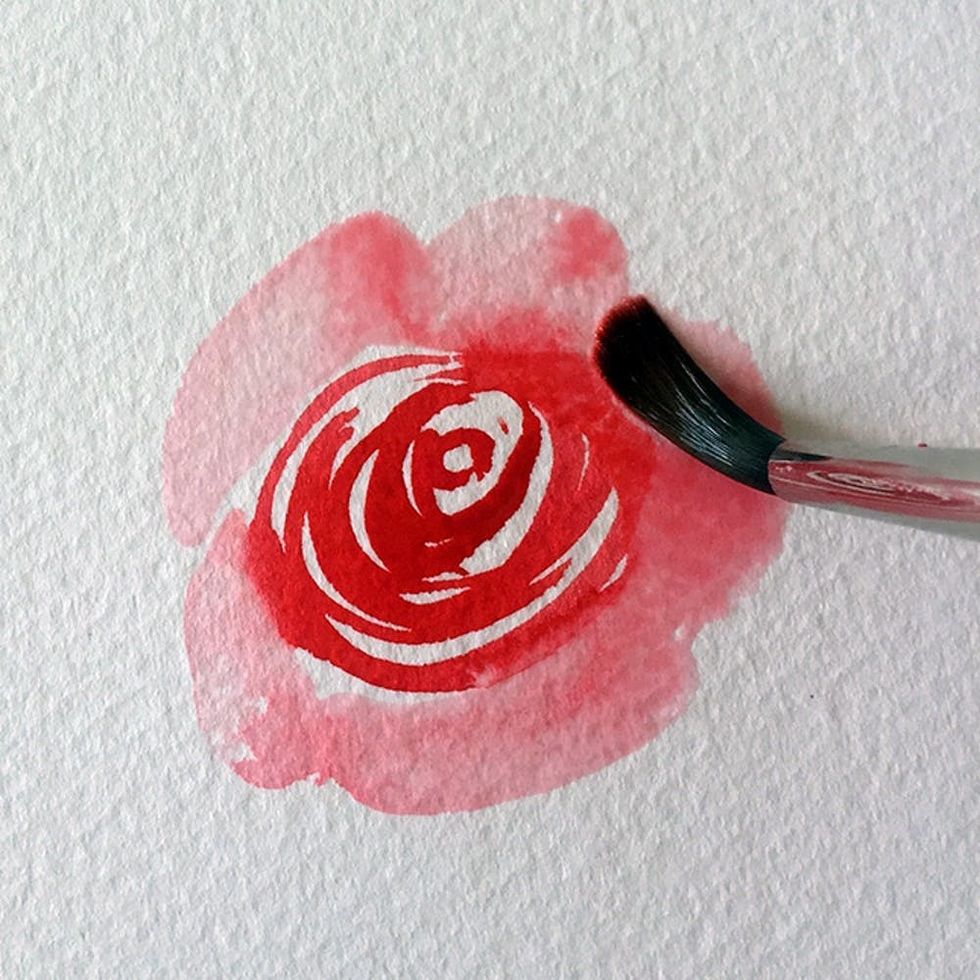
Step Two: Next up, lighten your brush with water, then with pressure on your size six brush, use the belly of the brush to add in wider and lighter petals around the ball of the flower. Remember to keep the overall shape of the flower resembling a sphere!

Step Three: Add in your leaves! Like the peony, you’ll add in leaves to frame the flower. Vary the leaves in hue and lightness to create movement and variety.
Voila! And if it’s not perfect, don’t fret! All you have to do is keep practicing. Plus, if you need to brush up on your skills, Jenna has an awesome Watercolor Painting class to get you started! And be sure to tag us in a snap of your work of art on Instagram.
Brit + Co may at times use affiliate links to promote products sold by others, but always offers genuine recommendations.