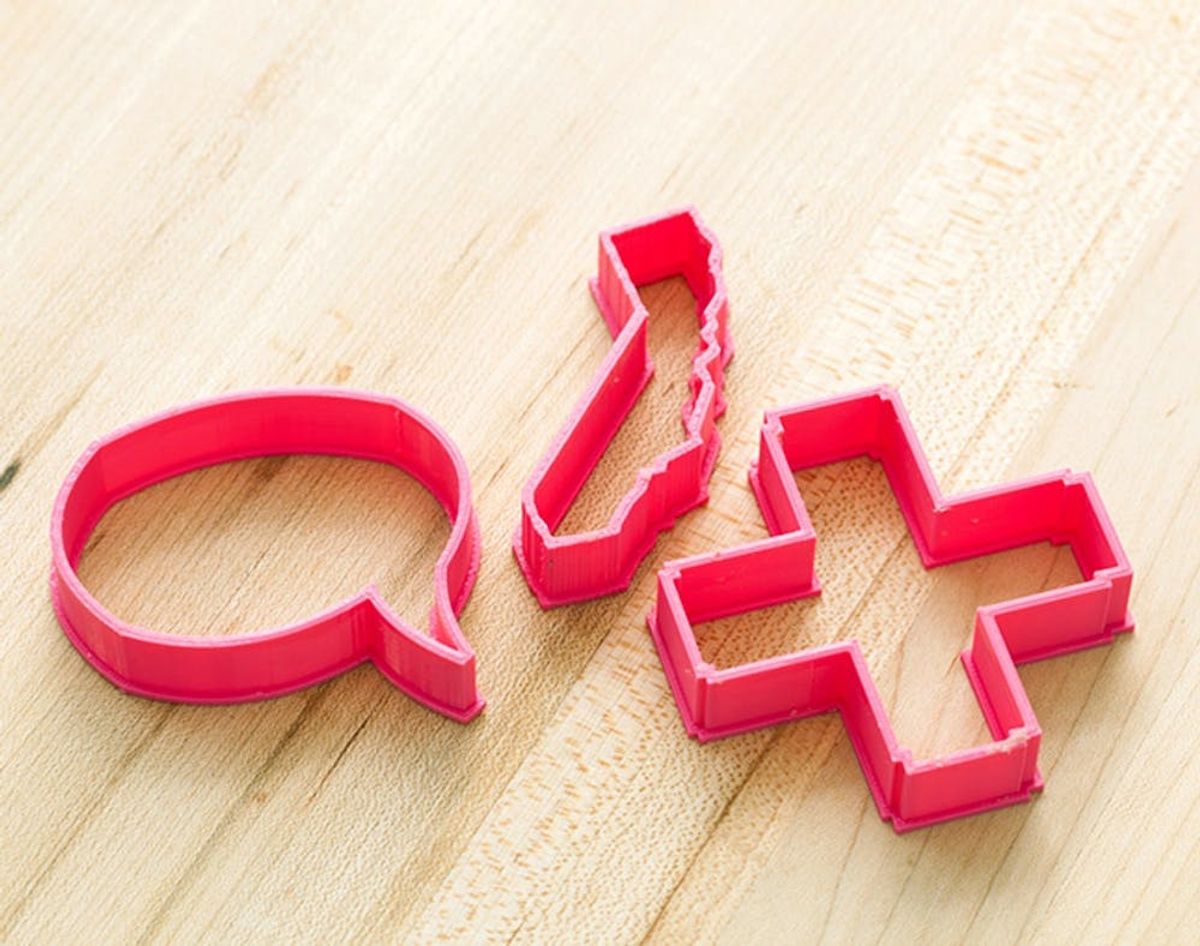
We’ve been playing around with our new Makerbot here at Brit HQ, and we decided it was time to give you a peek at what we’ve been making. This week, the collective sweet tooth in the office got the best of us, and we decided it was time for some cookies. Thus, we needed to print up some cookie cutters. Here’s how it went, and what we learned.
We Tried It! 3D Printed Cookie Cutters

We’ve been playing around with our new Makerbot here at Brit HQ, and we decided it was time to give you a peek at what we’ve been making. This week, the collective sweet tooth in the office got the best of us, and we decided it was time for some cookies. Thus, we needed to print up some cookie cutters. Here’s how it went, and what we learned.
We started by looking for a pattern to use for the cookie cutters. There are several available on Thingiverse a great resource for 3D designs. We considered printing a Facebook like button, two puzzle pieces, or a unicorn, but we decided we wanted to try our hand at making our own designs.
Enter Cookie Caster. This site is dedicated solely to helping you easily make cookie cutter designs to be printed on your 3D printer of choice. We easily made three different designs: the state of California, a speech bubble, and the plus sign from our logo.
What makes it easy is that you can upload an image and it will automatically trace the shape in the picture. (Just so you didn’t think we drew California freehand!)
Now it’s time to position the designs in the Makerware software.
This will help you lay everything out on the printer plate (to make sure it all fits) and save the file in a format the printer can read. Then simply save it to the SD card that came with your printer, and we’re ready to print.
Our color of choice today was pink. Once we got the card loaded, we followed a few quick prompts on the machine, and it was ready to print.
See how it starts with the outline of each shape, and then starts filling it in layer by layer. Until you get this:
Removing the pieces from the plate can be a bit tricky. You want to avoid scratching the glass. You can put down a layer of painters tape, which will make it easier to remove, or you can use CubeStick, which creates a thin film that dissolves in water and releases the item you’ve printed.
Who’s ready to make some cookies?
We love how the cookie cutters turned out. But next time we make them, we’ll do a few things differently. Here’s what we learned:
– If your design has any curvy or complicated edges, err on the side of it being too big. Our California cookie cutter was the smallest of the three, and it should have been the largest.
– Go as thin as you can on the cutting edge—you can adjust that on Cookie Caster. Not only will this speed up time in printing, but it will also make it a cleaner cut when you’re making the cookies.
– When actually making the cookies, if you’re using store-bought dough, buy the kind in the tube—it won’t spread as much as the kind that is already cut into squares. We had an epic fail with our dough losing the shape of the cookie cutters when they baked. If that happens, just use the cutters to cut the baked cookies while they are still warm.
Don’t have access to a 3D printer? You can still design your own cookie cutters, and have them printed for you. Check out Shapeways, you can send them your design, and they will print it and mail it to you. You can also sell the products you design.
What do you think we should make next with our 3D printer? Have you tried using one? We’d love to hear about it!


