These two looks are the foundation to any and all big ‘dos for the big day.
How to Do Your Hair for Every Wedding You Attend This Year
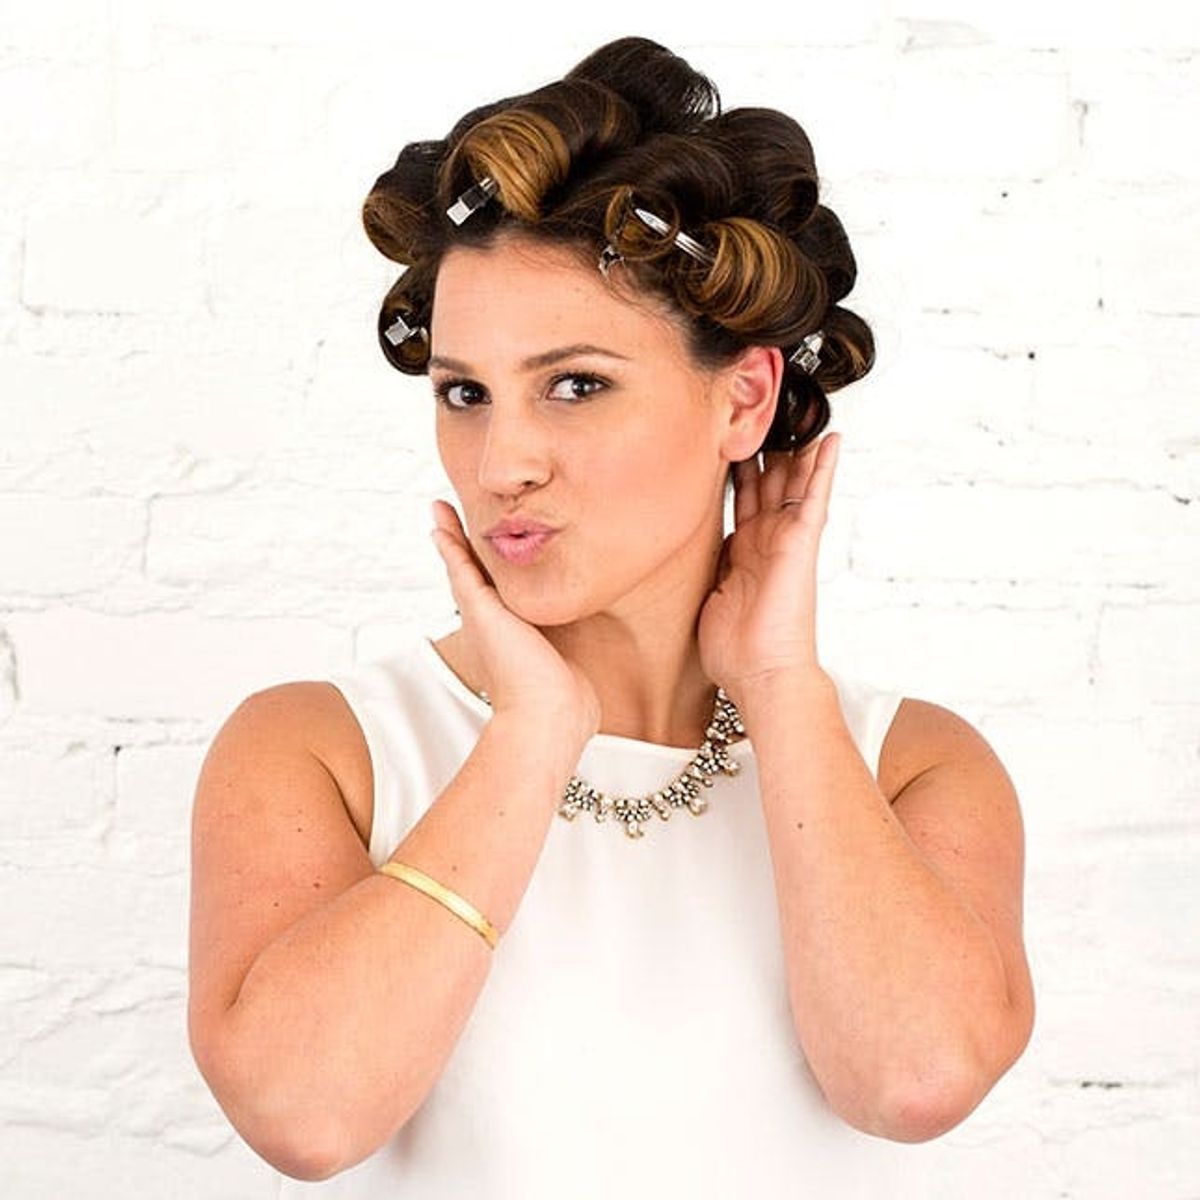
If you’re getting hitched this season, in a wedding or attending one, (um, did you all just nod? Us too. #YayWeddingSeason!) chances are that finding the perfect hairstyle is high on your to-do list. As a makeup artist who regularly does beauty and hair for brides and their wedding parties, I am here to teach you the basics for taking some of the beauty work into your own hands. We started with a makeup tutorial for your flawless face, and now I’m going to show you how to set your hair for beyond-gorgeous beach waves or majorly glamorous, romantic curls. Whether you’re a DIY-minded bride-to-be or a plus one, this post is your first step to perfect hair for every wedding you attend this spring. Pin these now, ladies: both of them will be the foundation to a lot of updos we will reference later on.
How to Get Perfect Wedding Day Beach Waves
Step 1: Protect Strands + Heat Up Those Waves
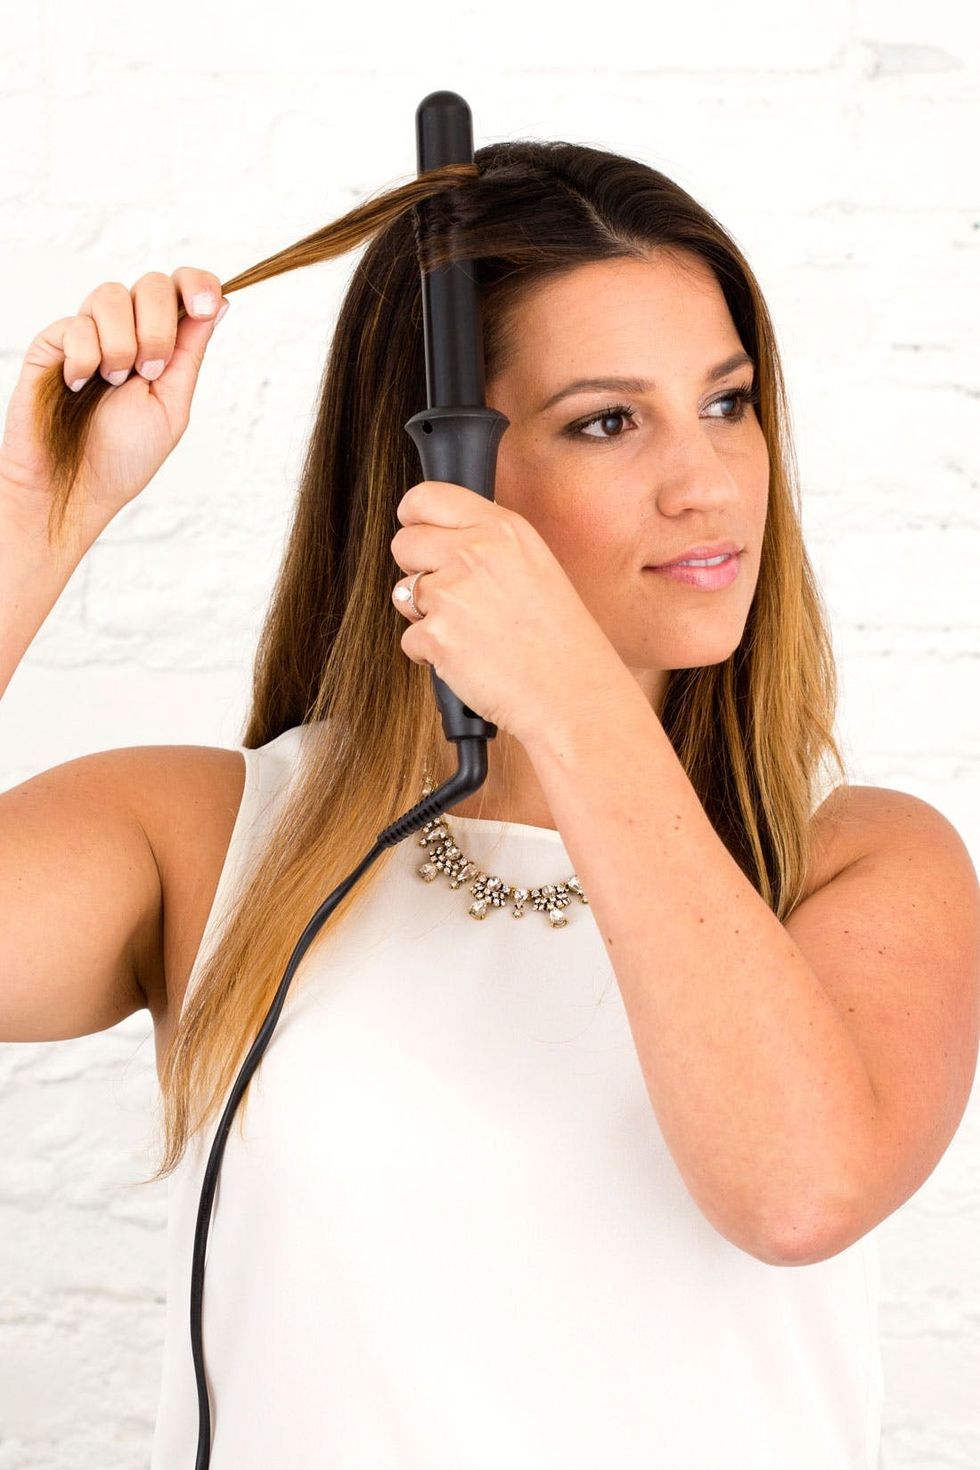
Let’s talk lingo first — when I talk about “setting your hair,” I’m talking about adding heat and curls, then letting them cool. We do this because it makes for a much longer-lasting curl, which is something you’ll need after hundreds of photos and hours of dancing ;) Before using any type of heat on your hair, you want to use a protective barrier and a setting agent to help get the most longevity out of your ‘do. Good thing for you I have found a two-in-one product that has not failed me or any of my clients yet! Kenra Platinum Hot Spray ($20) is your secret weapon — spray each section of hair from approximately 2 inches away from your roots to your ends prior to using your wand/curling iron. Your sections should be approximately 2 inches thick depending on the thickness of your hair.
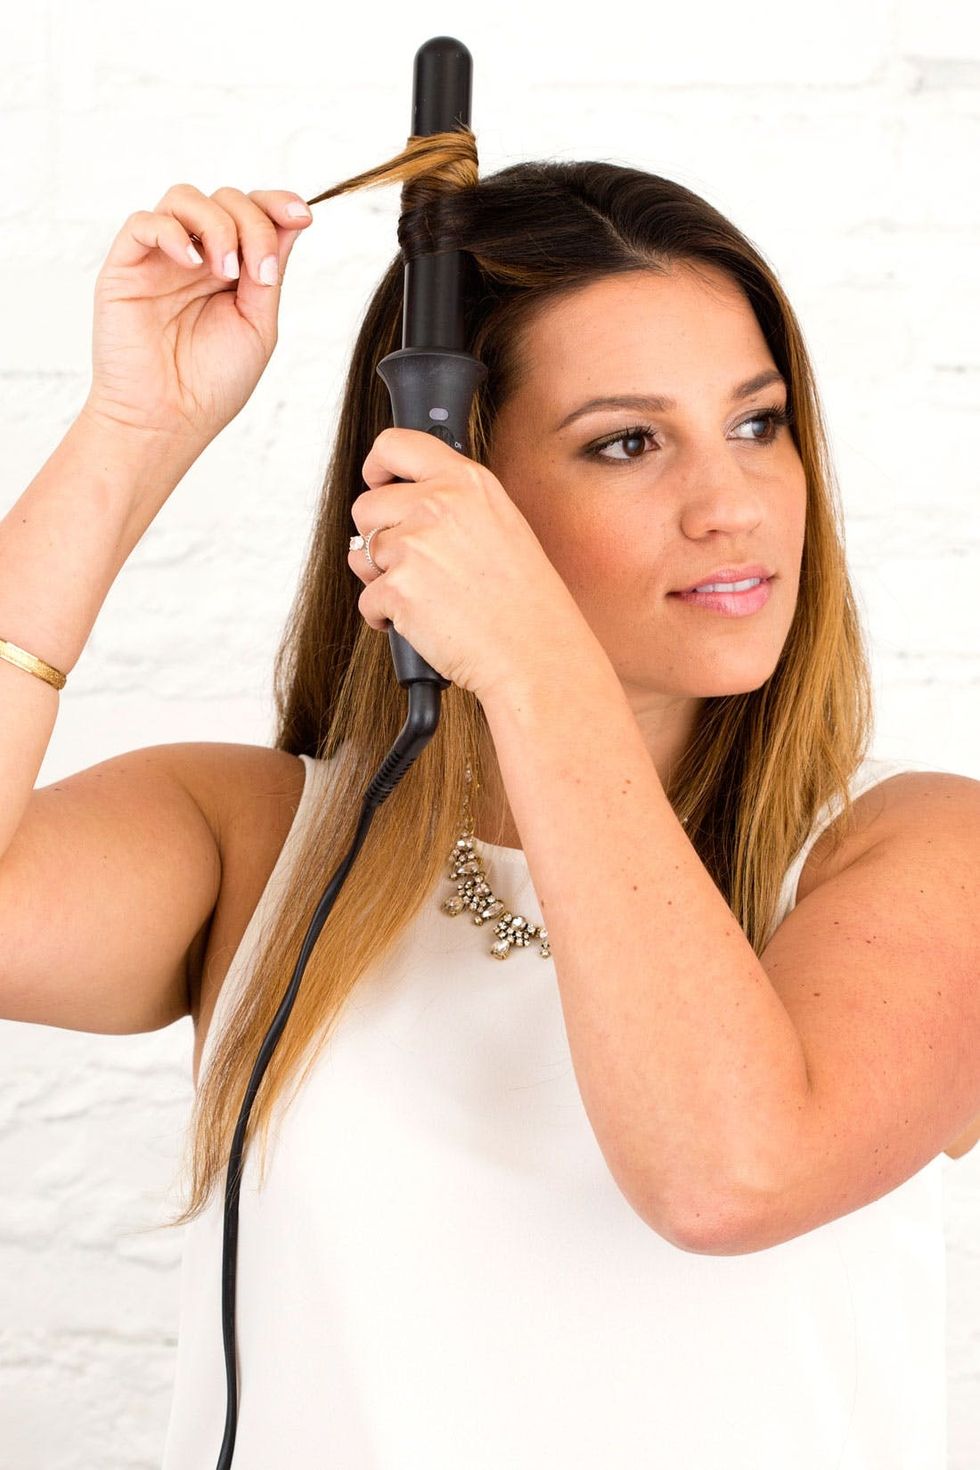
After you’ve prepped your hair with a setting spray, it’s wave time! I used a curling wand for the ultimate beach waves. When curling locks, many people make the mistake of starting at the bottom and curling up to their roots. Sorry, y’all, this is not going to give you the best curl! The best way to distribute the heat evenly is to start at the base of your section (go with 2-inch sections, a little less if your hair is super thick) instead of the ends. Simply hold the ends of your hair with your opposite hand and place the curling wand at the base of your 2 inch section like Ashley is in the above picture.
Now carefully wrap the hair around the wand. (It might feel a little awkward, so do a couple test runs before the big day.) For beach waves, you want the curl pattern to move away from your face so your curls cascade backwards instead of into your face.
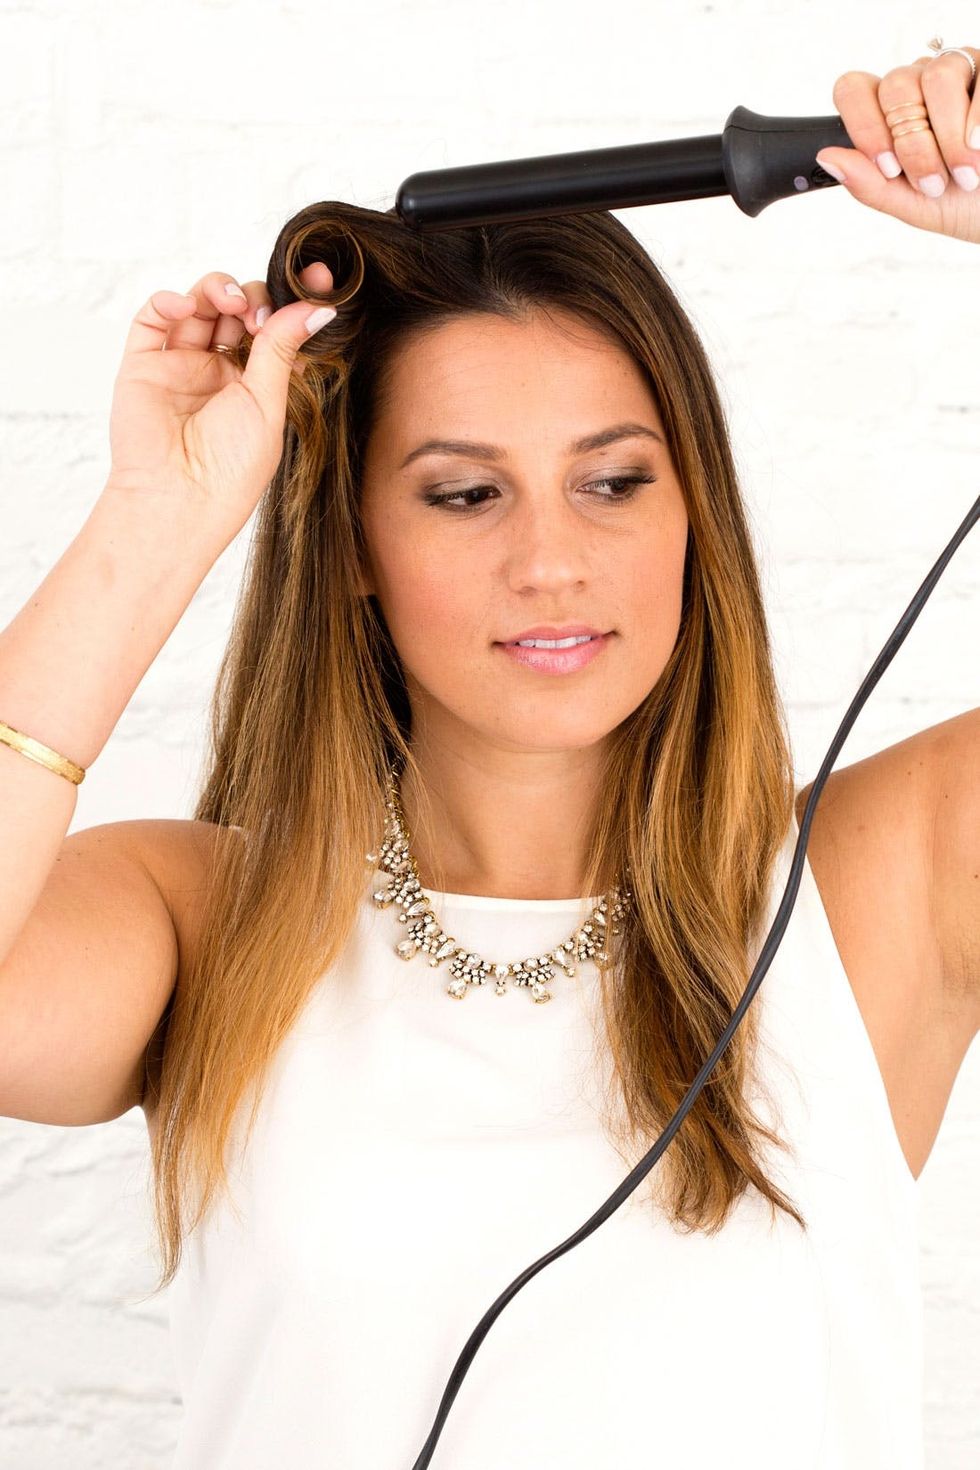
Continue wrapping your hair around the curling wand until you get to the last 2 inches of your ends, and leave them out for the best beachy wave effect.
Remove the curling wand by gently pulling it out from the center of your pin curl, pinching the curl together with your index finger and thumb.
Step 2: Make a Pin Curl
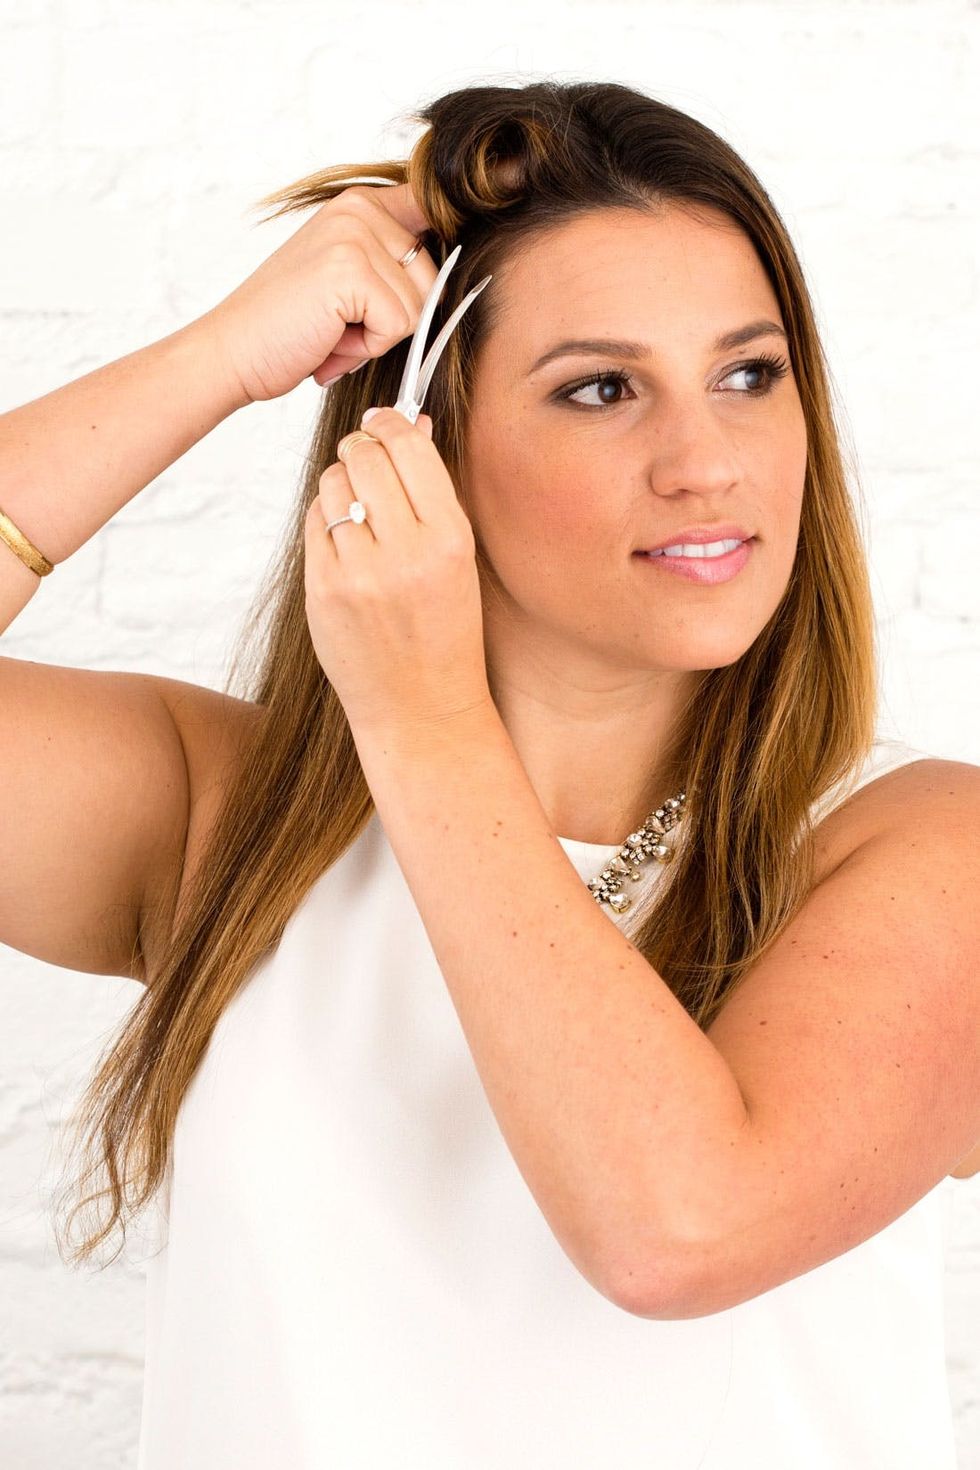
Let the curl fall loosely down your finger and clip a duck bill clip at the base of the curl to secure it in place.
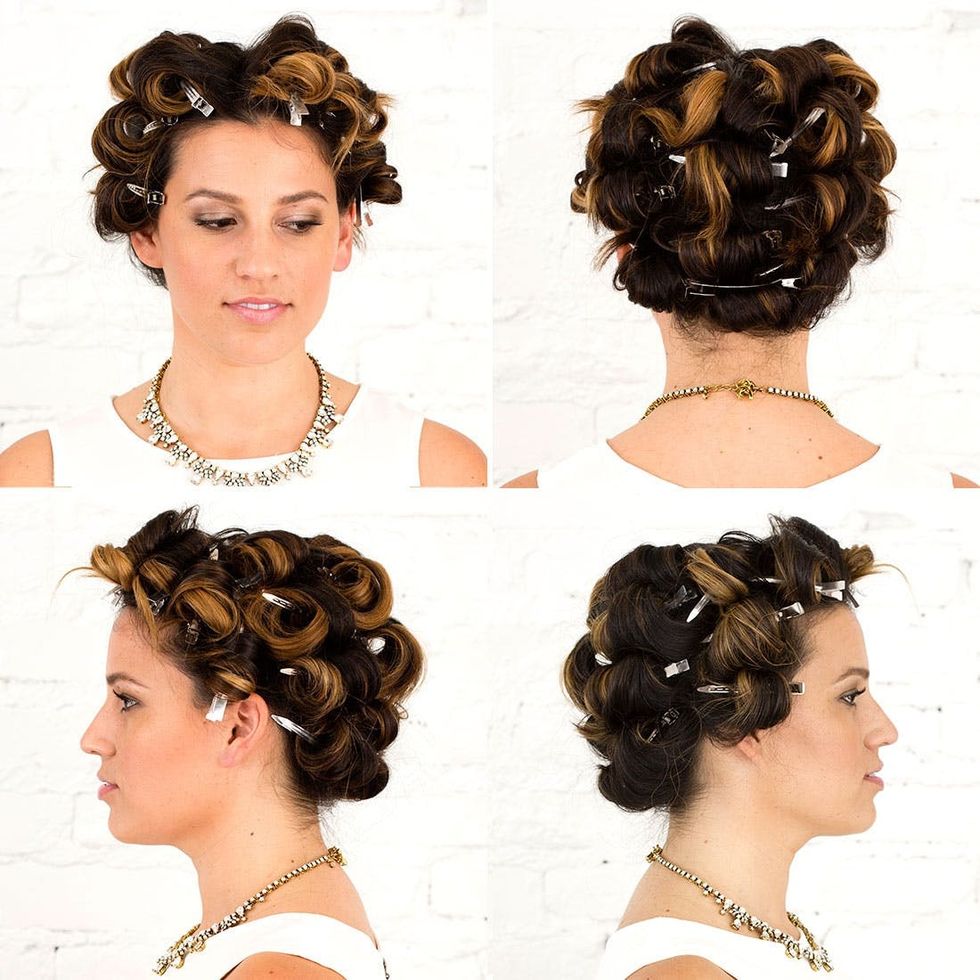
Continue steps one through three until all of your hair is in pin curls. As you can see above, your hair ends up having pin curl rows in five vertical sections around your head. Notice in each row the hair is curled away from the face and pinned so that the ends stick out.
Step 3: Final Wave Pattern
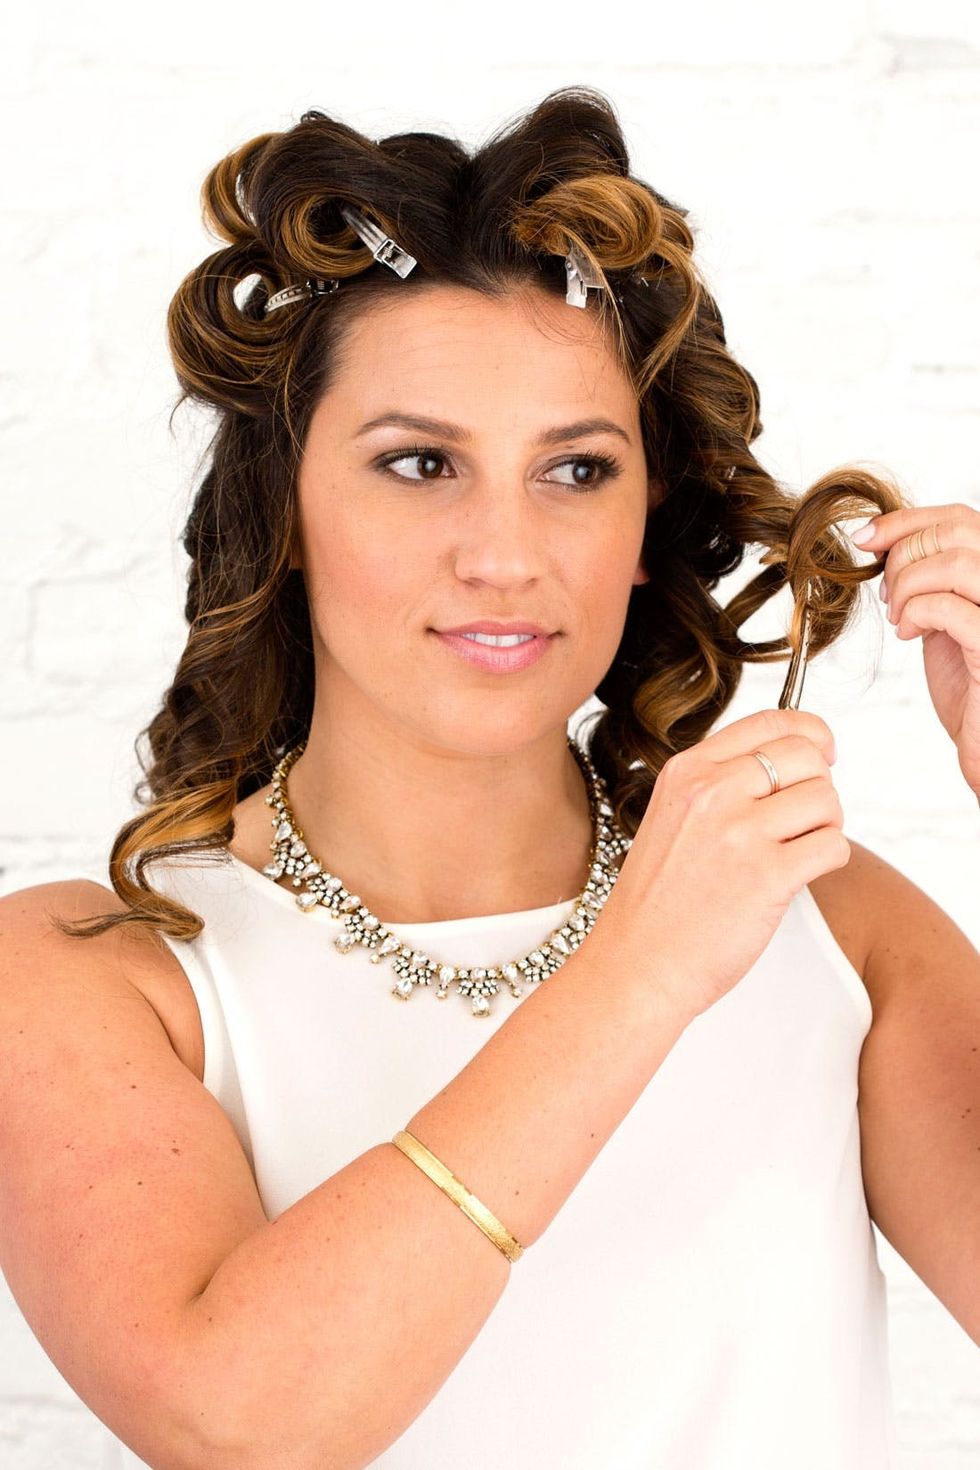
After your curls are cool to touch (approximately 10 to 15 minutes) remove all of the duck bill clips.
Step 4: Let Set + Remove Pins
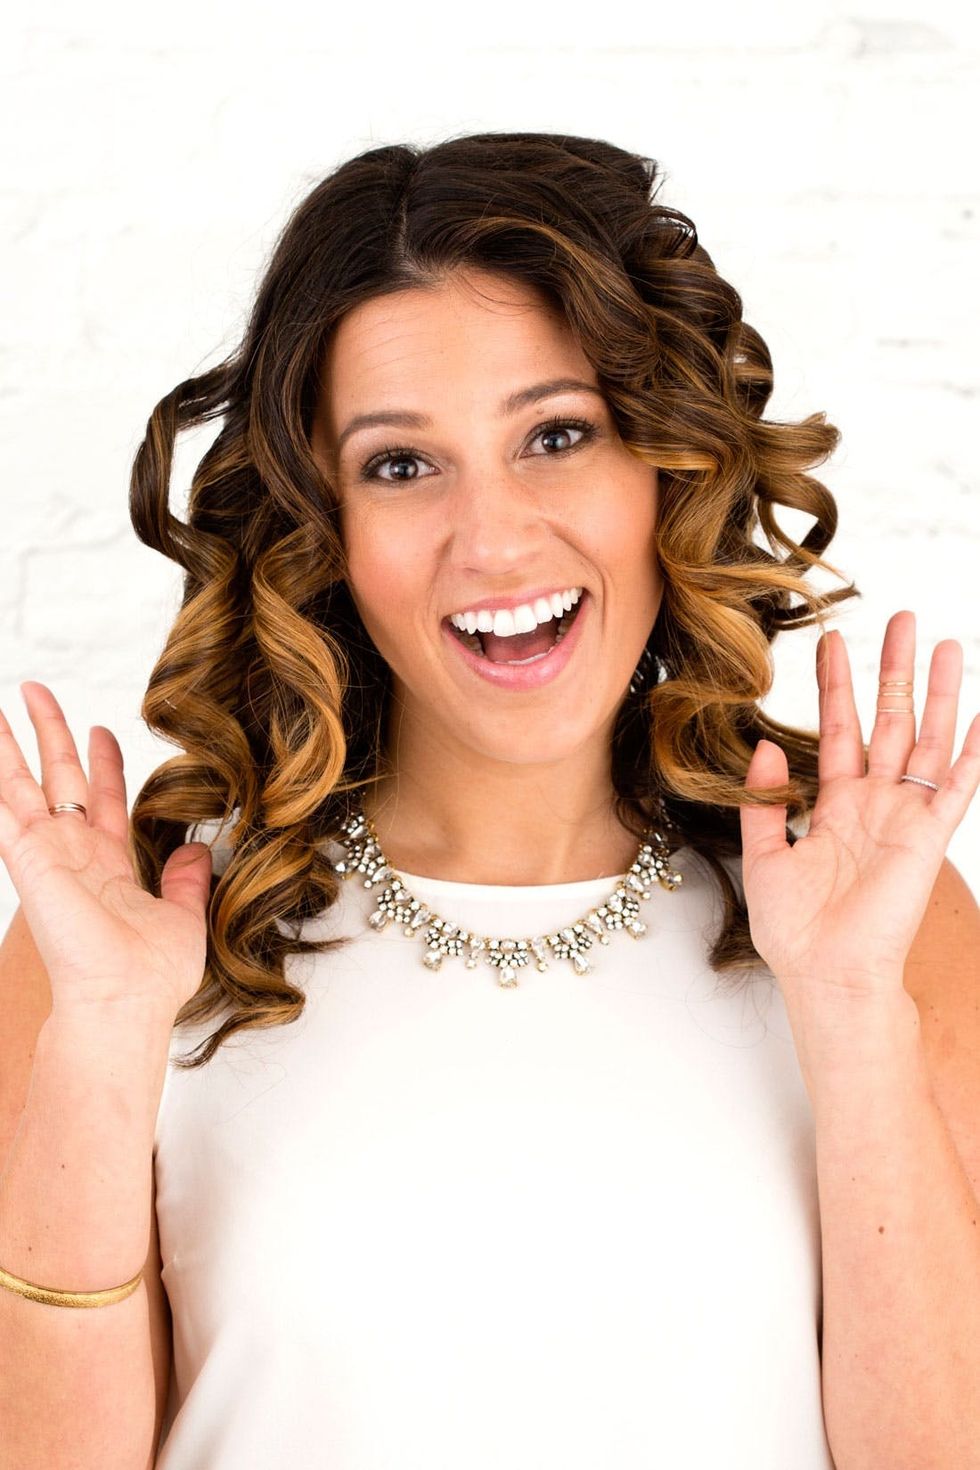
Voila! You’re good to go —JUST KIDDING!!! Your hair WILL look like Goldilocks at this step, but only for a moment, I promise!
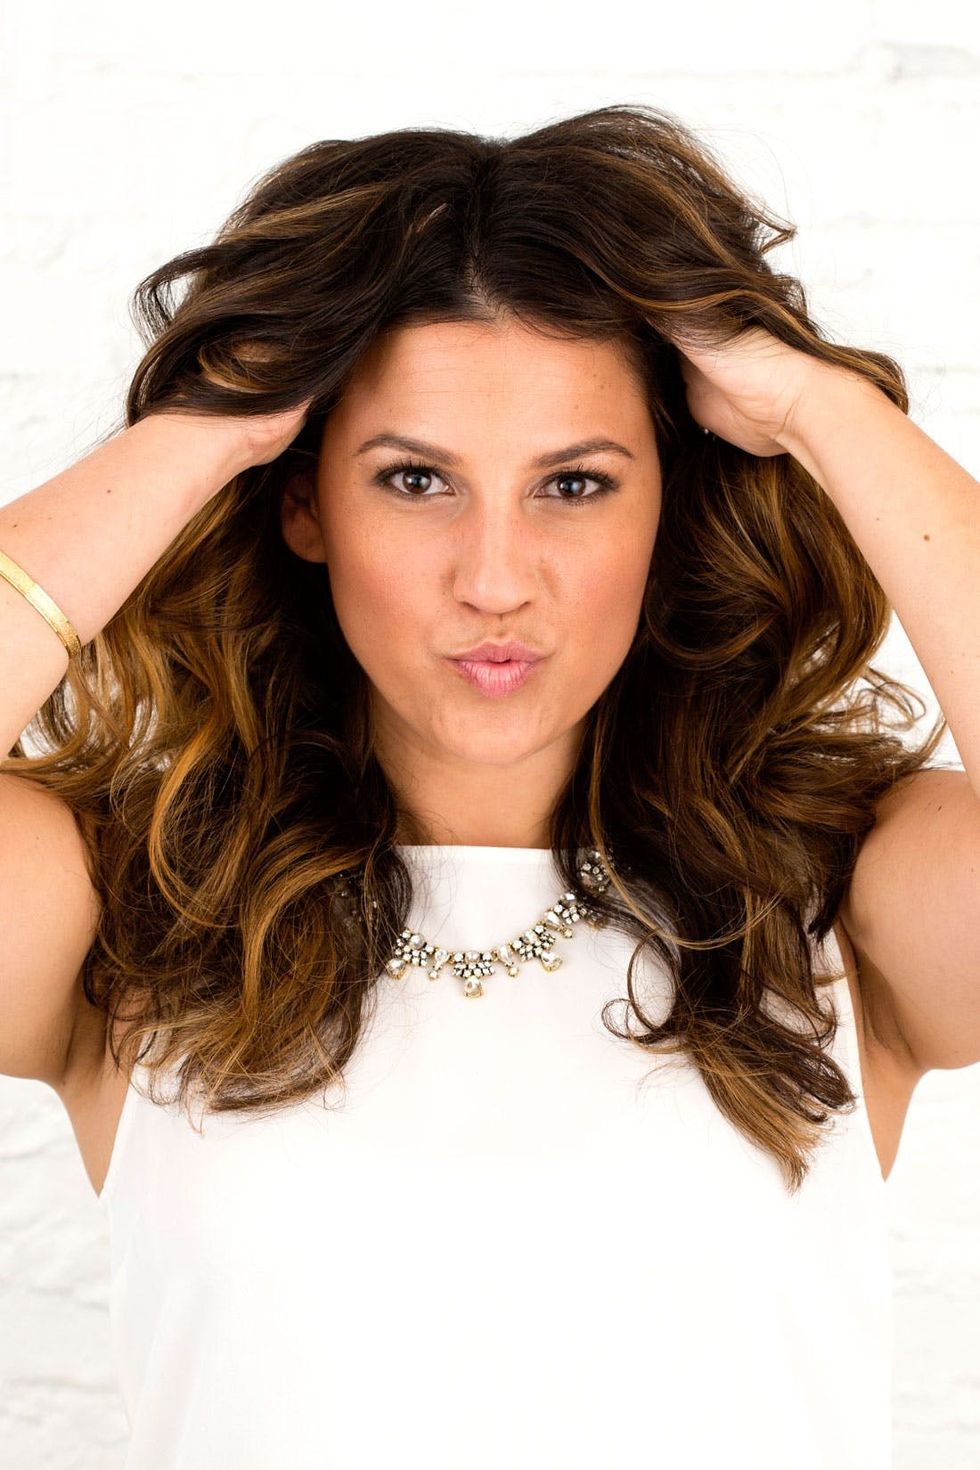
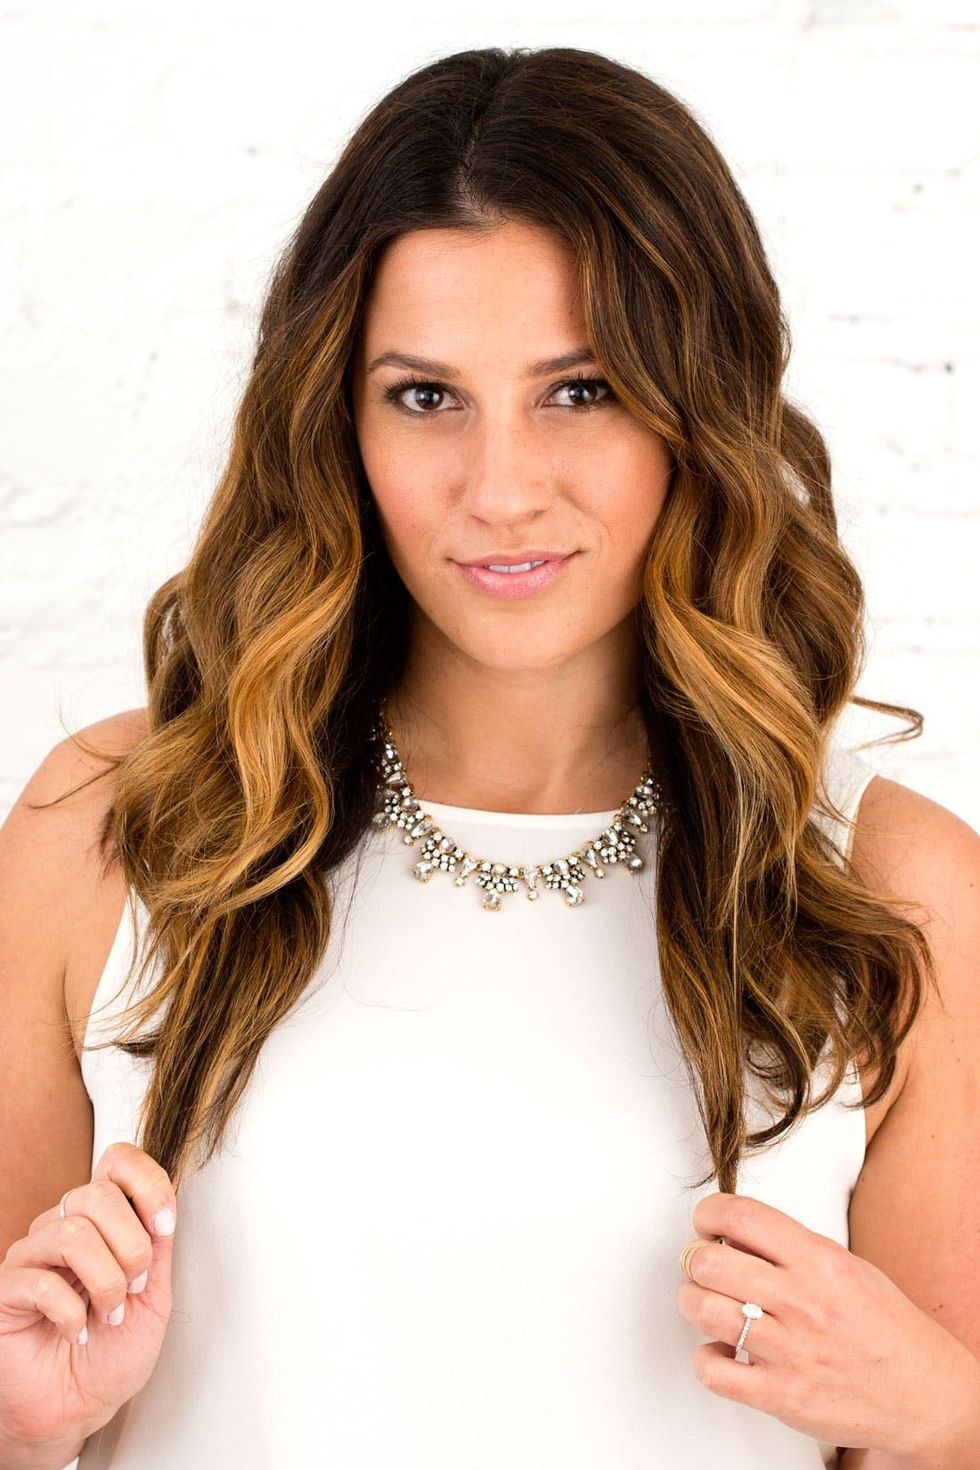
Ahhhhhh, there we go! Use your fingers to break apart and comb through your ’90s prom curls! Shake your hands back and forth through the roots of your hair to help add volume. This is going to tame the curls into a more relaxed wave pattern as well.
Step 5: Break Apart Curls
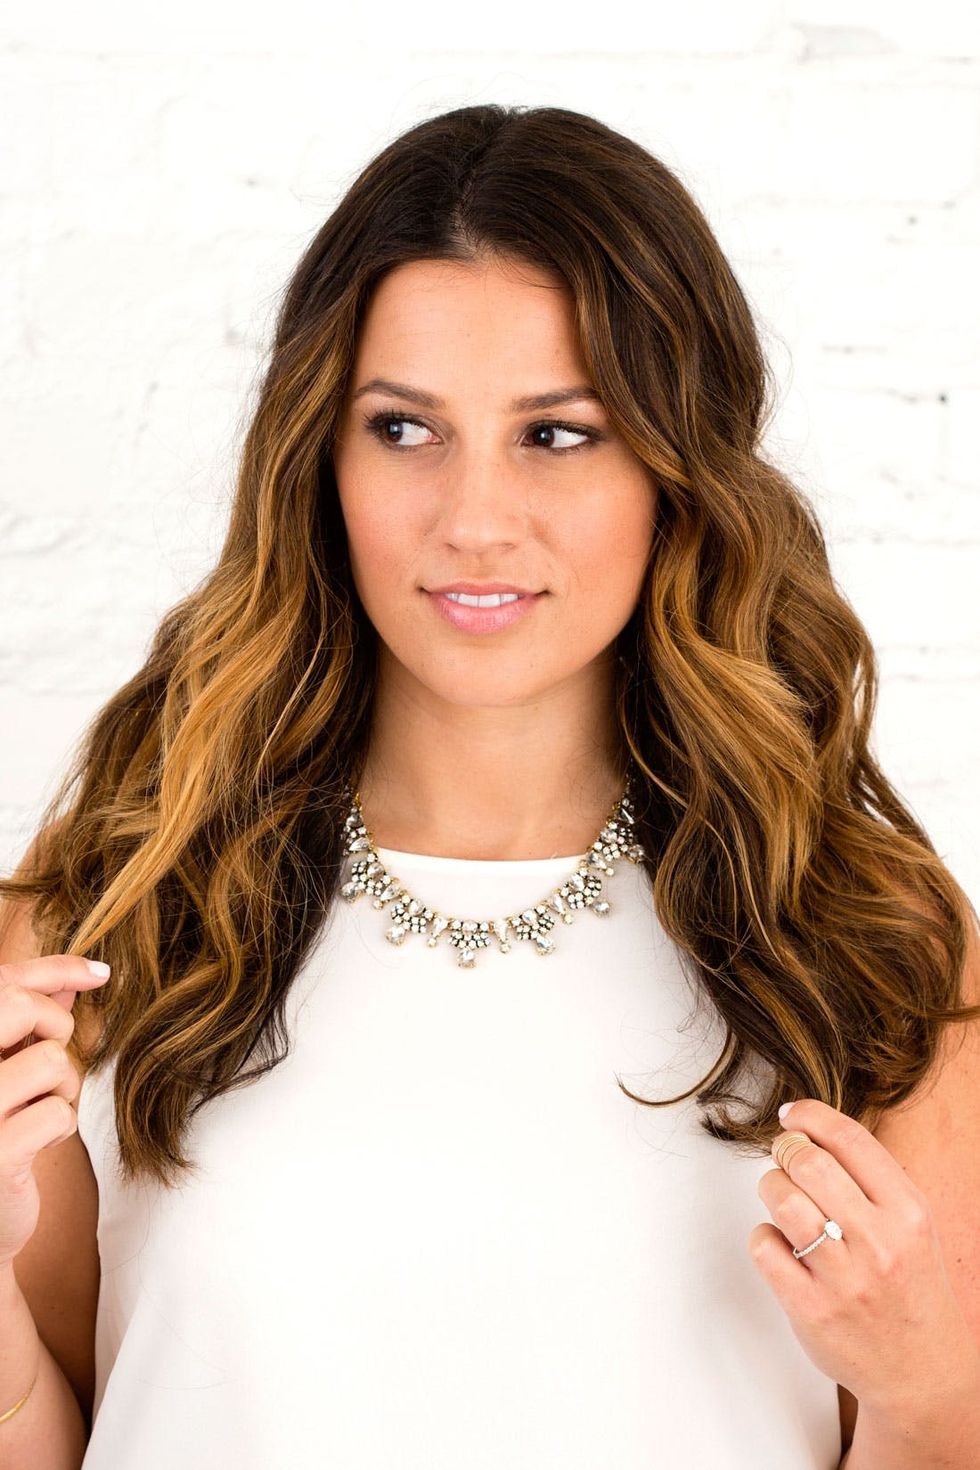
Once you get your curls to a place where you’re channeling a Victoria’s Secret bombshell, it’s time to mend the ends of your hair to keep them piecey, driving home the beach vibe. You will want to use a waxy product like Bumble And Bumble Brilliantine ($30) for this. This is a styling oil that feels like serum and hair wax had a baby. Your ends will be pieced together but still totally touchable!
Step 6: Mend Your Ends
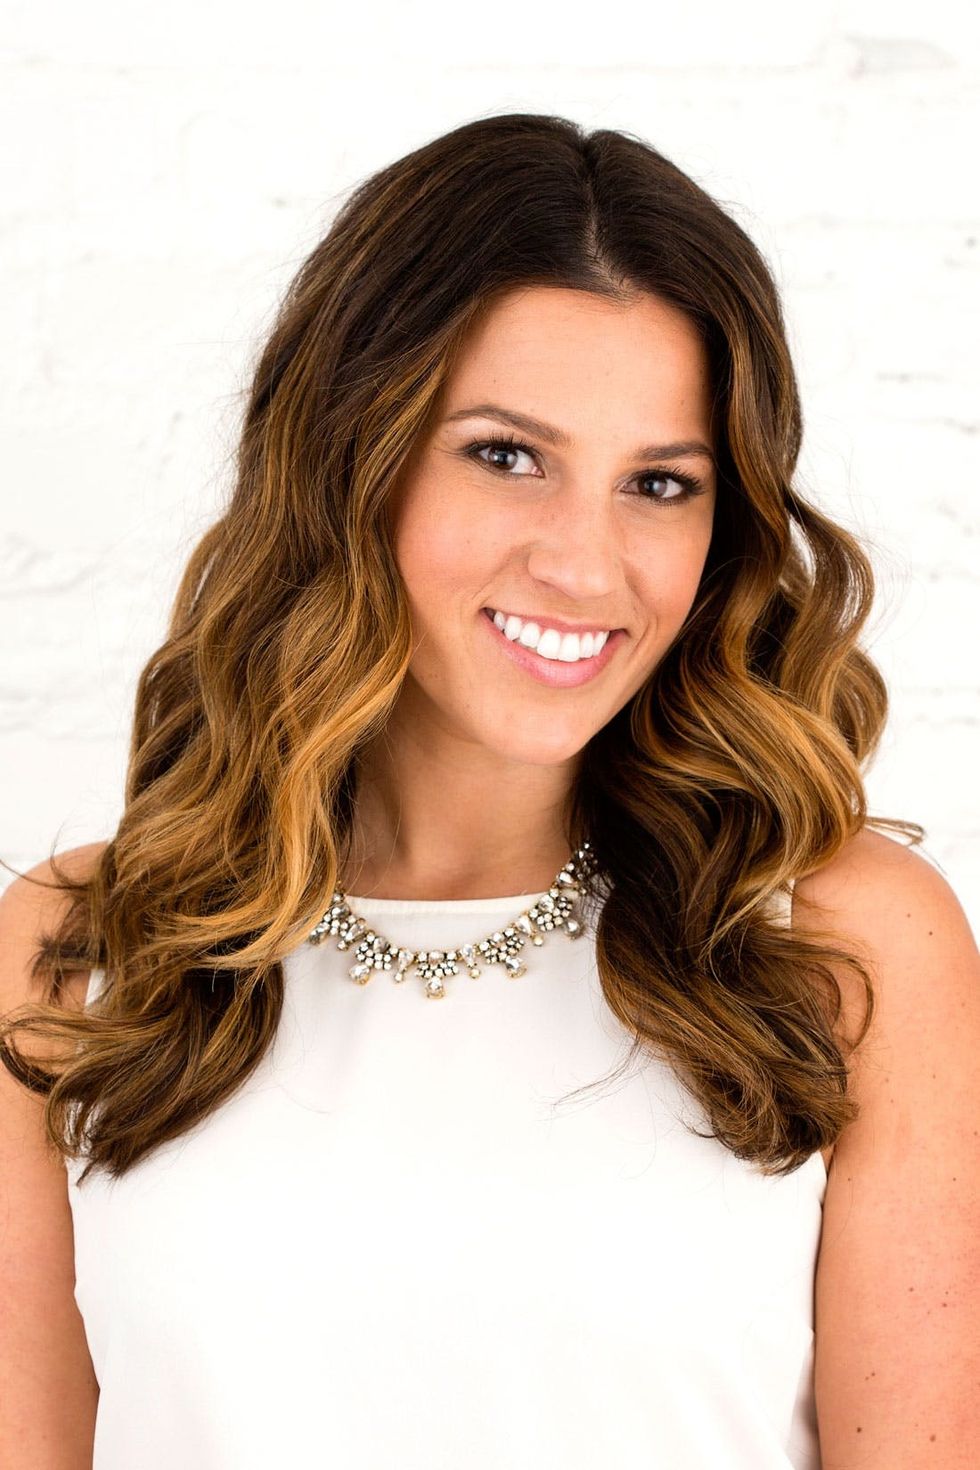
How to Do Wedding Day Glamour Curls
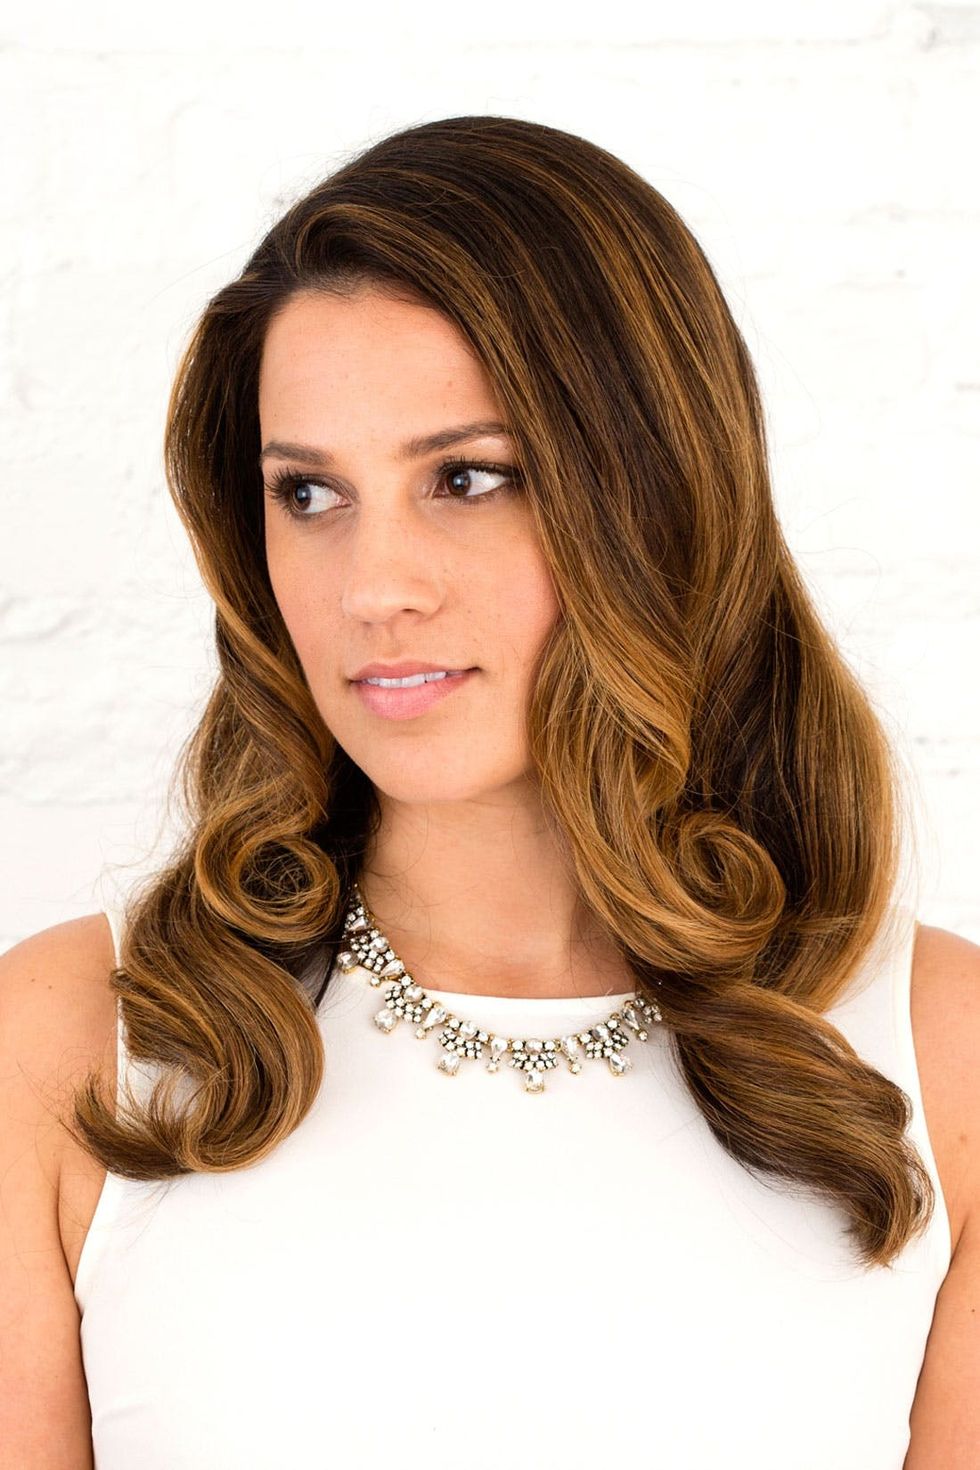
Step 1: Dramatic Side Part
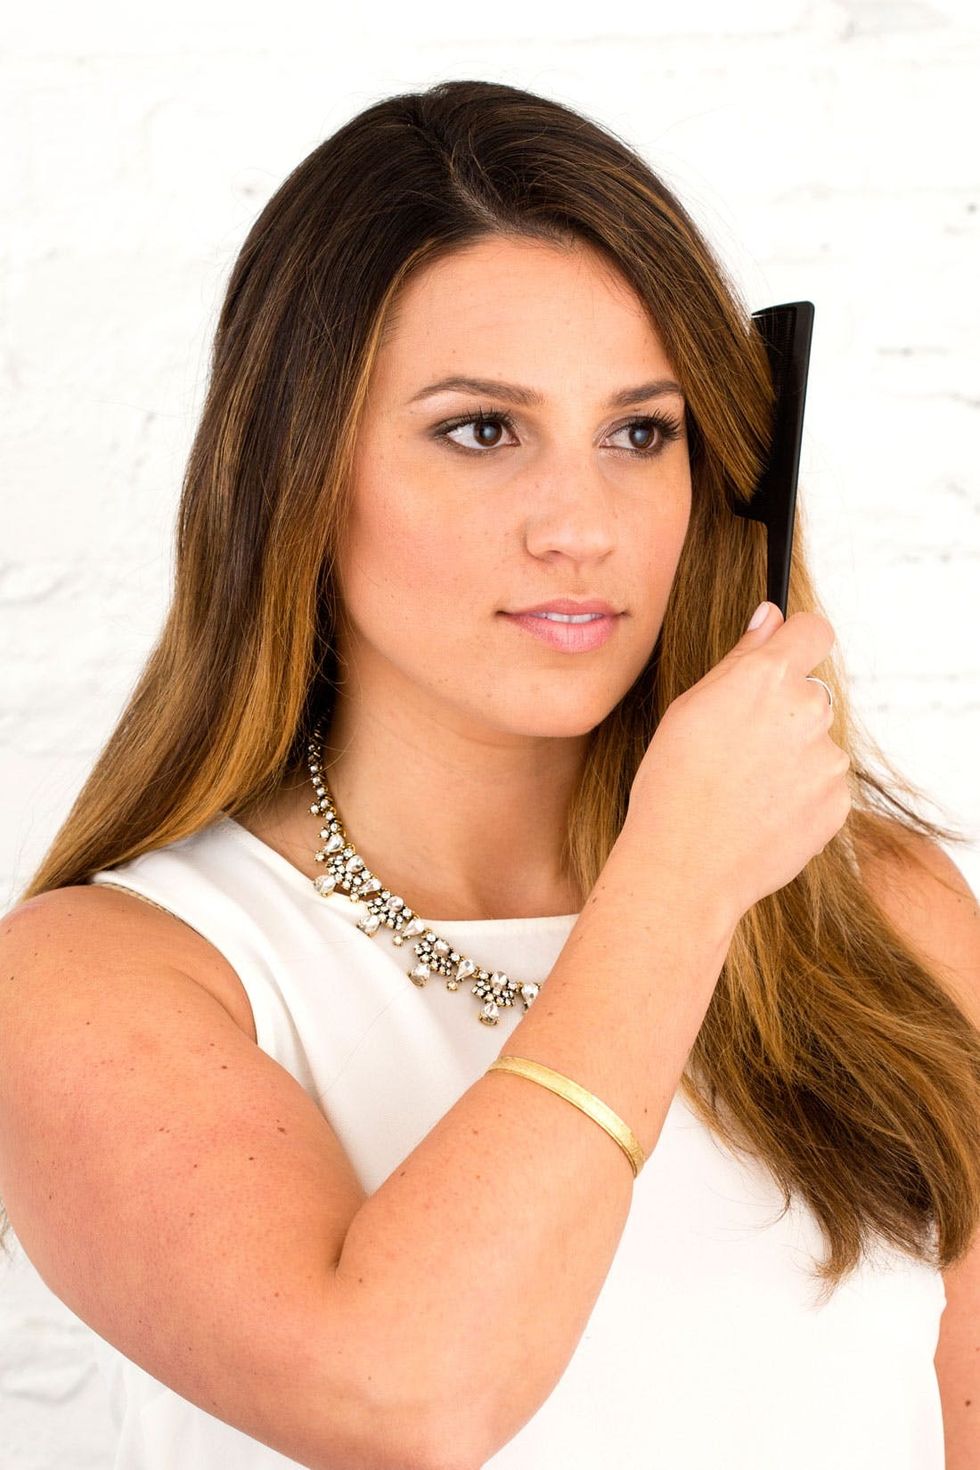
Use a comb or brush to put a dramatic side part into your hair. You can comb your hair to whatever side is better for you.
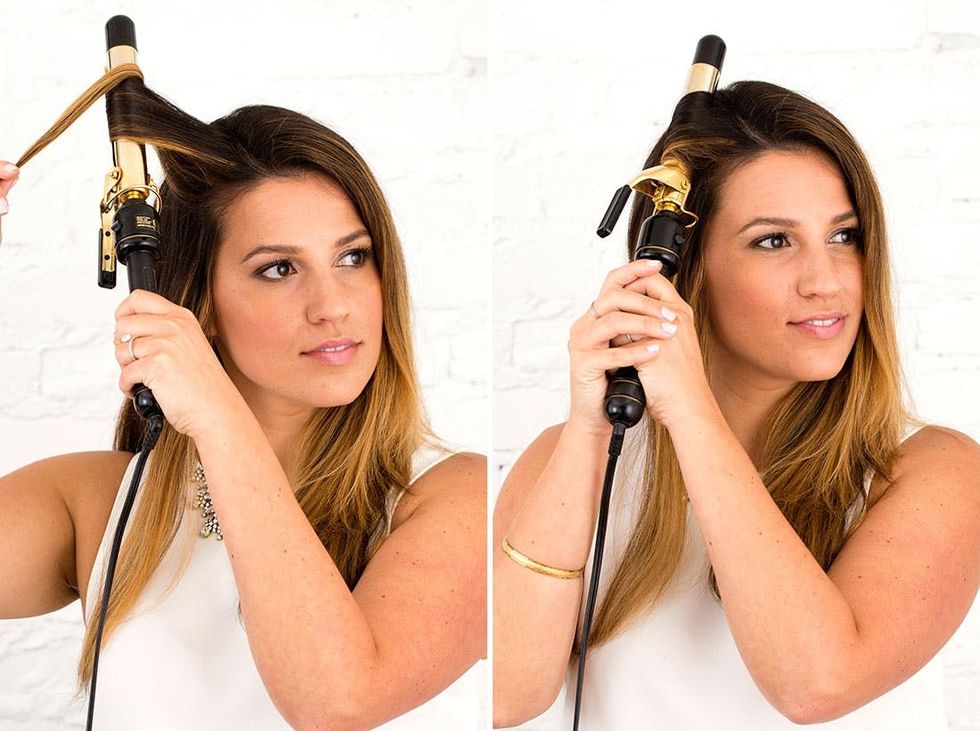
After spraying your heat protector and setting spray onto your first section of hair (yes, just like above!), use a 1 ½” curling iron to begin setting your glamor wave pattern. Just like above with the curling wand and beach waves, the best way to distribute heat evenly is to start at the base of your section instead of the ends. Simply hold the ends of your hair with your opposite hand and clamp the curling iron at the base of the section. Carefully begin to wrap the hair in and around the wand as you gently clamp the wand open and shut while feeding your hair in and rotating the curling iron around to wrap the entire section of hair. Your ends are the last part of hair to go into the clamp. For glamour waves, curl your hair while lifting it upwards away from the root, with the curl pattern turning in and down toward your face (this is the opposite of beach waves).
Step 2: Curl Your Hair
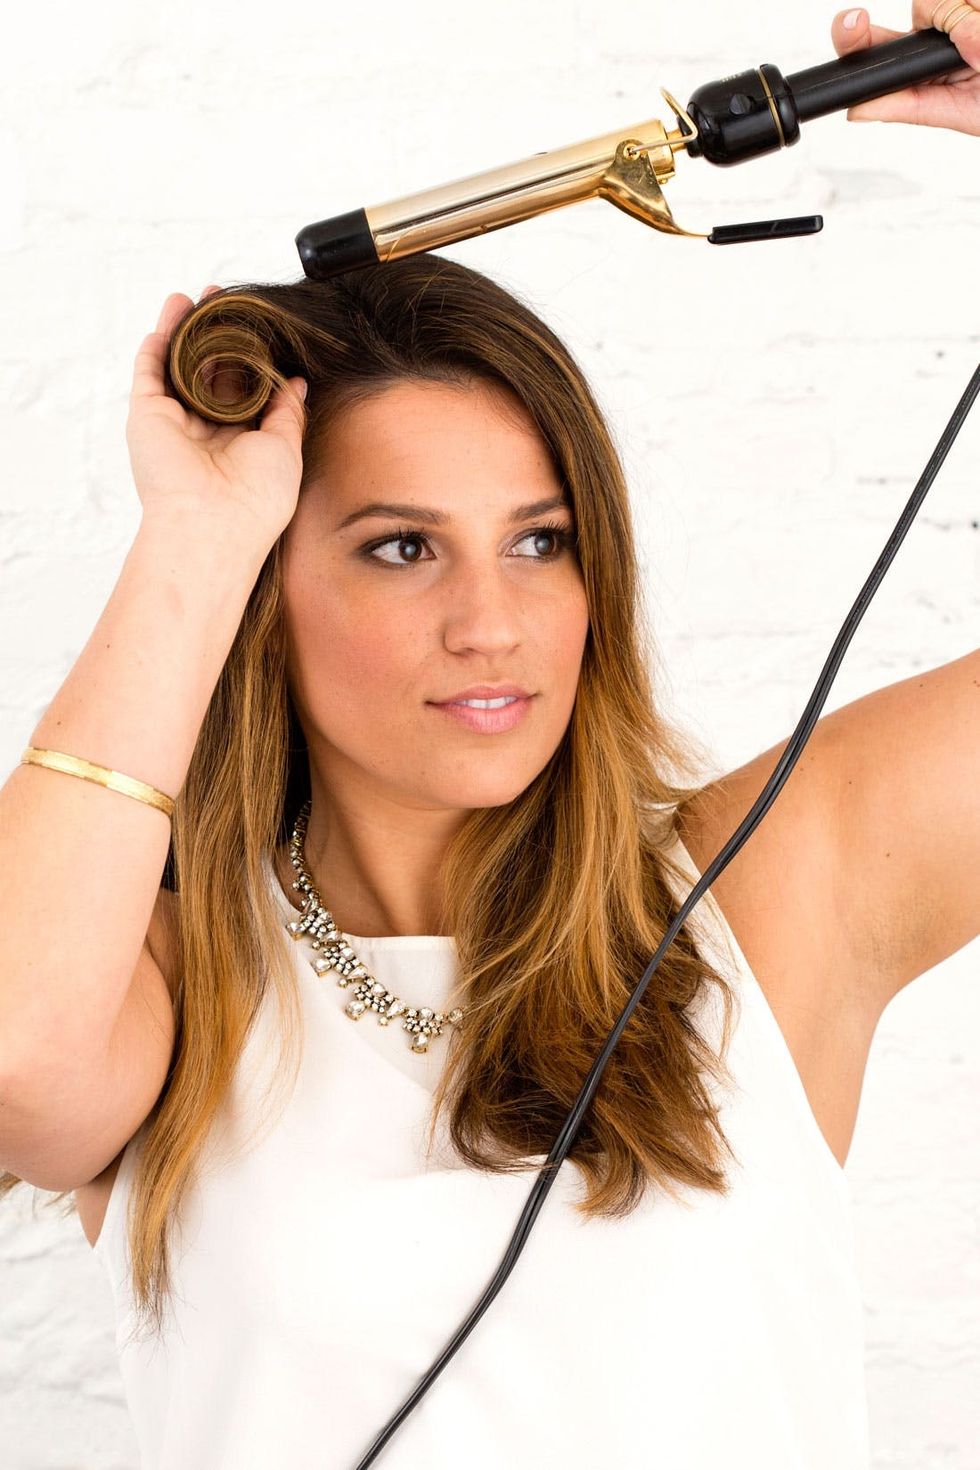
Hold the iron in place for no longer than 5 to 10 seconds. Then gently tap and release the clamp, letting the curl, will in place, slide into the palm of your hand.
Step 3: Release Pin Curl
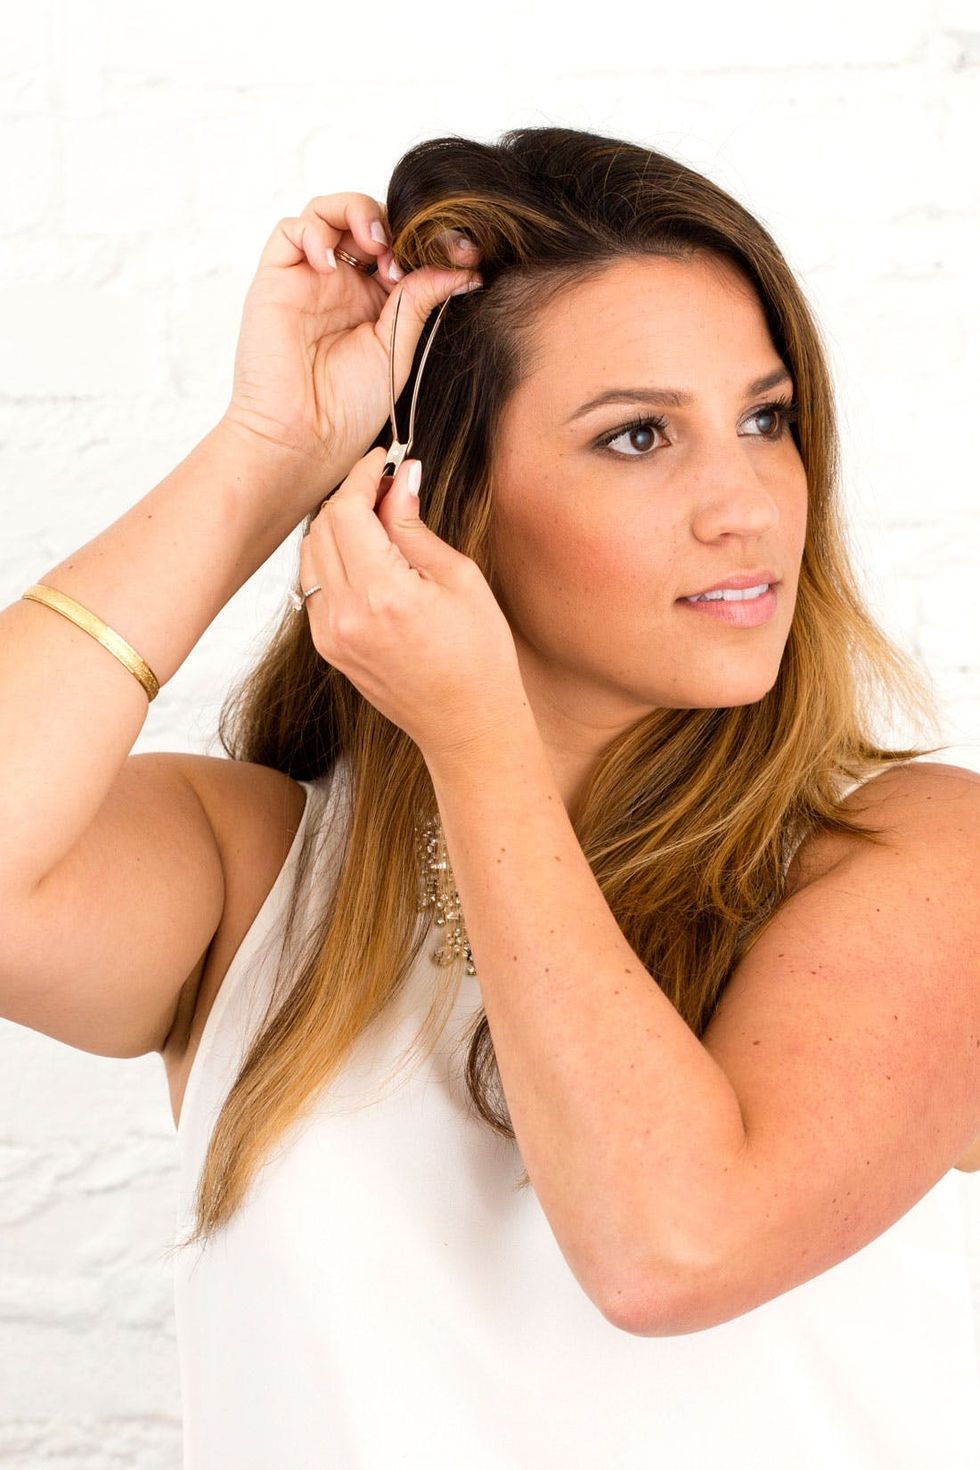
Pin the curl in place using a duck bill at the base of the curl.
Step 4: Pin Curl
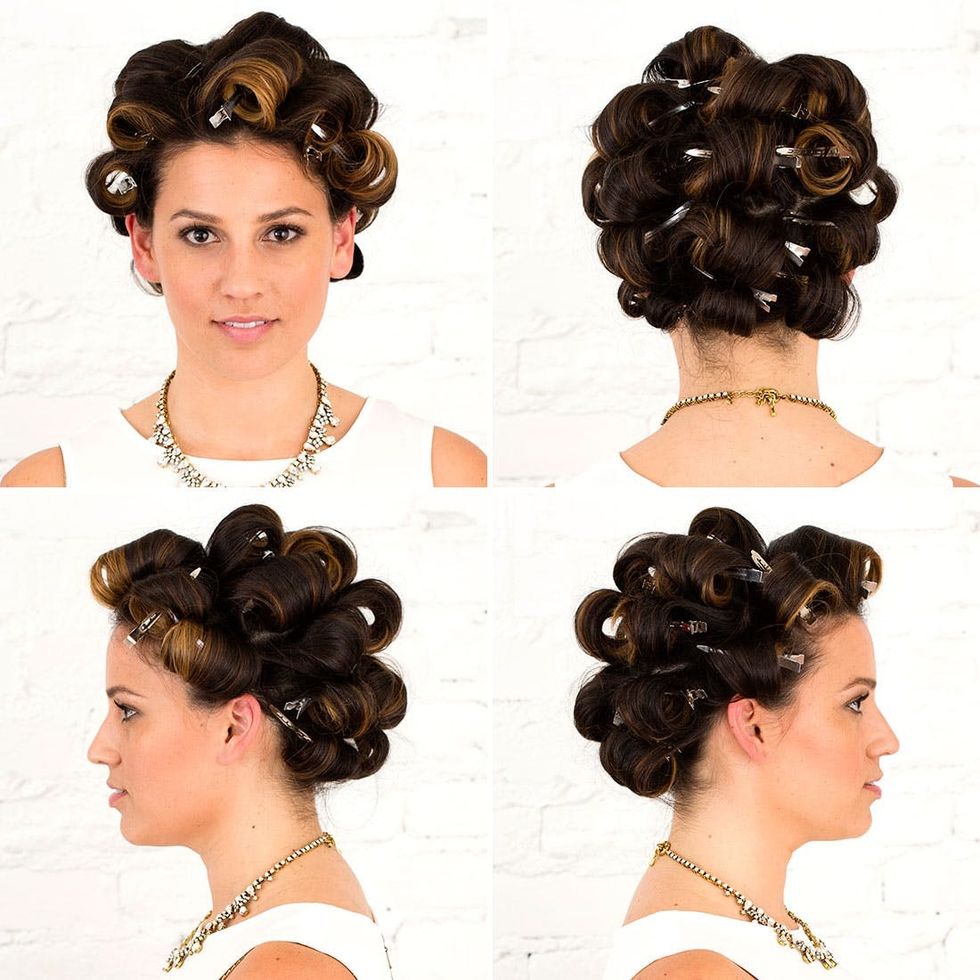
As you can see, these curls compared to the beach wave setting pattern are much more prominent. The curls are lifted up and over, which will give your final look a more voluminous finish. The sectioning will be the same as the beach waves, with five vertical sections going around your head.
Step 5: Final Wave Pattern
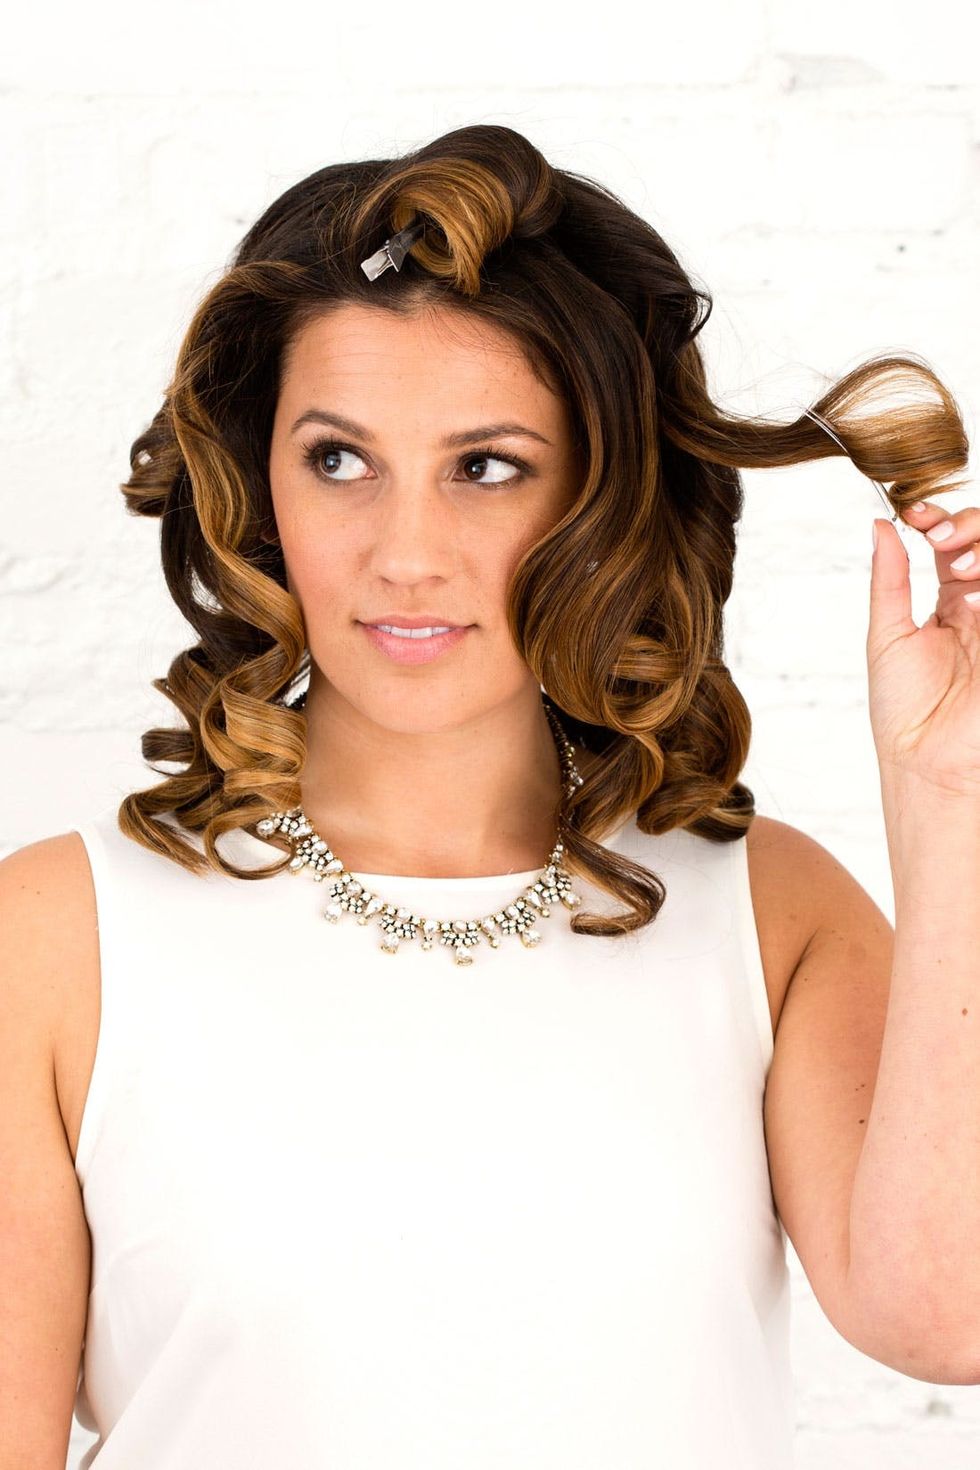
After 5 — 10 minutes, when your curls are cool to touch, remove all of the pins. Right now you should have crazy curl, CMA red carpet-style hair, but we’re not done yet!
Step 6: Let Set + Remove Pins
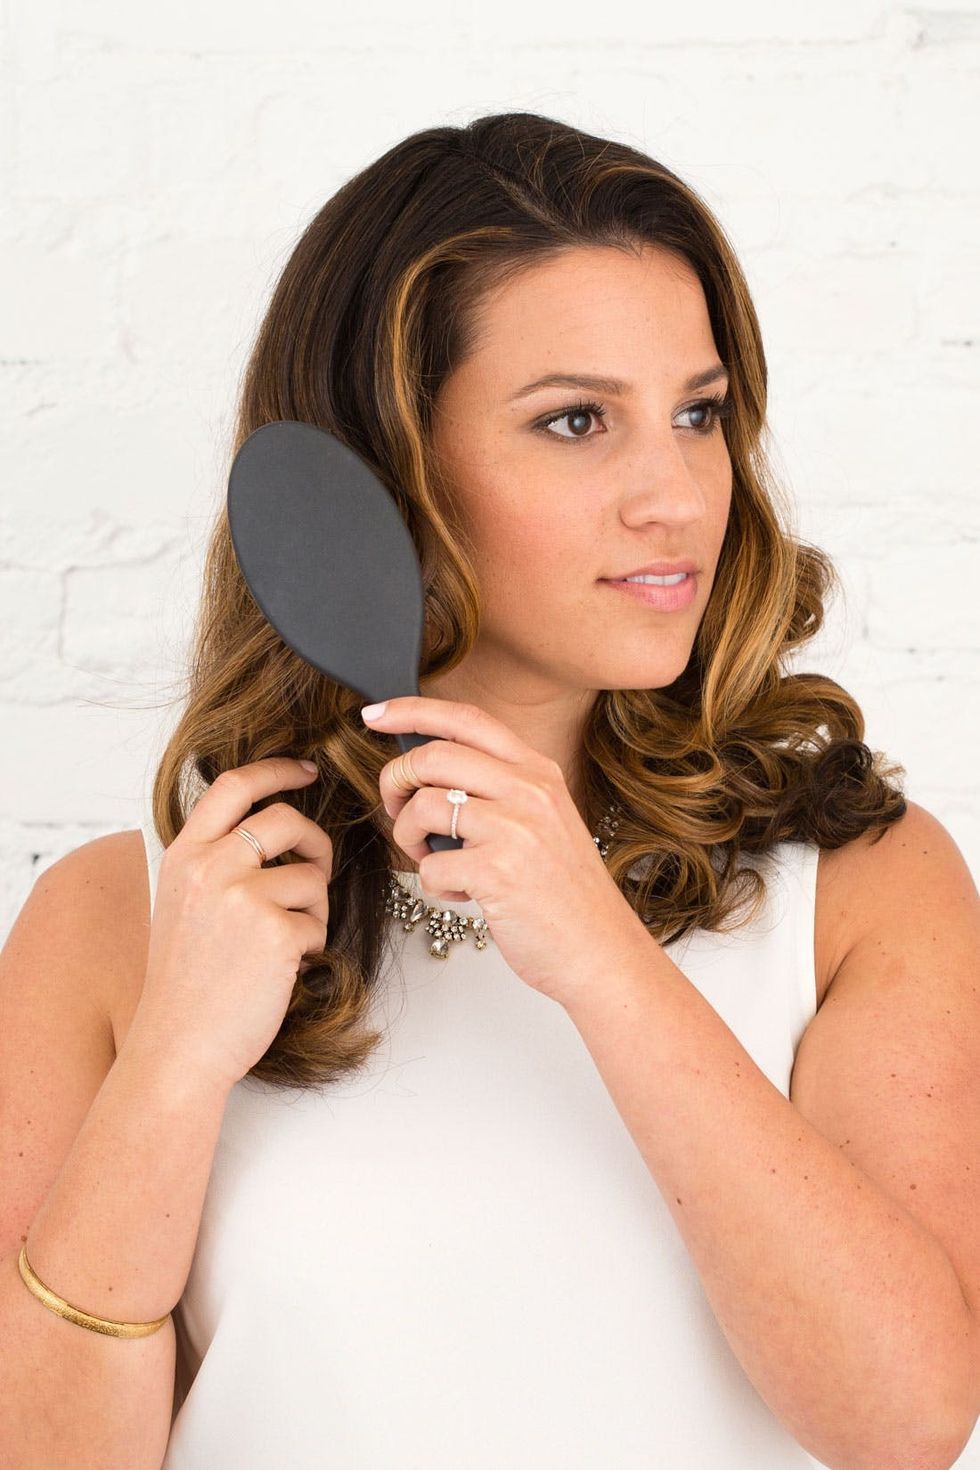
Using a wide tooth brush, gently comb through all of your curls. Do this several times until the curls are more relaxed and begin to soften. You will begin to notice that glamour wave pattern beginning to take form.
Step 7: Brush + Shape Curls

Using your fingers and a wax balm like Bumble And Bumble Brilliantine ($30), shape and define the curls at the ends of your hair. You can also use a finishing hairspray to really hold your hair in place.
Step 8: Define Curls

Now that you have the blueprints to navigate getting the perfect waves or curls, all you have to do is practice practice practice! Just as you would have a wedding trial to see if your stylist is capable of executing your dream hairstyle, you will need to try this out a few times to see if you can make it happen according to your expectations as well (and remember, if not, you can always call yours truly :). Bonus: this style *also* looks fab on your next night out, beauties!


