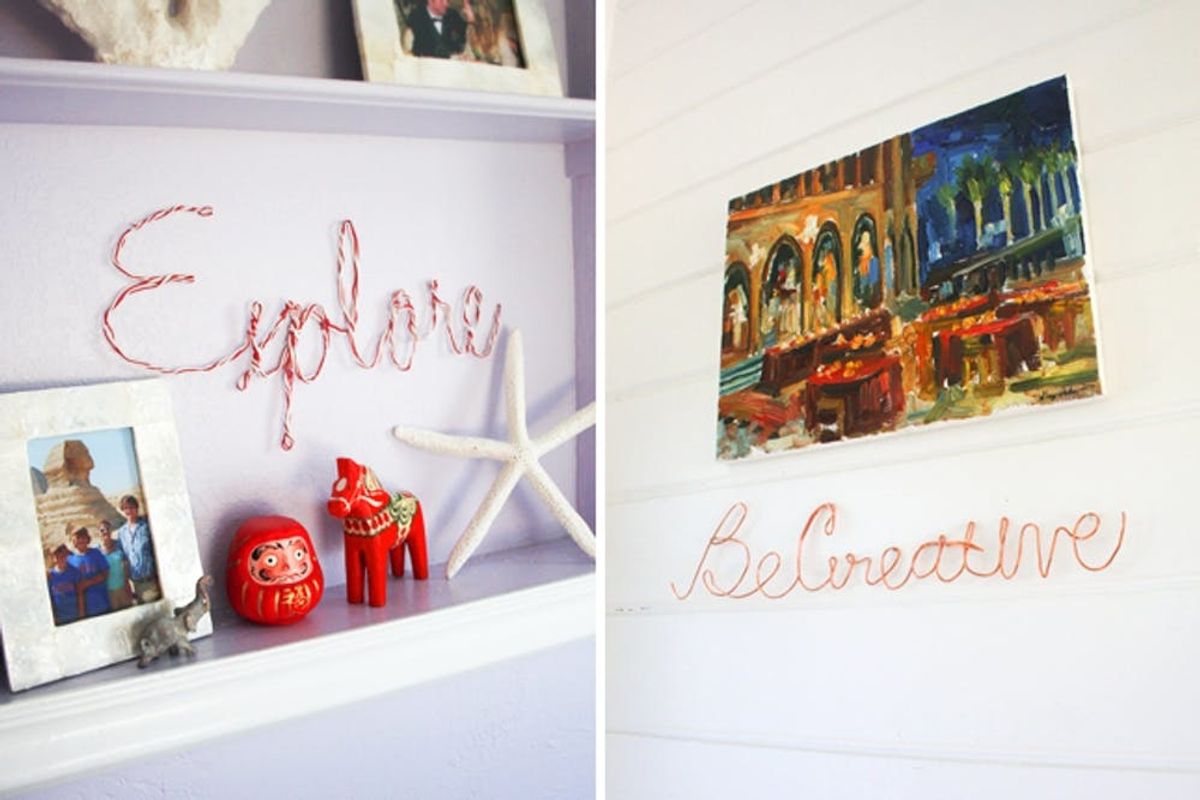
How to Create Wire Word Wall Art

Do you have a favorite motto or mantra you try to live by? Us too! After a trip to the hardware store, we came up with the idea to make some of our favorites into wall art using…electrical wire. It might seem a bit crazy, but the results literally speak for themselves. Read on to learn how to make your own words of wisdom into wire art.
Supplies:
– dazzle tac jewelry glue
– paper clamps
– copper electrical wire (the thinnest you can find)
– hot pink electrical wire
– red and white electrical wire
– template (we’ve included downloads below)
Tools:
– pliers
– needle nose pliers
– wire cutters
– sandpaper
– tape
Start by printing out a template of the phrase or word you want to spell out. You can download one of our templates to print out: Explore, Bon Appetit, or Be Creative. But you can also print out one of your own; just make sure to print it out around 300-350 font size, and pick a font that is similar to script or cursive.
To make wire wall art like our “Explore” one, tape your template down and fold the red and white electrical wire in half and twist it so it stays together. Then start with the “E” and shape it along the letter on the template. Tape it down as you go to hold it in place. Use the needle nose pliers to pinch the shape if you need to, but we did most of these using just our fingers.
Whenever you have to do a hard corner, simply make the wire that full length and twist and loop it back the other way. This will make little loops that look cute and give you the ability to hang it up later. When you’re done, you should have a project that looks something like this:
Go back with the pliers to make any last adjustments, and then cut off any excess wire at the end.
Remove it from the paper and tape and readjust if needed.
Pretty neat, huh?
To make the copper “Be Creative” wall art, start by sanding the ends of the copper so they aren’t too sharp. Then tape down your template and leaving about 9 inches of wire out; clamp the rest in a coil so that it’s easier to use. You can let out more wire as you need it. Start with the “B” and shape it along the letters on the template.
The copper wire is a little harder to shape than the red and white wire, so we used our template more as a guide and didn’t stick to it exactly. Use the pliers to pinch hard corners when you need to double back the wire. Smooth out any kinks and then cut off the excess wire.
To make the crosses on the “t”‘s, simply cut a small section of wire, fold it in half, and glue it on using jewelry glue (a hot glue gun would work too). To make the dot on the “i”‘s, just use the pliers to round a tiny section of wire into a circle. You will have to nail these in separately.
You should now have a cool piece of original wall art that looks a little something like this:
Remove it from your template, and it’s ready to hang up and enjoy as a daily reminder to be, well, creative!
To make the “Bon Appetit” wall art, just follow the same steps as above. We loved using this hot pink electrical wire because not only did it look cool, but it was the easiest to work with of the three. However, you can see we had to make some adjustments to the font so the “A” would connect to the other letters.
This one looked super cute in the kitchen bar area!
Just hang them up using tiny nails and a hammer.
What mantras or advice do you live by?
We think they add a bit of whimsy and inspiration to our home and keep words of wisdom within easy view.
This may be your first time to the electrical aisle at Home Depot to get the wire for this project—always a good adventure.
Can’t get enough of wire word art? Check out our post on how to make wire word jewelry!
Which of these Wire Word Wall Art pieces is your favorite? Will you try making any of these? Talk to us in the comments below!


