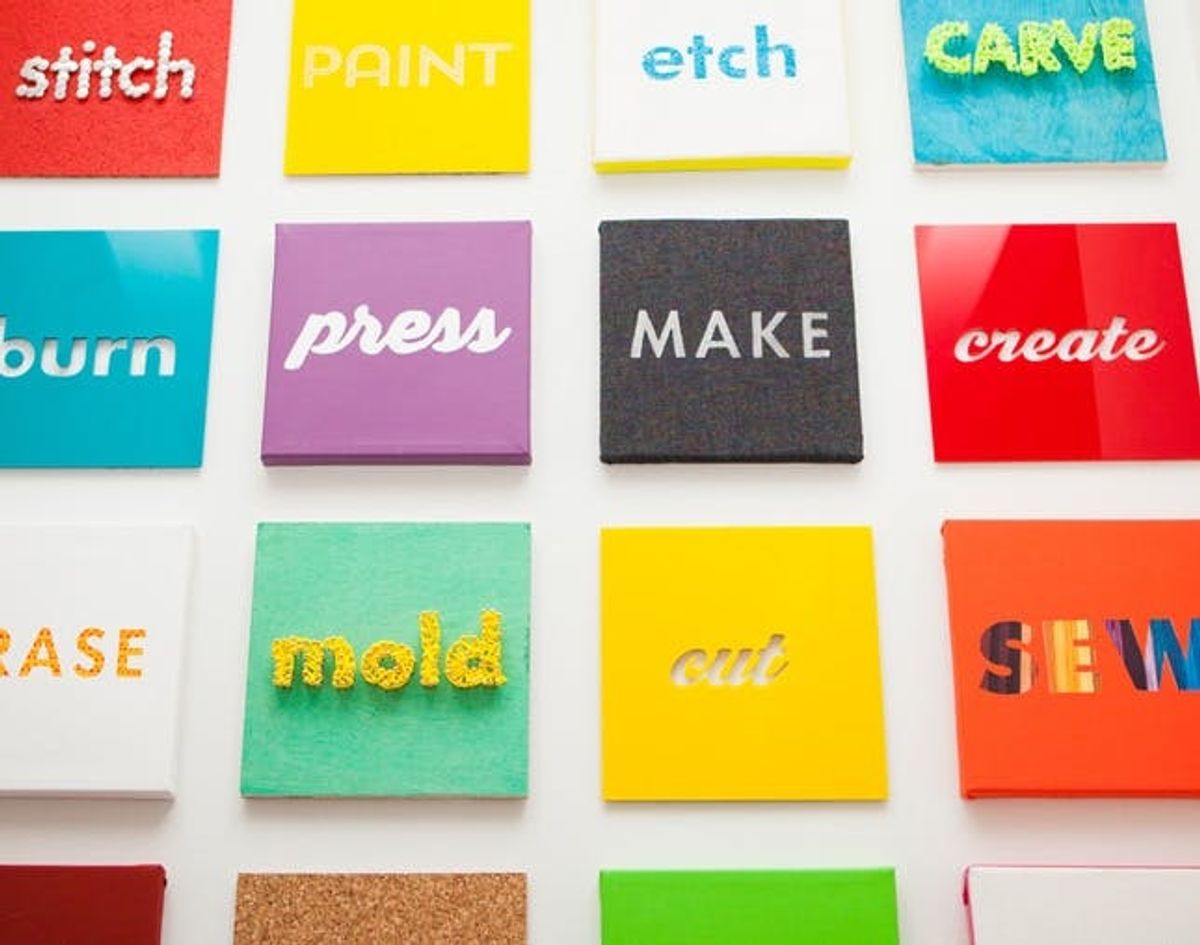
Being SF residents, a few of us had seen this installation of words at the Exploratorium and thought it would be fun to do our own Brit-ified take. With our brilliant designer Annie at the helm and brand new editorial intern Kelly cross-stitching, painting, and hammering her little heart out, we created a totally inspiring wall installation in just two days.
5 Clever Ways to Turn Words into Wall Art

If you’ve been keeping up with us as of late, then you probably know that we re-opened Brit + Co SF our first foray into a retail-meets-DIY workshop, open to the public. While constructing the winter Brit + Co SF scene, we wanted to install a piece of colorful wall art with words that inspire people to make.
Being SF residents, a few of us had seen this installation of words at the Exploratorium and thought it would be fun to do our own Brit-ified take. With our brilliant designer Annie at the helm and brand new editorial intern Kelly cross-stitching, painting, and hammering her little heart out, we created a totally inspiring wall installation in just two days.
First, we created the stencils for each of our words in Illustrator, then used our laser cutter to cut them out on card stock. Of course, most folks don’t have access to a laser cutter, so you can bust out your trusty old X-acto knife to create the same stencils! You can download all of our word templates right here.
We decided to employ five main techniques: Thumbtacks on Cork, Paint on Canvas, Nail String Art on Wood, Cross-Stitch, and Iron-On Transfers on Fabric. We also threw in a few laser cut acrylic signs because… why not? Read on to see how we made it happen. (And if you are a total word nerd like us, you should check out our DIY Neon Sign, also created for Brit + Co SF!)
<br/>
<br/>
2. Stencil the word onto the cork board
3. Insert thumbtacks following the stenciled outline.
We stuck to our signature colors, and left one cork board au natural for a little extra texture.
<br/>
<br/>
2. Tape stencil to canvas.
3. Paint inside stencil.
With all the different fonts and colors available, you could easily create an entire wall with just this method.
<br/>
<br/>
2. Trace stencil onto wood.
3. Use a hammer to insert nails into wood following the stenciled outlines.
4. Tie string to one nail and then continue to wrap string around every other nail. The best results come from wrapping the nails in a zig-zag pattern.
5. When finished tie string to the last nail.
To take your string art skills to the next level, check out our tutorial on how we made a string art neon sign using EL wire!
<br/>
<br/>
2. Stretch cross-stitch fabric over the frame and staple.
3. Using a pencil, stencil the word onto the fabric.
4. Using a needle and embroidery thread, use a basic sewing stitch and follow the outline.
5. To cover up the stapled edges, use colored duct tape!
We love the handmade feel of these stitched squares.
<br/>
<br/>
2. Iron the image onto fabric.
3. Stretch fabric over canvas and attach with a staple gun.
This is another one where the possibilities are endless. Use photos, patterns, and the like to create your words.
Then, mount all of them up on your wall! You can use nails, mounting strips, or VELCRO® Brand Sticky Back™ tape to attach to the wall. You can use painter’s tape and a level to make sure you hang your photos straight on the wall.
Stay tuned for more behind the scenes makery courtesy of Brit + Co SF! :)


